Friday, May 28, 2010

Iced Coffee

Because I absolutely love it, but I don't absolutely love driving out to McDonald's just to get one and I really don't absolutely love spending money on something I can make at home. At any time, any day, any hour.

You get the picture right?

So anyway, I love my coffee and I love a good Iced Coffee in the summer and I cringe when I hear my friends talking about going to Starbucks because, geez Louise, they're expensive and they're hard to order from. Don't laugh....but I am an idiot when it comes to ordering stuff from there, all I want is a simple coffee but I always end up feeling like I should have studied for a test.

I've been looking for a good iced coffee recipe and then yesterday one of my facebook friends posted one, so I immediately saved it.

I had a tooth extracted on Tuesday and I'm still dealing with tenderness and pain in the area so I've been careful with what I eat and drink, I guess this is my little reward for being such a good girl at the dentist and not socking her in the mouth when she tried to give me a crown and root canal before pulling the darn thing. That's another post and NOT one that belongs in the food blog.

Here, I'll just shut up and give you the recipe, you can thank me later for all the money you'll save you on these.


Iced Coffee

ICED COFFEE
Adapted from Foodie With Family

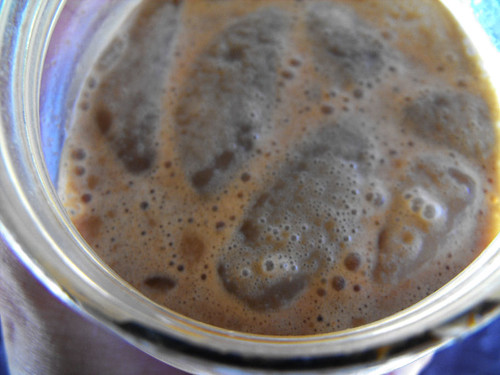
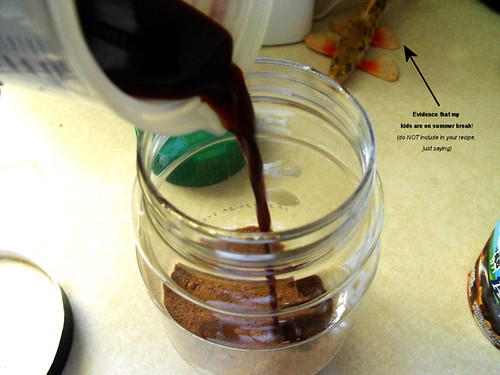
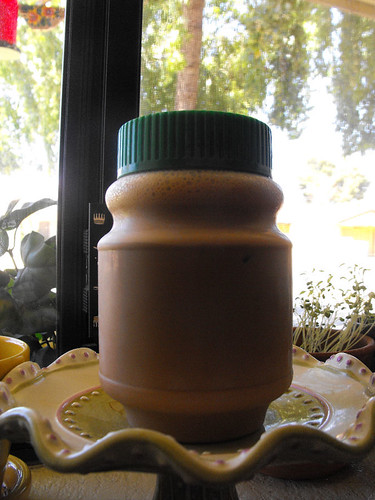
  1. I put 3 tablespoons of Nesquick in a clean, empty 24 oz. jar with a tight fitting lid. I am actually using an empty ground coffee plastic jar. It works too.
  2. Add 4 oz. super strong coffee. I just make 4 oz. of really strong coffee in a mug and then pour into the Nesquick. Now the recipe says you can chill it, but I don't have time or patience for that, I want to enjoy it now.

Iced Coffee Step 1 & 2

  1. Put the lid on and make sure it's tightly closed, then shake vigorously until the coffee and chocolate are mixed.


Iced Coffee Step 3

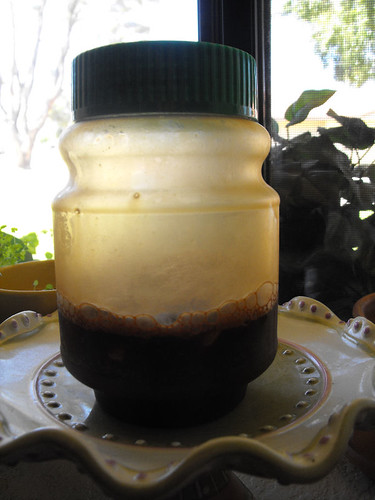
  1. Remove the lid, add 1 cup of ice cubes. (that's for the ones that don't want to chill it first, it's a shortcut), replace the lid and close tightly again, then shake it like a polaroid picture until the outside of the jar is very cold.

Iced Coffee Step 4

  1. Remove the lid again (I know, I know, monotonous, but worth it), add milk to where the jar narrows. The original recipe says about 4 oz. Replace the lid again and shake it shake it shake it.
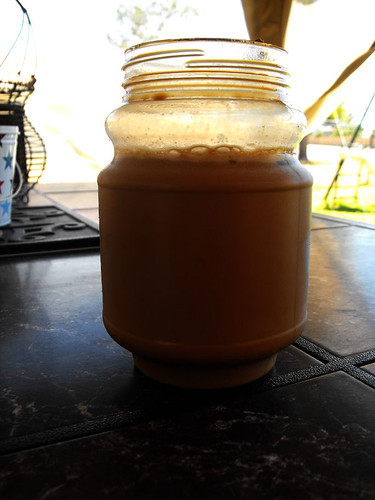
  2. Remove lid (sigh) and drink straight from the jar. The recipe says you can also transfer to a chilled glass for your food snob friends, but I don't have any of those and since I'm not a snob myself, it's straight from the jar for me.

I'm so far from a snob, did you notice up close in the jar pictures that I didn't even completely removed the foil from the rim? How's that for a snob? LOL

I'll do that after I'm done drinking. Bottoms up my friends.

Iced Coffee

Wednesday, May 26, 2010

Mexican Chicken

These are best grilled but you know, I'm having tooth issues right now and though I love cooking even when sick, I really didn't want to sit outside in the heat, so I popped these in the my cast iron pan and went to town.

And boy am I glad I did, YUMMY!

Next time though, in the grill they go.

2010_05260060

Mexican Chicken
credit: The Crepes of Wrath

3 chicken breasts or legs (the drumstick + thigh attached), fat trimmed
1/4 teaspoon hot sauce (I used 1/2 teaspoon and I didn’t think it was too spicy)
1/2 teaspoon ground black pepper
1/2 teaspoon kosher salt
1 teaspoon dried oregano
1 teaspoon ground mustard
1 tablespoon chili powder
1 tablespoon Worcestershire sauce
1/4 cup olive oil
juice of 1 lime
3 cloves garlic, minced


1. Combine all of the ingredients, except the chicken, in a small bowl and whisk together. Place the chicken in a sealable container or bag, then pour the marinade over the chicken. Allow to sit in the fridge for at least 1 hour or up to 24 hours.

Mexican Chicken

2. Preheat your oven to 400 degrees F and place the chicken on a wire rack over a baking sheet (preferably covered in tin foil to prevent the juices from burning to your baking sheet). Bake for 30-40 minutes, until cooked through and the juices of the chicken run clear. Cover with foil and allow to rest for 5 minutes before serving with some fresh summer veggies.


Mexican Chicken

I threw it into my cast iron casserole and cooked it for about 35 minutes on medium low. Just remember to keep an eye on it and add some water once in a while to keep it from sticking.

Homemade Pop Tarts

I love Pop Tarts and so do my kids, but one thing that makes me cringe is when I thing about the ingredients listed in the back of the box. There's a bit of this and a bit of that and names I can't even pronounce, not to mention there are over 50 ingredients in the store bought ones. I mean....50 INGREDIENTS?!?!?!?!?!

What the heck is in there? A toaster? A kitchen-aid mixer?

Anyway, I'm always looking for recipes to make some of our favorite treats at home and I started seeing these pop up all over the net, I bookmarked a few to try and today was the day.

These are seriously delicious and my kids already told me "way better than the box ones, don't buy those anymore". I may have just given myself a lot more work, but you know, that's ok.

You have GOT to try these. BTW, this recipe only makes about 5 or 6 small pop tarts, so don't freak out when they don't look as big as the store bought ones.....you won't even mind when you taste the buttery pastry. *drool*

Homemade Pop Tarts

Homemade Pop-Tarts
credit: The Crepes of Wrath who adapted from Genesis of a Cook

For the crust:
1 1/2 cups all-purpose flour (plus more for rolling out the dough)
1/2 teaspoon salt
1/4 cup shortening, cubed
1/4 cup butter, cubed and at room temperature (I mean it – if it’s cold, it won’t cut into the flour the right way)
2-3 tablespoons cold water

Filling:
2-3 tablespoons of jam (any flavor is fine)

For the glaze:
1 cup powdered sugar
1-2 tablespoons of milk
sprinkles (any kind will do)

1. Preheat oven to 425 degrees F. Combine the flour and the salt in a large mixing bowl, then add in the cubed butter and shortening. Mix everything together with clean hands until the dough is crumbly.

Homemade Pop Tarts

Add in the water, 1 tablespoon at a time, until the mixture forms a ball. I used a bit less than 2 tablespoons. If your dough gets too wet, add in a bit more flour to compensate.

Homemade Pop Tarts

2. Separate the dough into two balls. Roll it out on a lightly floured surface into a square, to about 1/8 inch thickness (mine was a bit thinner than that). Cut out long strips about 3 inches wide and 5 inches long. You might have to collect up scraps of unused dough and roll it out again to use up all of the dough.

3. Take one pie crust rectangle and place 1 teaspoon of jam on top (do NOT use more than this, seriously).

Homemade Pop Tarts

Fold the top part of the dough over on to the bottom part (see the above photos). Use a form to crimp the corners of the dough shut. Repeat with the rest of dough. Place the Pop-Tarts on a lined and greased baking sheet (I covered my baking sheet in tinfoil and sprayed it with non-stick spray) and bake for 8-10 minutes, until golden and set.

Homemade Pop Tarts

4. Remove the Pop-Tarts from the oven and place the entire baking sheet on a cooling rack; don’t try to remove them from the baking sheet until they’re completely cooled. When they’re cool, place the powdered sugar in a medium sized bowl. Whisk in about 1/2 tablespoon of milk at a time, until the icing is a thick consistency, like syrup. Use a spoon to pour the icing over the Pop-Tarts (you can also use a knife or a spatula). Sprinkle the sprinkles over the wet frosting and allow to set (I put mine in the fridge for about an hour to speed this process up.

Homemade Pop Tarts

Enjoy! Makes 5-6 Pop-Tarts. Stores well in an air-tight container in the fridge for a week.

Homemade Pop Tarts

Cast Iron Beer Chicken

Well it seems like it's been forever since I've posted. I do apologize, but things have been absolutely hectic around here with the end of school for the kids and me with an abscessed tooth having to be extracted etc.

It's just been nuts, and though I have still continued to cook, I didn't make anything worth sharing, other than this chicken dish.

I recently was sent a Rachael Ray Cast Iron Enamel Casserole to review.

I can tell you that I fell in love at first sight and have been in love ever since, I have used NOTHING else to cook in. If you're interested in my review of the product, you can check out my main blog here.

I pretty much used the same recipe that I have already posted on here, just that I adapted it to my cast iron pan and I did omit the whipping cream.....not only did it cook in half the time but the chicken was literally falling off the bone. SO SO GOOD.

2010_05180033

Chicken with Beer


olive oil
1 chicken, cut up
1 medium onion, thinly sliced
salt and pepper
garlic powder
1 bottle of beer
2 cups of water
1/2 bottle of heavy whipping cream (8 oz)


In a large skillet, add a little bit of olive oil and the chicken. Cook for a few minutes until the chicken is browned on both sides.

Add the onions and the seasonings, the beer and the water.

2010_05180025

Simmer for 20 to 30 minutes until chicken is cooked through. Keep checking to make sure it doesn't dry out, add more water if needed.

When the chicken is done, add the whipping cream and cook for a minute or two until thickened. Serve with mashed potatoes, rice or fries.

2010_05180032

Friday, May 14, 2010

Crunchy Onion Barbecue Chicken

I love Taste of Home, I have tons of their magazines and cookbooks and I can always find something easy and delicious.

This is one I found a few months ago and set aside to try, but then I forgot about it cause I'm a ditz like that. Anyway, I found it a few days ago and decided to give it a try so I could use up some chicken breasts I had.

SO good, the kids loved them.


2010_05100008

CRUNCHY ONION BARBECUE CHICKEN
Credit: Taste of Home

Ingredients

* 1/2 cup barbecue sauce
* 1-1/3 cups french-fried onions, crushed
* 1/4 cup grated Parmesan cheese
* 1/2 teaspoon pepper
* 4 boneless skinless chicken breast halves (I cut mine into strips)

Directions

* Place barbecue sauce in a shallow bowl. In another shallow bowl, combine the onions, cheese and pepper. Dip both sides of chicken in barbecue sauce, then one side in onion mixture.

2010_05100002

* Place chicken, crumb side up, on a baking sheet coated with cooking spray. Bake at 400° for 22-27 minutes or until a meat thermometer reads 170°.

2010_05100013

I served mine with creamed spinach and garlic mashed potatoes. Yum!

Italian Sausage, Peppers and Potatoes

I love this dish, it's very quick and easy for a midweek dinner.

I've had this recipe for a years and honestly don't remember where I got it from, but it's my go to when I'm in a hurry and just want to throw something filling on the table.


Italian Sausage, Peppers and Potatoes


Ingredients:
1 pound/1 package Italian sausage, mild or spicy.
1 medium onion, cut into 1-inch chunks.
2 green peppers, cut into 1-inch chunks or slices.
6 medium red potatoes, cut into 3/4-inch chunks.
3/4 cup water.
1/2 teaspoon salt, optional.
1/8 teaspoon pepper, optional.
Grated parmesan or shredded mozzarella cheese, optional.


Directions:
In a deep skillet that has a lid, cook sausage until it turns a brown color on all sides.
Remove from pan and cut into 1-inch chunks.

Return to pan, brown on all sides and cook until almost cooked through. Drain grease.
Add remaining ingredients, cover and cook over medium low heat for 20-30 minutes. Stir occasionally and cook until potatoes are fork tender.

Add shredded or grated cheese just before serving, if desired.

Tuesday, May 11, 2010

Beer Batter Onion Rings

Yummy, that's all. Nothing more to say!

2010_05110081

BEER BATTER ONION RINGS

1 1/2 c. flour
1/2 tsp. salt
3 tsp. baking powder
1 c. cold beer
3 eggs

Slightly beat the eggs in medium mixing bowl. Add remaining ingredients. Blend well with electric mixer. Use immediately to batter fish or onion rings for frying.

2010_05110080

2010_05110078

2010_05110083

Friday, May 07, 2010

Turkey, Chourico and Bacon Kabobs

I love the warm weather and I'm all about grilling outside, but today I realized a little too late that I didn't have any charcoal for the grill.

No problem, you can pop these in the oven at 450 F for 30 minutes or until the turkey is cooked and the bacon is crispy. SO SO good!

This is not a recipe I got anywhere, I just threw a couple things on the skewer and spiced it up, baked it and VOILA. Kids love these, which tells me next time I need to make double of what I made today.

2010_05070049

TURKEY, CHOURICO AND BACON KABOBS

2 turkey breasts (they need to be thick, not the thin ones)
1 chourico
Bacon slices
Onion
Salt
Worcestershire flavored Pepper
garlic powder
paprika
olive oil

Cut the turkey into big chunks, wrap a slice of bacon around it and put it on a skewer. Follow with a slice of Chourico. Repeat with another piece of bacon wrapped turkey and another chourico slice. Continue until you have 3 pieces of each, top with a few slices of onion.

2010_05070045

Sprinkle with salt, pepper, garlic powder and paprika. Repeat with the remaining skewers. I got 6 out of 2 turkey breasts.

2010_05070046

Drizzle with olive oil and bake in a 450 F oven for about 30 minutes or until turkey is cooked and bacon is crispy.

2010_05070050

Serve with a salad.

2010_05070052

Chicken Pizza from Trisha Yearwood

Another great recipe from her cookbook, I wish I had time to sit and chat with you guys but I'm running late for an appointment, so none of my quirky comments (roll my eyes) I'm such a dork.

Anyway, here you go, oh and btw, I didn't use premade pizza crust, I used my own homemade crust.

2010_05070008

CHICKEN PIZZA
Credit: Home Cooking with Trisha Yearwood

2 13.8-ounce cans premade pizza crust dough
4 tablespoons olive oil
2 teaspoons minced garlic
2 cups shredded mozzarella cheese (about 8 ounces)
2 cups shredded Cheddar cheese (about 8 ounces)
1 bell pepper, cored, seeded, and cut into strips
1 red onion, sliced vertically
3 boneless, skinless chicken breast halves, grilled and diced
6 slices bacon, cooked until crisp and crumbled


Preheat the oven to 350°F.

Roll the pizza dough out and fit onto two 15-inch pizza pans. Drizzle 1 tablespoon of olive oil and 1 teaspoon of garlic on each pizza crust, followed by ½ cup each of the mozzarella cheese and ½ of the Cheddar cheese. Scatter half of the bell pepper, sliced onion, chicken, and bacon on top of the cheeses. Sprinkle another ½ mozzarella cheese and ½ cup Cheddar cheese over each pizza and drizzle each pizza with 1 tablespoon more of olive oil.

2010_05070006


Bake the pizzas for 20 to 25 minutes, or until the crusts are lightly browned. Slice each pizza into 8 pieces.

2010_05070007


Pizza doesn’t have to be round! I make this pizza dough into a rectangle and cut it into squares to serve.


2010_05070009

Tuesday, May 04, 2010

{ Menu Plan }


It's been a while since I posted my menu plans, it's not like I stopped doing them, but I just haven't been sharing them with you.

I thought I would get back on track with that, so here is my Menu Plan for this pay period.


TUESDAY 4TH
Grilled Steaks, Baked Potatoes and Salad
http://img.timeinc.net/recipes/i/recipes/sl/05/04/grilled-steaks-sl-1041980-x.jpg


WEDNESDAY 5TH
Pork Tenderloins with Mustard and Beer Gravy
Image and video hosting by  TinyPic


THURSDAY 6TH
Chicken a la King w/ Mashed potatoes
http://hostedmedia.reimanpub.com/TOH/Images/Photos/37/exps36654_SD1192217D18B.jpg


FRIDAY 7TH
Chicken Pizza (Trisha Yearwood Cookbook)
Image and video hosting by  TinyPic


SATURDAY 8TH
Feijoada c/ Arroz (Portuguese Beans)

SUNDAY 9TH
Roast Chicken Leg Quarters w/ roast potatoes
http://z.about.com/d/southernfood/1/0/P/j/2/garlic-quarters-1.jpg


MONDAY 10TH
Ranch-style Steak Kabobs w/ rice
Image and video hosting by  TinyPic


TUESDAY 11TH
Kid's pick - Fish sticks with potato salad, mixed veggies
Image and video hosting by  TinyPic


WEDNESDAY 12TH
Turkey Kabobs with bacon
Image and  video hosting by TinyPic


THURSDAY 13TH
Crunchy BBQ Onion Chicken
Image and video hosting by TinyPic


FRIDAY 14TH
Beef baked with Yogurt & black pepper

Image and video hosting by  TinyPic

Being military we get paid on the 15th, so that is when I'll be doing my groceries and the next menu plan.

There you have it, as always, the recipes will be posted on the blog as I make them.