Wednesday, July 21, 2010

Sourdough Starter

2010_07210035

One of my favorite things to do, is bake bread.

I just love the whole process, the kneading, the baking and then knowing that when it's all done my family is rewarded with a loaf or two of the best tasting fresh homemade bread.

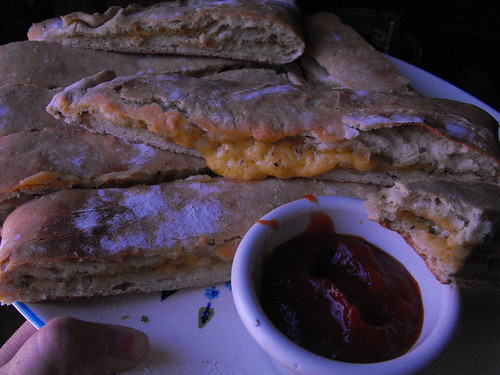
There really is nothing like a warm slice of bread slathered with butter, is there?

I've been wanting to make Sourdough Bread for such a long time but quite frankly, it intimidated me, I have looked through so many recipes and websites and they made it sound like you need some sort of degree in bread making to even attempt it.

So, it's been put off, for a really long time.

Until I got my first Homestead Blessings DVD's, the West ladies make it seem so so easy and after watching the video The Art of Bread Making, I decided that it's now or never.

If you've never made a Sourdough Starter for fear that it would be really hard or a difficult process, then stop that thought and get right in the kitchen with me.

Let's make some together shall we? What's the worse that could happen? It doesn't work? Then we'll start right up again, but imagine if it does, we'll all be eating delicious Sourdough Bread, Pancakes, Pizza Dough etc in a few days.

Making Sourdough
Credit: Homestead Blessings - The Art of Bread Making


• 2 cups of All Purpose Flour
• 3 tablespoons of Sugar
• 1 tablespoon of Active Dry Yeast
• 1/2 teaspoon of Salt
• 2 cups of Warm Water


Mix in plastic or glass bowl till blended. Cover with cloth and set in warm place out of draft. Stir several times each day. Let ferment 2 to 3 days.

To use, remove starter needed for recipe then refrigerate remaining starter. Replenish every 7 to 10 days by stirring equal amounts of water and flour. Let stand at room temperature overnight and return to fridge.


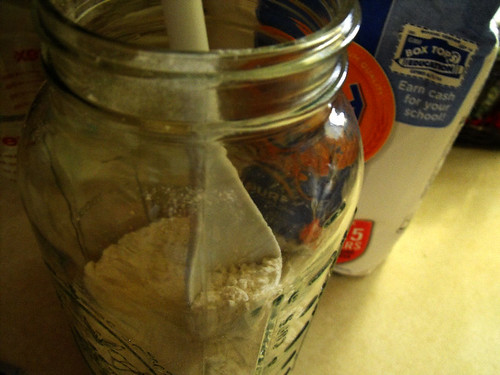
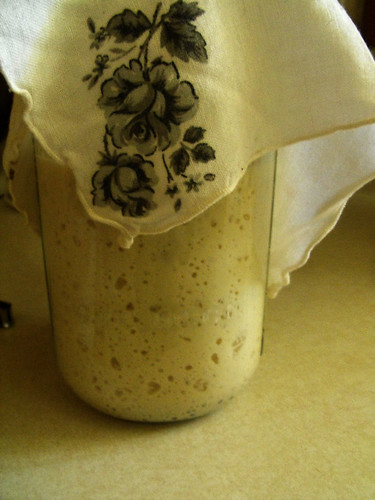
Some people use bowls and some use these big glass jars, that's what I'm using and besides I don't have a glass bowl big enough.
2010_07210002

The West Ladies advice using a plastic or a wooden spoon to stir the ingredients.
2010_07210003

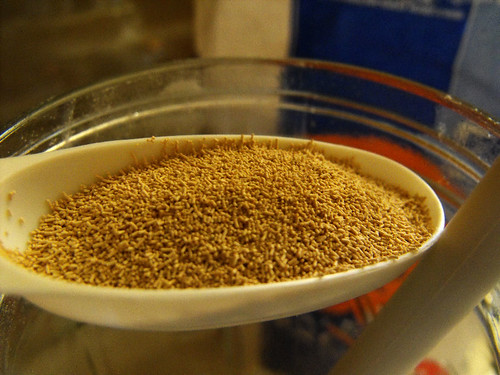
In goes the tablespoon of yeast, I measured it out and it's exactly one of the little packets of Dry Yeast that you get at the grocery store.
2010_07210006

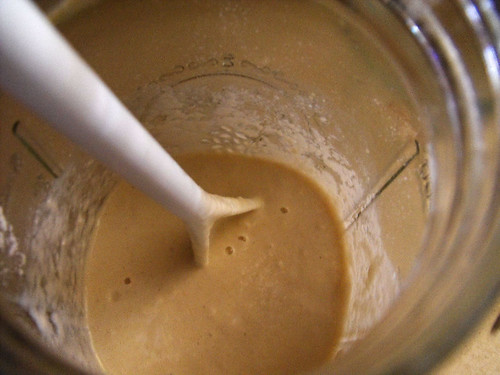
Stir the ingredients well.
2010_07210008

Cover with a cloth. I set mine on the window for about 10 minutes and with this Arizona heat it quickly expanded and bubbled up, so I removed it and it's now sitting on my counter.

2010_07210010

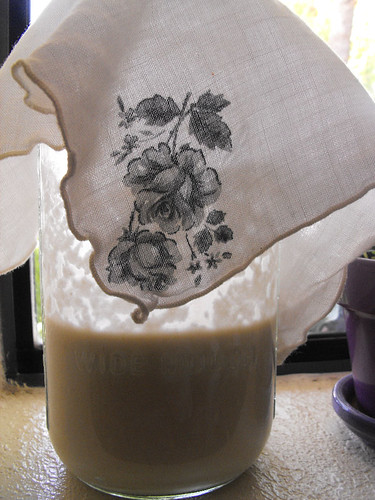
This is what it looks like two hours later, can you see all those bubbles?

2010_07210032

I'll keep you up to date on my Sourdough Starter, I'll even take photos every day to show you.

You may have noticed that usually they tell you it takes 7 to 8 days and you're adding flour and water every day to it and stirring and whatever.

Honesty, that put me off because with everything that I have going on during the day, I can bet you anything that I would totally forget about it.

This way, it seems a lot easier and shorter too, only 2 to 3 days. I can DO that.

Friday, July 16, 2010

Frozen Orange Pie

It's so hot here in Arizona, 115 degrees hot. It's just debilitating in a way, you find yourself not wanting to go anywhere or do anything that in any way, shape, or form, involves more heat of any kind.

We've been trying to stay cool and for that, I usually whip up a Frozen Lemonade pie, but this time, I used Frozen orange concentrate instead and it's just as good. Citrusy, cold...just YUMMY!

So here's the original recipe, I just changed the concentrate used.


2010_07140031

FROZEN LEMONADE PIE

  • 1 graham cracker pie crust
  • 1 8 oz. container frozen whipped topping
  • 1 14 oz. can sweetened condensed milk
  • 1 12 oz. container frozen lemonade concentrate (try different flavors too)

1. In a large mixing bowl, combine the frozen lemonade concentrate and condensed milk until blended.

2. Fold in the whipped topping, do not let it get soupy, so don't over mix.

3. Pour filling into the pie crust and freeze for at least 6-8 hours before serving. Store leftovers in the freezer.


2010_07140025

Saturday, July 10, 2010

Pizza Cheese Breadsticks

Super easy to prepare using my Honey Pizza Dough, but filled with cheese and Italian spices.

SO good dipped in Pizza Sauce.


2010_07100032

Pizza Cheese Breadsticks

1 Honey Pizza Dough recipe (but add a bit of garlic powder to the dough when making)
Italian Seasoning to taste
Sliced Cheddar Cheese (you can use Shredded too)


2010_07100015

Roll the dough out to an oval or rectangle shape then drizzle with olive oil....spread it over the entire surface

2010_07100016

sprinkle with Italian Seasoning

2010_07100018

On one half of the pizza lay your cheese slices. I just cut up some from a block of Cheddar cheese I had and as you can see they don't exactly look pretty, but it doesn't matter, they will all melt into a gooey yummy goodness

2010_07100020

Fold over and pinch sides to seal

2010_07100022

Bake at 450 degrees for 20 minutes or until golden brown

2010_07100035

Carne Guisada com Massa - Beef w/ Noodles

This is one of those dishes that makes me think of home and my childhood. I remember growing up it was a staple at our house, not only because it's comfort food at it's best, but it's simple, easy to make and it was also one of my brother Miguel's favorite.

You can use whichever noodles you have on hand, for this one I actually used 1 and a half boxes of macaroni and cheese noodles. I threw out the cheese sauce packet and used the pasta.


2010_07090057

Carne Guisada com Massa - Beef w/ Noodles

1 lb stewing beef
1 medium onion, chopped
1 large tomato, chopped
olive oil
bay leaf
paprika
salt and pepper to taste
garlic powder
Water
1 beer

Start off by drizzling a little of the olive oil on the bottom of your pot, I'm using my cast iron one which I just absolutely love.

2010_07090036

Add the beef, onions, tomato, bay leave, paprika, salt and pepper, garlic powder and a little bit of water. Remember I don't measure, I just eyeball everything so you'll have to do the same.

Stir the ingredients well and cook for about 5 minutes.

2010_07090040

Sprinkle about 2 or 3 tablespoons of flour over the meat and stir to combine well. This is what will make your gravy nice and thick.

2010_07090041

Pour half of the beer into the pot and a little bit more water and turn the heat to medium-low. Simmer for 20-25 minutes or until your meat is cooked through. Just remember to keep checking and adding a little bit more of the remaining beer at a time so it won't dry up.

When the meat is cooked, add the noodles and more water, enough to completely cover the noodles. You may think it's too much but believe me, the pasta needs it to cook.

2010_07090043

Keep stirring often and checking if it needs water until the pasta is cooked.

2010_07090047

2010_07090048

Sprinkle with some fresh parsley and serve immediately.

2010_07090051

The longer you have it sit out, the more the pasta will absorb the gravy, I usually just put the lid on my pot and let it sit for about 5 minutes, we like ours pretty thick.

2010_07090059

Good to the last bite. YUM!

2010_07090062

Tuesday, July 06, 2010

Lucky Leaf American Flag Cake

Every 4th of July I make an American Flag Cake, but I usually use fresh strawberries and blueberries.

This time I tried something different, I was offered some products from Lucky Leaf to review on my main blog and one of the recipes included was for the Flag Cake, but using Pie Filling.

YUMMY!

I will always make it this way, it was so good and within about 3 hours the cake was completely gone, not even a crumb was left.


2010_07040022

LUCKY LEAF AMERICAN FLAG CAKE
Credit: Lucky Leaf Products


  • 1 prepared 9 x 13 inch white cake or the cake of your choice
  • 1 (16oz.) tub of whipped topping, divided
  • 1 (21 oz.) can of LUCKY LEAF Apple Pie Filling
  • 1 (21 oz.) can of LUCKY LEAF Cherry Pie Filling
  • 1 (21 oz.) can of LUCKY LEAF Blueberry Pie Filling


Directions

Reserve 1/3 cup whipped topping. Spread remaining whipped topping over top and sides of cake. In the upper left-hand corner of the cake, use ½ can LUCKY LEAF Blueberry Pie Filling to create the square field for the stars. Starting with the LUCKY LEAF Cherry Pie Filling at the top edge of the cake, form alternating stripes of the flag using LUCKY LEAF Cherry Pie Filling and LUCKY LEAF Apple Pie Filling. Use remaining whipped topping to create stars in the blue field. Refrigerate.

Makes 12 servings