Friday, September 28, 2012

Winner Bento Kit Giveaway

Thank you all so much for entering the giveaway.


I used Random.org to draw a winner and it came back with #4 which is the Saville Family.

Congratulations!!!!

I will contacting you shortly :)

Tuesday, September 25, 2012

California Ripe Olives Bento Kit - Review & Giveaway

Who hasn't heard of Bento lunch boxes?

Bento Box California Olives

I remember when I first came across these, it was actually through a friend of mine, Eden, who had the cutest boxes and lunches.  At the time my kids were in public school and I wanted to start doing the same, but then never got around to them.

Now, they are homeschooled, and even though I don't have to send lunches to school, I STILL have to prepare lunch everyday and I am now a huge fan of Bento Boxes.

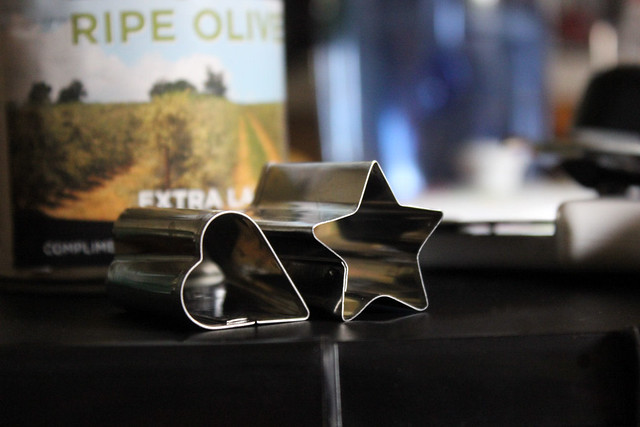
A few weeks ago, I was sent a package from California Ripe Olives to promote healthy lunches as well as incorporating olives into a Bento Creation!

Bento Box California Olives

I'm always up for a challenge, especially if it includes cooking, and this one is right up my alley.  WE are an olive loving family.

Bento Box California Olives

How adorable are those little cutters???

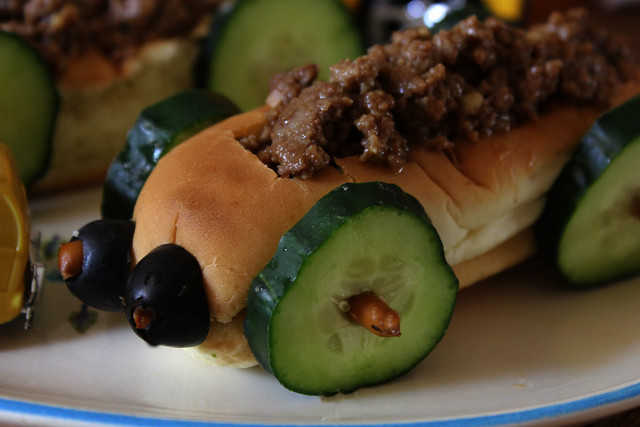
But back to olives, I use them all the time, in dishes, in pizza, in sandwiches, to decorate etc.  Remember my Sloppy Joe Bun Buggies?  

Sloppy Joe Bun Buggy

Not only are olives delicious but they're so versatile in the kitchen. I always have them on hand, funny enough my favorite kind of black olives are the California Olives, so this was a special treat for me :)

A little more about California Ripe Olives???


 California olive growers produce more than 95 percent of the ripe olives grown in the U.S. These growers operate multi-generational family farms from the inland valleys of California, from San Diego County to far north of Sacramento County. 

From breakfast to dinner. January to December. And from every day to gourmet. Olives are as casual or as elegant as you like, adding color, texture and flavor to any meal.
 
You can “Like” us on Facebook at Facebook.com/CaliforniaBlackRipeOlives. 
 
 For more information about California Ripe Olives—including hundreds of recipes—visit www.CalOlive.org.

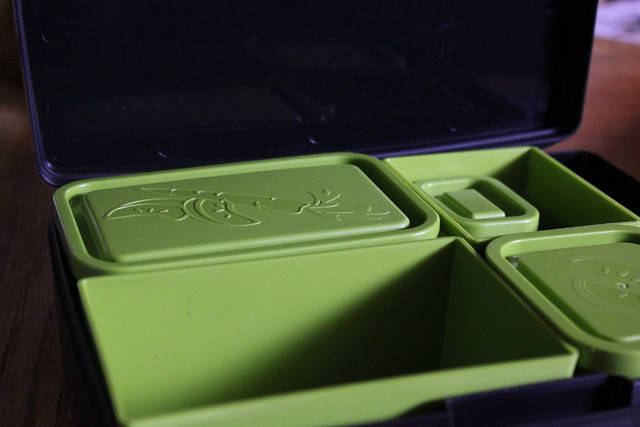
The wonderful bento box I was sent, is from Laptop Lunches and I love all the little compartments.

Makes packing lunches so much easier. I even use it for my husband's lunches. That tiny little one is great for salad dressing.

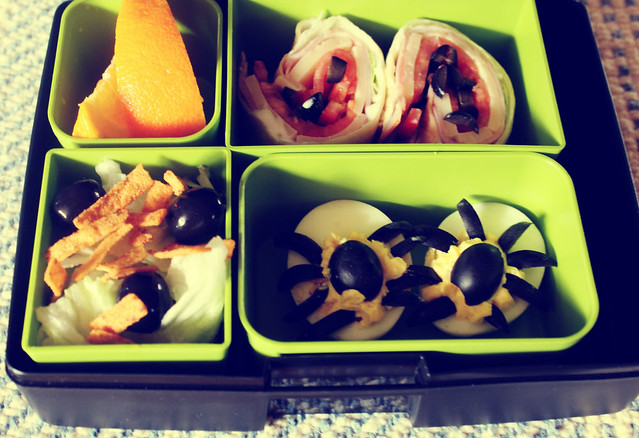
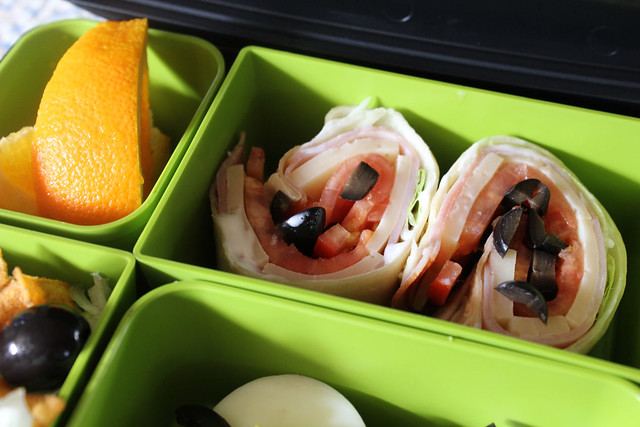
So, want to see what my bento lunch box usually looks like???? I may change some of the ingredients in there, but this is mostly what I like packing for the kids.

Bento Box California Olives

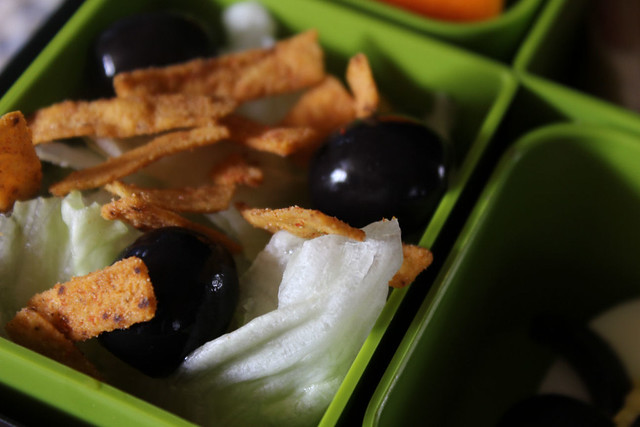
Sliced oranges, or apples or any other fruit I have on hand. Sandwich wraps are always a hit around here. A simple salad and in this case, some spider deviled eggs.

Wraps don't have to be complicated, I add deli meat, cheese, lettuce, mayo or ranch, tomatoes and olives. Always have the olives in there.

Bento Box California Olives

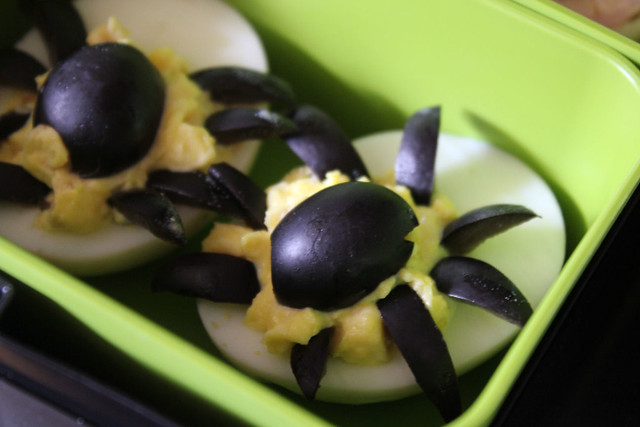
And those little spider deviled eggs? Perfect for a treat, but also for Halloween right? Nothing to it, just deviled eggs, then half of an olive for the main body and the legs are made of thinly or thickly sliced olives.

Bento Box California Olives

I could eat olives all day long. Matter of fact, I have to control myself or I'll eat the whole can.

Bento Box California Olives

So tell me, do you do Bento Box lunches?

Do you like olives, or more specifically have you ever tried the California Olives?

Guess what????

California Ripe Olives is giving away a similar kit to a winner. If you want to learn more about them, be sure to check out their facebook page.

To enter this giveaway:

- Leave a comment and let me know what your favorite kid lunches are?


Contest will run until Friday morning. Feel free to share with your friends if you think they would be interested in winning a Bento Box California Ripe Olives Kit.

 I was provided with a California Ripe Olives prize pack  to review.   All thoughts and opinions are my own.

Sunday, September 23, 2012

Cheesy Mixed Vegetable Bake

I'm lucky in that my children love vegetables.  I do try to serve some with every meal, but truthfully sometimes I get tired of the same thing over and over.


I first made this casserole about 7 years ago and since then it's become a favorite, especially with the kids.  Threw in what I had on hand and it turned out really yummy.


2012_09230031

Cheesy Mixed Vegetable Bake

1 (16 oz) package frozen mixed vegetables
2 Small sweet peppers, chopped (I like using the little ones that come prepackaged)
1 (10 oz) can condensed cheddar soup
1/3 cup sour cream
salt and pepper to taste
French-fried onions
shredded cheese


Preheat oven to 350 F.  Grease a large casserole dish.

In a big bowl, combine the veggies, peppers, cheddar soup, sour cream, salt and pepper and some french-fried onions.  ( I add about 1/3 cup)

Pour into the casserole dish and bake for about 20 minutes. 

2012_09230019

Sprinkle the remaining french-fried onions and some shredded cheese on top and bake for a few minutes longer.

Remove from oven and let sit for about 5 minutes before serving.

2012_09230033

NOTE:  I have also made it using mushroom soup which is really yummy as well.

Pork Parmigiana

I know, I know, the most common are Chicken and Veal, but I like changing things up and going against the grain.  I've had Turkey Parmigiana but this time I decided to go with Pork, and I'm so glad I did because it works wonderfully and is just as good as the others.

I used Pork Scallopini which is nice and thin.

The recipe is adapted from an Easy Everyday Cooking card.

2012_09230032

Pork Parmigiana

1/2 cup vegetable oil, divided
1 small onion, chopped
1 clove garlic, crushed
2 (15 oz) cans diced tomatoes, undrained
1 (6oz) can tomato paste
1 teaspoon chopped fresh basil
1/2 teaspoon dried oregano
1 bay leaf
6 pork scallopini
2 eggs, beaten
1/2 cup seasoned bread crumbs
1 cup shredded mozzarella cheese (or sliced)
1/2 cup grated Parmesan cheese, divided


Preheat oven to 400 F.

Grease a large baking dish.  Heat 2 tablespoons oil in a large skillet over medium-high heat;  add onion and garlic.  Cook until tender, about 5 minutes.

Stir undrained tomatoes and tomato paste into skillet.  Add basil, oregano and bay leaf;  mix well.  Simmer, stirring frequently for 20 minutes.  Discard bay leaf.

2012_09230020

Dip pork in egg and coat with bread crumbs.  Saute in remaining oil, turning once, until browned, about 5 minutes;  drain.

2012_09230025

Layer tomato mixture,

2012_09230023

pork, mozzarella and 1/4 cup parmesan in prepared baking dish. 

2012_09230026

Bake until browned and bubbly, about 15 minutes.

2012_09230028

Sprinkle with remaining parmesan cheese before serving.

2012_09230029

Thursday, September 20, 2012

Linguine with Peppery Beef Strips

Here's a simple, quick to throw together recipe. Another one from my very old Easy Everyday Cooking Cards :)

The recipe doesn't call for red pepper, but I did add chopped red pepper just to give it a bit of color.

Linguine with Peppery Beef Strips  
Linguine with Peppery Beef Strips

 1 lb lean beef steak
1/2 Tbsp dried oregano
1/2 Tbsp dried basil
2 Tbsp coarsely ground pepper
1 Tbsp olive oil
2 cloves garlic, minced
1/2 cup thinly sliced green onions
1 cup beef broth 8 oz linguine
1 cup julienned carrots Slice steak into
1 4-inch-thick slices.


Mix oregano, basil, pepper, olive oil, garlic and green onions in a shallow dish. Add steak; toss to coat. Heat water for pasta.

Linguine with Peppery Beef Strips

Dissolve cornstarch in broth.

Cook pasta according to package directions. Meanwhile, heat a large skillet over medium-high heat. Add steak; stir-fry for about 3 minutes. Remove steak.

Stir broth mixture into skillet. Boil, stirring continually, for about 1 minute. Return steak to skillet. Add carrots; cook for 5 minutes. Drain pasta and add to skillet; toss with steak and vegetables.

Serve immediately.

Linguine with Peppery Beef Strips

Monday, September 17, 2012

Maple and Sweet Pepper Meatloaf

Meatloaf.....is there another comfort food that brings such a smile to your face?

I don't know what it is about it, maybe the fact that it's so yummy and filling, or maybe the fact that it can be so versatile using pretty much anything you may have on hand.

Maple and Sweet Pepper Meatloaf

It is how this meatloaf came to exist, using what I had on hand and it got the thumbs up from the family, matter of fact I think it's one of my favorite meatloaves I've had.

Give it a try, let me know what you think.

Maple and Sweet Pepper Meatloaf

Maple and Sweet Pepper Meatloaf

1 lb ground beef
1 lb maple sausage
1/2 cup milk
1 egg
1 teaspoon dried basil
3/4 cup breadcrumbs
1 small onion, finely chopped
4 small sweet peppers (I used the ones you get in the packages, two orange, 1 red, 1 yellow, but feel free to use whichever you prefer)
fresh parsley

For the topping:
3 tablespoons ketchup
1 tablespoon honey
1/2 teaspoon worcestershire sauce

In a big bowl mix the milk, egg and breadcrumbs.  I used my little food processor to chop up the onion and the sweet peppers together....then added those to the bowl.

Maple and Sweet Pepper Meatloaf

Add the beef and maple sausage, mix just until well combined.

Shape into a loaf and place in a loaf pan lined with aluminum foil.

In a small bowl, combine the topping ingredients, then spread evenly over the meatloaf.  Bake at 375 degrees for an hour or until cooked through.  Depending on the oven temperatures it may vary.

Let cool for 5 minutes before slicing and serving.

No Reply Blogger


Alright blog readers, I need to talk to you all about something.

See I love getting comments and I don't usually reply back in the comment section because I figure you are like me, you make a comment and then move on and don't go back and check again.

I much prefer to reply through email and it's sad when I try to do that and get the "No Reply Blogger", which means if I reply to you, the email will end up somewhere in a black hole in cyberspace.  Not good.

I love replying, I love letting people know that I appreciate them taking the time to stop by and leave me a note, but I have a feeling that many of you may find me to be the rudest blogger alive, because you don't hear back from me.

Not for lack of trying, trust me.

So, if you could do me a huge favor, and it's no biggie because when I first started blogging I did the same thing and then people wanted to reply to me and hit the same brick wall.

This is very easily fixed.

Click on your blogger profile, click edit and then make sure "show my email" is checked.  That's it!

Now when you leave me a comment, I can quickly reply to you through email :)

And while we're on the subject, I've also ran into the problem where one of my readers will ask me to check out their blogs, but when I go to do so, I run into the empty profile window, no blogs showing.

This is also a quick fix.  Again in your profile, click "select blogs to display", then select the blog you want to be shown and save settings.

Now when someone wants to visit you back, they'll be able to do so :)

Deal??????


Cream of Broccoli Soup

I love a good bowl of soup.

Not just in the fall or winter, but year long.  I don't believe that soup should only be enjoyed when it's cold outside.

Last night's dinner was soup and Baked Grilled Cheese and Ham Sandwiches.  The soup I chose to make was Cream of Broccoli.

Cream of Broccoli Soup

Cream of Broccoli Soup

4 cups chicken broth
Cream of celery (recipe below)
1 package (10 oz) frozen chopped broccoli
1 medium onion, finely chopped
salt, pepper
shredded cheese

In a big pot, add the 4 cups of chicken broth and the cream of celery, bring to a boil.  Add the broccoli, return to a boil and then reduce the heat.  Simmer for 5 minutes or until broccoli is tender.

In a small skillet, cook up the onion until tender, then add the onion to the soup.  Give it a good stir and add a dash of salt and pepper to taste.  Cover and simmer for about 15 minutes or so.

I like to add in a little shredded cheese and then after I serve the soup, I sprinkle in a little more over the top :)


For the cream of celery (instead of using a can, I make my own)
2 1/2 cups of milk
1/2 cup flour
2 tablespoons butter
dash celery seed
dash salt, pepper

Put all ingredients into a blender, and blend until smooth.  That's it. 

Cream of Broccoli Soup

Thursday, September 13, 2012

Shortbread, Shortbread and more Shortbread

I'm not a big fan of cookies, I eat them once in a blue moon.  But the one cookie that I can't resist is shortbread.  If there's any in the house, I don't stop until it's all gone.

Shortbread

Best part is that my husband and children love it just as much as I do, so it never lasts long.

Shortbread

Yesterday I had a craving for some melt in your mouth shortbread, and I whipped up a batch.  It's GONE, there is nothing left and so, here I am again, making another batch, or two, or three to fill up the cookie jar.

I made two different variations.  The first one is a very simple straight forward shortbread, just 3 ingredients.   The second one is a Pecan Shortbread, another of my favorites. :)

Shortbread

Melt in your Mouth Shortbread

2-1/2 cups flour
1/2 cup sugar, plus
1 cup butter, cold and cut into cubes

Preparation:
Preheat oven to 350 degrees f. Place flour and sugar in large bowl. Mix with wire whisk. Add cut butter.

Shortbread

Use a pastry blend, your fingers or food processor to blend butter into flour/sugar mixture. Dump mixed ingredients into 9x13 pan. Press down with fingers and level-out.

Shortbread

Bake for 25 to 30 minutes or until lightly brown on top. Remove from oven. Cut shortbread into squares and then into triangles while the shortbread is still warm. Sprinkle with sugar, if desired. Cool completely in pan.

Shortbread

And now for the Pecan Shortbread. This one is slightly adapted from Ina Garten.

Shortbread

Pecan Shortbread

3/4 pound unsalted butter, room temperature
1 cup sugar
1 1/2 teaspoon pure vanilla extract
1/2 teaspoon pure almond extract
3 1/2 cups all-purpose flour
1/4 teaspoon salt
1 1/2 cups small diced pecans


Preheat the oven to 350 degrees F.

In the bowl of an electric mixer fitted with a paddle attachment, mix together the butter and sugar until they are just combined. Add the vanilla and almond extracts. In a medium bowl, sift together the flour and salt, then add them to the butter/sugar mixture. Add the pecans and mix on low speed until the dough starts to come together. Dump into a 9x13 pan, press down with fingers.

Bake for 20 to 25 minutes, until the edges begin to brown. Cut into rectangles or diamonds or whatever you wish :) Allow to cool to room temperature and serve.

Saturday, September 08, 2012

Bourbon Chicken

We love Chinese food, love love love it.

I'm slowly getting a  stash of these favorites that I can make at home.  This one I hadn't tried yet but had the recipe sitting around for a long time, and getting a big craving for some Chinese food yesterday I thought it was the perfect time to make it.

It's so good, tastes just like the Bourbon Chicken you get at Chinese take outs.

Bourbon Chicken

Bourbon Chicken

2 pounds boneless chicken breasts; cut into bite-size pieces
1 tablespoon olive oil; (1-2)
1 garlic clove; crushed
1/4 teaspoon ginger
3/4 teaspoon crushed red pepper flakes
1/4 cup apple juice
1/3 cup light brown sugar
1 tablespoon ketchup
1 tablespoon cider vinegar
1/2 cup water
1/3 cup soy sauce
1 tablespoon cornstarch


Combine garlic, ginger, red pepper flakes, apple juice, brown sugar, ketchup, cider vinegar, water, soy sauce and cornstarch in a big bowl.

Bourbon Chicken

Add chicken to the bowl and give it a good stir to coat. Scoop chicken out onto a skillet to which you've added the olive oil.

Cook until lightly browned. Remove chicken.

Bourbon Chicken

Add mixture from the bowl, heating over medium heat until well blended and dissolved. Add chicken and bring to a hard boil.

Reduce heat and simmer for 20 minutes uncovered. Serve over hot rice.

Thursday, September 06, 2012

Blackberry Coffee Cake Cupcake

I wanted to make an easy dessert for tonight using the pie filling that I have in the pantry.  I have a lot of these Lucky Leaf pie filling cans on my shelves which are great for anything from pies to cobblers.

Blackberry Coffee Cake Cupcakes

Following one of the Lucky Leaf recipes, I decided to change it up and instead of making the usual coffee cake in a big pan, I made a smaller one and used the rest for cupcakes.

Next time I won't fill them up as much because some did overflow, but it doesn't matter, the end result is yummy :)

Blackberry Coffee Cake Cupcakes

Blackberry Coffee Cake Cupcakes

2 cups all-purpose flour (9 oz)
2 teaspoons baking powder
1/2 teaspoon salt (increase to 3/4 if using unsalted butter)
1 stick (4 oz) butter, softened
2 cups granulated sugar
4 large eggs
1 teaspoon vanilla extract
1 can (21 oz) Premium Lucky Leaf Blackberry Pie Filling


Preheat oven to 350 degrees F. Spray a 13×9 inch pan with flour-added baking spray.
Mix the flour, baking powder and salt together in a bowl and set aside.
In a large mixing bowl, beat the butter and sugar until creamy. Beat in the eggs and vanilla. By hand or using lowest speed of the mixer, stir in the flour mixture.

Blackberry Coffee Cake Cupcakes

Spread the batter in the pan reserving a bout 1 cup.

Blackberry Coffee Cake Cupcakes

Spread the pie filling over the batter. Drop gobs of reserved batter over the pie filling.

Blackberry Coffee Cake Cupcakes

Bake for 45 to 50 minutes or until a toothpick inserted in the center comes out with moist crumbs rather than batter. Let cool.

Blackberry Coffee Cake Cupcakes

Canning Stewed Tomatoes

Anytime I have extra tomatoes in the house, I quickly can a few just so they won't go back.

Canning Stewed Tomatoes

One of my favorite ways to make them is stewed, that way I can add them to many dishes.  They are so versatile and can be used in pizza sauce, spaghetti sauce, stews, soups etc.

I don't have a specific recipe or amounts for you because I just make these with however many tomatoes I have on hand.

But here's the general idea of how I can these.

Canning Stewed Tomatoes

Tomatoes
Onion, finely diced
Seasonings:  celery seed, salt and pepper, garlic powder, a little bit of sugar

Boil the tomatoes for a few minutes until the skin cracks, then immediately scoop them out and into cold water. 

Canning Stewed Tomatoes

I usually clean out my sink really well and fill it with cold water and a few ice cubes, then scoop them into there.  Peel off the skin.

2012_09060058

Cut off the tops and ditch those.

In the meantime boil the jars and lids.

Canning Stewed Tomatoes

When the tomatoes are all peeled, chop them up roughly and add them to a pot. Season to your taste. I always add a little bit of sugar to cut a bit of the acidity of the tomato.

Simmer for about 15 minutes.

Canning Stewed Tomatoes

Scoop into prepared jars, to 1/2" of the top of jar. Wipe rims clean with a cloth and then pop on the lid and tighten.

Process in boiling water for 25 minutes. If you've never canned, this simply means adding the jars to a big pot, I use a stock pot for canning. Fill with water to cover the jars, about an inch above the jar lids. Bring to a boil, then place the lid on and boil for a further 25 minutes.

When ready, carefully remove the jars and allow to cool. Wait for the popping sound to begin. I have to say it's one of my favorite sounds in the kitchen, hearing those lids pop and knowing that they're sealed properly :)

Canning Stewed Tomatoes