Maybe it's the fact that I grew up used to simple homemade vanilla cakes, those that my grandfather would throw together at midnight, just because the 4 grandchildren said they wanted cake. He was awesome like that.
He never really measured, he never really used a recipe, he actually didn't cook much but we all knew him for his perfect cakes. There were no rich sweet gloopy frostings slathered on top, or complicated fillings. They were homemade, plain, not too sweet, with a dusting of powdered sugar, and enjoyed over a cup of tea.

Those memories have stuck with me my whole life.
I'm not a huge cake fan, I've always been more into savory than sweets, and I really dislike very rich cakes especially with tons of frosting. They make me feel quite sick, to be honest. But once in a while I'll get a hankering for a slice of fluffy cake and I have to cave.
And here we are.....
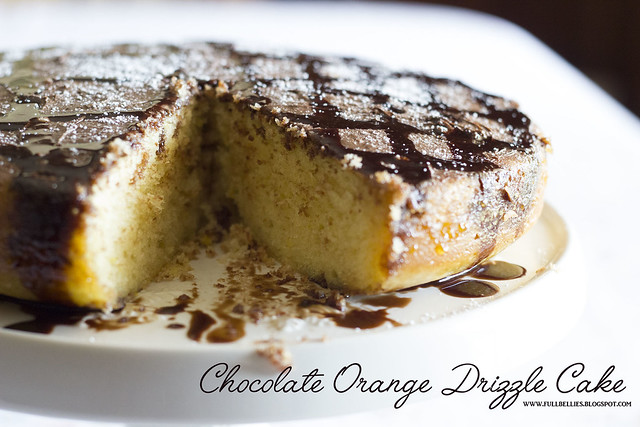
If you like chocolate oranges, you are in for a treat, because this cake tastes just like one of those. My son loves the chocolate oranges and he was quite excited when I handed him a slice of this cake after photographing for the blog.
The recipe comes from one of my very much loved British cookbooks that I've had for many years.

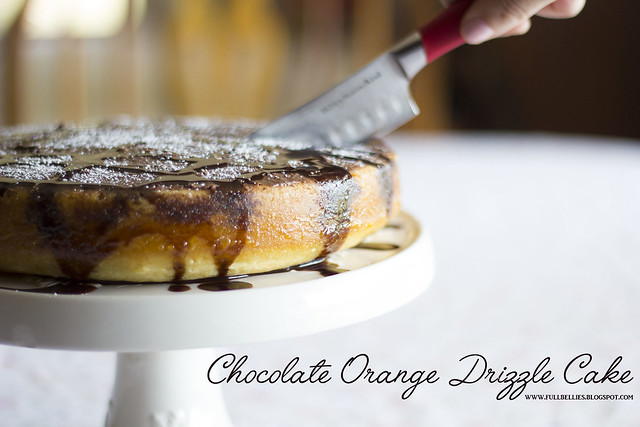
Chocolate Orange Drizzle Cake
For the cake
1 ½ sticks of butter, softened
¾ cup sugar
3 large eggs
Grated rind of 2 oranges
1 ¾ cups self rising flour, sifted
2 tbsp milk
For the topping
Juice of 2 oranges
½ cup sugar
2 oz. semisweet chocolate
Preheat the oven to 350° F. Grease and line a 7 in. round pan. Cream together the butter and sugar until light and fluffy. Add the eggs, one at a time, and beat well. Add the grated orange rind, flour and milk and fold in with a metal spoon.
Turn into the prepared pan, smooth the top and bake for 30-40 minutes until a skewer comes out clean. Remove from the oven and leave to cool in the pan.
When cool, score the top of the cake lightly with a sharp knife. Put the orange juice and granulated sugar into a pan and heat gently until the sugar has dissolved.
Bring to the boil and boil for 1-2 minutes. Pour over the cake.
When all the juice has soaked in, carefully remove the cake from the pan. Melt the chocolate and drizzle over the top.
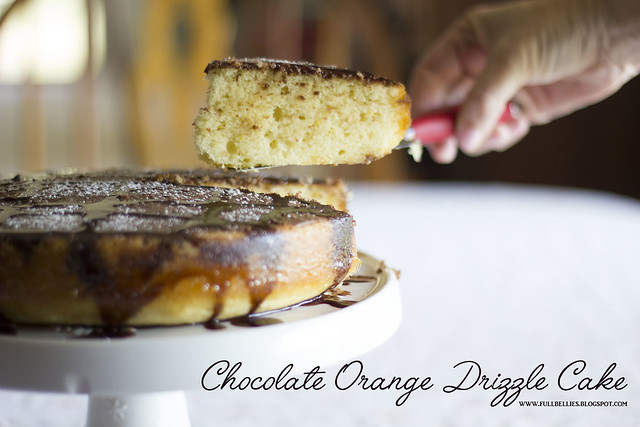
You can leave it as is, or do a dusting of powdered sugar like I did.