Monday, February 21, 2022

Menu plan for week February 21 - 28

Good morning everyone, I know I haven't been very good at updating this ol' blog, but I've been trying to get more recipes posted the past few days.

I sure hope you've been enjoying them.  

I plan on posting more frequently, sharing family favorites, new meals we have discovered and continuing to build up on my record of recipes, here on the blog.

If you've been following me for a while, thank you for still being here.  I sure hope you'll stick around.

Here is this week's meal plan, I'm making some old favorites, and sticking to recipes already available here on the blog.  I will be taking new pics for some of them, because they're quite old and have been here for many many years, but I enjoy going back in time, seeing what we were eating, and making some of those comfort foods again.

Hope you enjoy the new menu, and hope it inspires some of you, if you're struggling to figure out what to make for your families.
 
 
Sausage Rice, Fried Okra


Chicken Alfredo, Salad


Meatballs and Spaghetti, Garlic Knots


Dad's Favorite Chicken
 
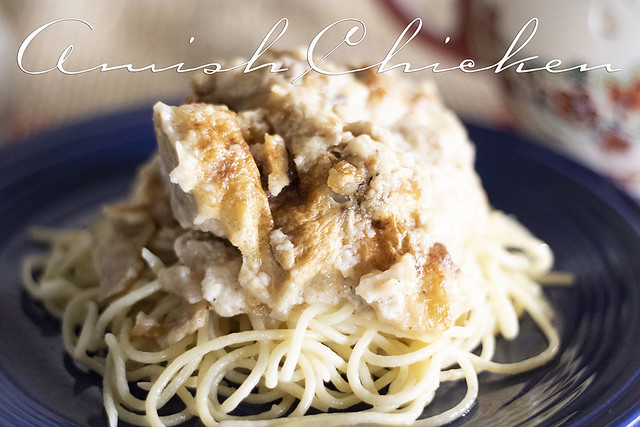
Dad's Favorite Chicken, Mashed Potatoes with Carrot, Salad


Sandwich Ring
 

Baked Ziti
 
Baked Ziti, Homemade Garlic Bread


Day 22
 
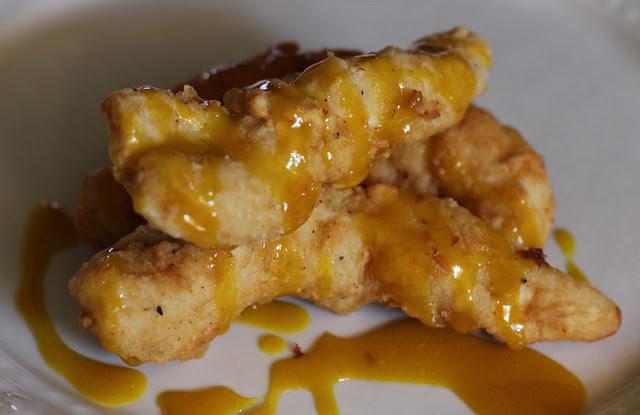
Honey Mustard Chicken Strips, Waffle Fries, Bacon Thousand Island Chopped Salad


Saturday, February 19, 2022

French Dip Squares

IMG_2654

I love a good french dip sandwich.  There used to be a time, where that is all I would order, when we went out to eat. 

When I saw this recipe a while back, I immediately bookmarked it because I knew it would be something, that my family and I would really enjoy.  Since Friday nights and weekends, I try to make easy meals, this was the perfect pick for a yummy, fun, easy meal to get on the table.  

I paired these french dip squares with onion rings, but you could do fries, or a salad.  You could even make these for a get together, party and so on. 

IMG_2652

The recipe is from Delish.com so pop on over there for more delicious meal ideas.
 

IMG_2659

French Dip Squares
 
 
Ingredients
2 (8-oz.) tubes refrigerated crescent rolls 
4 tbsp.butter, divided 
2 medium onions, thinly sliced 
4 sprigs fresh thyme, divided 
Kosher salt 
Freshly ground black pepper 
1/4 c. whole-grain mustard 
1/2 lb. deli roast beef, patted dry 
9 slices provolone 
1 tbsp. freshly chopped parsley 
1 clove garlic, minced 
1 c. low-sodium beef broth 
1 tbsp. Worcestershire sauce 
 
 
Directions 
Preheat oven to 350° and grease a 9"-x-13" baking sheet with cooking spray. Place one unrolled can of crescents on prepared baking sheet and pinch together seams. Bake until edges are slightly golden, about 12 minutes. Remove from oven and set aside. 
 
Meanwhile, caramelize onions: In a large skillet over medium heat, melt 2 tablespoons butter. Add onion and 2 sprigs thyme and season with salt and pepper. Cook, stirring occasionally, until onions begin to soften and turn slightly golden. Continue cooking, stirring occasionally, until onions are soft and caramelized, about 20 minutes. Remove from heat. 
 
Build squares: Spread an even layer of mustard onto prepared crescent, leaving a 1/2" border clear on all edges. Top with a layer of roast beef and a layer of provolone. Top with caramelized onions. 
 
Unroll remaining tube of crescent rolls and place on top of onion layer. Press seam into bottom crust to seal all edges. Melt 1 tablespoon butter and brush all over top of crescent dough, then sprinkle with parsley and salt. Bake until dough is golden and cooked through, about 35 minutes. (If dough is browning too quickly, cover with foil.) 
 
Let cool 15 minutes before slicing into squares. 
 
Meanwhile, make au jus: Melt remaining 1 tablespoon butter in a medium skillet over medium heat. Stir in garlic and cook until fragrant. Add beef stock, Worcestershire sauce, and remaining 2 sprigs thyme, stripped from stem. 
 
Season with salt and pepper. Simmer for 10 minutes until reduced slightly. Serve squares with au jus on the side for dipping. 
 
IMG_2655

Thursday, February 17, 2022

Salmon Croquettes

IMG_2575
 
I was born in a beach town, and then later moved to Portugal where the ocean was always just a few minutes away.  That meant that the availability of fresh fish, was something we just took for granted.

Fish and seafood have always been something I love but don't eat much of, primarily because I prefer fresh to frozen, but also because I find it so expensive at the grocery stores.

When I lived in South Africa, we had a few fresh fish markets that we would always go buy from.  Anything from cod to mussels, crab and huge prawns, clams, calamari, you name it, we had it, so not having that anymore is quite sad at times.  I miss it, and so once in a while that craving comes in and I try to answer the best way I can.
 
IMG_2573

This past grocery trip, I picked up some Salmon.  It's not something I buy ever, I find it extremely expensive and for a family of four, it just isn't enough unless I really splurge.  But I found a small package for $7, it only had 4 small pieces in there.  Clearly not enough to make it a main part of the meal, so I opted to make it stretch and turned it into some Salmon croquettes instead.

It was so good, so so good.  My 18 year old devoured them and asked if we can have them again soon.  We will see son, we will see.

Anyway, here is the recipe, hope you enjoy it.


IMG_2572

Salmon Croquettes


Ingredients 
1/4 cup diced onion
1 pound fresh salmon, skin removed and diced
Salt and pepper, to taste 
1/4 cup of mayonnaise
1/4 cup of bread crumbs
Minced garlic, to taste
1 teaspoon mustard
1/4 teaspoon Old Bay seasoning 
Parsley and Cilantro, to taste
 
 
Directions
 
In a small skillet, add a little bit of olive oil and fry the onion until translucent.  Transfer to a big bowl.  To the onion, add the salmon, salt and pepper to taste, mayonnaise, bread crumbs, garlic, mustard and old bay seasoning  and parsley and cilantro.

Mix well, then form into small croquettes.

In a small bowl, add some breadcrumbs, then roll each croquette in the crumbs and set on a tray.  Repeat with remaining croquettes.  Place in the fridge for 30 minutes to an hour.

When time is up, remove from fridge, and fry over medium heat for about 3 minutes on each side.  Serve immediately!

Wednesday, February 16, 2022

Beef Burrito Skillet

IMG_2561
 
 
I've been trying to make simpler meals, using what I have on hand.  The prices of everything has gone up, and meat is starting to be quite difficult to buy around here.  Long gone are the days where I could get a pound of ground beef for 3 dollars at the base commissary.
 
It makes it harder to meal plan, but it's also quite fun to try and make delicious meals, that stretch, that fill our tummies but don't break the bank.
 
IMG_2570
 
Using just one pound of ground beef, and a few other pantry ingredients, this meal comes together pretty quickly and when paired with a side salad, it makes for a filling dinner that is sure to please everyone.
 
Recipe is adapted from Life in the Lofthouse.
 
 
IMG_2559
 
Beef Burrito Skillet
 

Ingredients

  • 1 pound lean ground beef (I use 7% fat)
  • salt and pepper, to taste
  • 2 cloves garlic, minced
  • 1 small red bell pepper, diced
  • 1 small yellow onion diced
  • 1/2 cup salsa
  • 1 can (10 ounces) Rotel (diced tomatoes and green chilies) undrained
  • 1 can (15 ounces) corn drained
  • 1 can (15 ounces) black beans drained
  • 1 cup uncooked jasmine rice
  • 2 Tablespoons taco seasoning
  • 2 ½ cups chicken broth
  • 1 cup shredded cheddar or Colby-Jack cheese

Instructions

  • Spray a large non-stick skillet with cooking spray. Turn heat to medium-high and then add ground beef to skillet. Crumble beef and season with salt and pepper, to taste. Then add garlic, diced bell pepper and onion. Continue to stir and cook until beef is no longer pink. Drain any grease.
  • Add salsa, Rotel, corn, black beans, jasmine rice, taco seasoning and chicken broth. Stir gently to combine everything. Bring to a boil, once it starts to boil reduce heat to low. Cover with lid.
  • Let mixture simmer, covered, for 15 to 18 minutes, or until rice is tender and thoroughly cooked.Remove skillet from heat and sprinkle the top evenly with shredded cheese. Let stand a few minutes for cheese to melt then serve.
 
IMG_2560

Red Velvet Cheesecake

IMG_2557


If you love cheesecake, and red velvet cake, then this is the perfect combination for you.  So yummy!!!

I made this cheesecake for Valentine's Day, and it was a success.  I wasn't quite sure how it would turn out, because to be honest with you, my experiences with cheesecake, are hit or miss.  Some are phenomenal, some crack, and I've even made one that completely fell apart.

This recipe seemed like a winner, and it was.

There is only one thing I would change, and that is the amount of red velvet cake that I added to the cheesecake mixture.  I found that the amount suggested in the recipe is far too much.  Also, make sure that the cake is completely cold before adding it to the cheesecake, or it will fall apart and end up turning the whole cake pink, like mine.  Not a bad thing, it was still delicious, but far too much cake for the cheesecake ratio.

Aside from that, it was really and I mean really yummy, and I will be making it again.

The recipe is from Restless Chipotle.


IMG_2556


Red Velvet Cheesecake 

Cheesecake

  • red velvet cake prepared but not baked
  • 32 oz cream cheese
  • 16 oz sour cream
  • 2 cups sugar
  • 2 teaspoon vanilla
  • 6 eggs

Topping

  • 1/2 cup heavy cream
  • 1 teaspoonful white chocolate instant pudding mix
  • 2 tablespoons of sugar as needed


Instructions

Cheesecake

  • Prepare the red velvet cake batter.
  • Preheat oven to 375F
  • Put about ¼ inch of cake batter in the bottom of a greased and floured 10 inch springform.
  • Use the rest of the batter in a 13x9 or 9 inch cake pan.
  • Bake cakes 20 minutes or until firm and done.
  • Break the cake (NOT the one in the springform) into large chunks and set aside.
  • Beat the cheesecake ingredients together until smooth.
  • Reserve about ½ cup cake crumbs for the top.
  • Fold the remaining cake chunks into cheesecake batter.
  • Pour into the springform pan.
  • Cover the bottom of the springform with aluminum foil, bringing it up the sides.
  • Place pan in larger pan of hot water. Water should come halfway up the sides.
  • Bake for 50 minutes.
  • Turn oven off and leave door closed for 1 hour. Don’t PEEK!
  • Remove from oven, take out of the water bath.
  • Let come to room temperature.
  • Cover tightly and refrigerate overnight.

Topping

  • Whip the heavy cream until it starts to thicken.
  • Add the teaspoon of instant pudding mix and 1 tablespoon of sugar.
  • Whip until soft peaks form.
  • Taste and add more sugar if needed.
  • Spoon on top of cooled cheesecake.
  • Sprinkle with reserved red velvet cake crumbs.

Monday, February 14, 2022

Amish Chicken

IMG_1934

 
  IMG_1937 
Amish Chicken
 
 
Ingredients: 
6 -8 chicken pieces, cleaned 
1 cup flour 
2 teaspoons garlic powder 
1 tablespoon salt 
1 teaspoon pepper 
2 teaspoons paprika 
1 1/2 cups heavy whipping cream 
1 1/2 cups water 
 
 
Directions: 
Dredge the chicken pieces in the flour and spices and arrange skin side up in a baking dish. Mix the cream and water and pour over the chicken. 
 
Bake at 350* for 1 1/2 hours or until the skin is golden brown. Review from my followers: Excellent recipe! I love Amish food and this really hit the spot! 
 
IMG_1935

Oreo Truffles - Valentine's Day


I know it's a little late in the game, after all, Valentine's Day is today.  But, if you are looking for a quick and easy, but really really and I mean REALLY good treat for your loved one, these are it.

Jasmine (my daughter) made them for her boyfriend, for their Valentine's Day Date, and let me tell you, they are phenomenal.  She is just now starting to learn to cook and bake, or rather, she is just now starting to actually want to cook and bake.  For a momma who has cooked her whole life, this is the best feeling ever.

So I'm guiding her, teaching her, especially the Portuguese recipes, after all she is half Portuguese, and watching her get comfortable in the kitchen.

I started by helping her in the beginning, but now she is much more comfortable following recipes and getting things done on her own.

I thought it would be fun to bring some of her creations here to the blog, as an incentive and motivation, perhaps, to younger girls who are just getting started in the kitchen, or feel nervous or intimidated and think they will never be able to do it.

If Jasmine can, you can!!!

Without further ado, let's jump right in to this delicious treat.


Oreo Truffles
Yield: 17


Ingredients:
8 ounces cream cheese, softened
36 Oreo cookies, finely crushed
12 ounces white candy melts
12 ounces milk chocolate, melted
Valentine's Day sprinkles


Instructions:
Cover large rimmed baking sheet with parchment paper.  When done, mix cream cheese and cookie crumbs until blended.

Using a cookie scooper, shape cream cheese mixture into balls and place on the baking sheet.  Freeze for 20 to 30 minutes.  You can also do this step the day before and let them chill in the fridge overnight.

While the oreo balls are in the freezer, melt the white candy melts and milk chocolate in two separate containers.

When the oreo balls are finished chilling, dip them in the white candy melts and place them back on the parchment paper covered baking sheet.  Drizzle with the milk chocolate.  

Keep refrigerated until ready to serve.