Showing posts with label Desserts. Show all posts

Thursday, April 02, 2026

Portuguese Coconut Cakes

IMG_0763

 
If you don't yet know, I am a huge lover of coconut.  I just absolutely love coconut anything.  I grew up eating fresh coconut, drinking fresh coconut juice straight out of the coconut, and really there's nothing like it.
 
IMG_0767

 
So it goes without saying that since I was a child, one of my favorite cakes are these Portuguese coconut little bars, sometimes they are round cakes too.  If we went to a Pastelaria (cake shop), I would usually order one of these.  
 
I haven't made them in years, but was having a craving for them yesterday, and since I had everything I needed on hand, I whipped up a quick batch.  Needless to say, I have got to be good and stay away from them, or I will eat the whole thing.  They are so good, and I hope you enjoy them too.
 

IMG_0765

Bolos de Coco (Portuguese Coconut Cakes)
 
  
2 cups shredded coconut 
1 cup sugar 4 eggs 
1/2 cup butter, melted 
1 teaspoon vanilla extract 
1/2 cup all-purpose flour 
 
Preheat your oven to 350°F (175°C). 
 
 In a bowl, mix shredded coconut and sugar together. Add eggs and melted butter to the mixture and stir well. Mix in vanilla extract and flour until combined. 
 
Grease a baking pan and pour the batter into it. Bake for 25-30 minutes or until golden brown. Allow to cool before cutting into squares.


IMG_0768

Thursday, November 09, 2023

Chocolate Yogurt Cake

IMG_5362

 
I love easy recipes, the kind that take a only a few ingredients and are easy to remember.

This yogurt cake is so easy to make and so delicious.  It just uses a yogurt cup for the measurements, so you don't even have to dirty your measuring cups.  Even better right?

The versatility of the cake is that you can make a simple vanilla cake, you can make chocolate, or even lemon, which I did last week, and was immediately devoured by my lemon loving boys here at home.

So, without any further ado, let's bake.....


IMG_5361

Chocolate Yogurt Cake


Ingredients:
1 plain yogurt 170 gr, cup  (6 oz)
Now using the same cup, we measure the remaining ingredients:
1 cup vegetable oil
1 cup sugar
1 cup cocoa powder
3 cups of all purpose flour
1 tablespoon baking powder
3 eggs
Chocolate chips


Directions:
In a bowl, beat the eggs with the yogurt using a whisk, then add in the oil and sugar.  Whisk until well combined.  Add in the cocoa powder and mix.

Add the flour, a little at a time, sifting while adding.  Lastly, add in the baking powder and mix gently just until combined, don't over mix the baking powder or it may make the cake dense.

Grease the cake pan with butter and cocoa powder, then transfer the cake mix to the pan.  At this point, you can pour some chocolate chips over the batter, but it's optional.  I like to, just to make it even more chocolaty.

Bake for 40 minutes, or until toothpick inserted in middle comes out clean.

Let cool completely then invert onto cake dish.  You can leave the cake as is, and make a simple chocolate frosting to cover the top, or you can cut the cake in half, and use your favorite filling.  

For simplicity purposes, I just used some whipped chocolate frosting, that I already had on hand.  

Enjoy!

Friday, April 21, 2023

Cream Cheese Pound Cake


My sweet boy, turned 20 years old on the 11th of April.

I have always made my kids birthday cakes, I don't think I've ever bought them a cake at the store, or maybe once?  Although I can honestly say, I don't remember ever doing it.  

But anyway, some of their cakes I decorate with fondant, and some with icing, and then some are just plain cakes, it all depends on what they request for that year.


For his 20th, he just wanted me to make one of his favorites, which is pound cake.  That's it, a simple pound cake, no parties, no big get togethers, nothing, just a cake and dinner with dad and mom, and his sister.

So that is what I did.

I have to say, this is probably one of my favorite cakes too.  I much prefer a simple, plain cake, to one that is slathered in frosting and icing.  


Cream Cheese Pound Cake


Ingredients:
  • 1 1/2 cups unsalted butter, softened (3 sticks)
  • 8 ounces cream cheese, softened
  • 3 cups granulated sugar, divided
  • 6 large eggs
  • 1 tablespoon vanilla extract
  • 1 teaspoon baking powder
  • 1 teaspoon salt
  • 3 cups all-purpose flour
 
 
Directions:
 
  • Set out the butter, eggs, and cream cheese to come to room temperature. Preheat the oven to 325 degrees F. Move one oven rack to the center of the oven and remove any racks above it.
  • Pull out a standard 12-cup capacity bundt pan. Grease the bundt pan with extra butter or shortening, then scoop 1/4 cup sugar into the pan and shake it around until the fat is well coated in sugar. Dump out any excess sugar. Set aside.
  • Place the softened butter and cream cheese in the bowl on an electric. Beat on high until the mixture is totally smooth. Scrape the bowl with a rubber spatula, then add the remaining 2 3/4 cups sugar. Beat on high again for 3-5 minutes to cream the ingredients until very light and fluffy. Scrape the bowl again.
  • Turn the mixer on low and beat in the eggs, vanilla extract, baking powder, and salt. Then slowly add the flour a little at a time, until fully combined. Once the batter is smooth, turn off the mixer, as to not overmix the batter.
  • Scoop the batter into the prepared pan. Bake on the center rack for 80-90 minutes. After 80 minutes, test the cake by inserting a toothpick deep into the center of the cake. If it comes out clean, take the pound cake out of the oven.
  • Let the cream cheese pound cake rest in the pan for 15 minutes. Then carefully flip the cake onto a platter or baking rack.


Thursday, September 15, 2022

Slow Cooker Pecan Pie

 
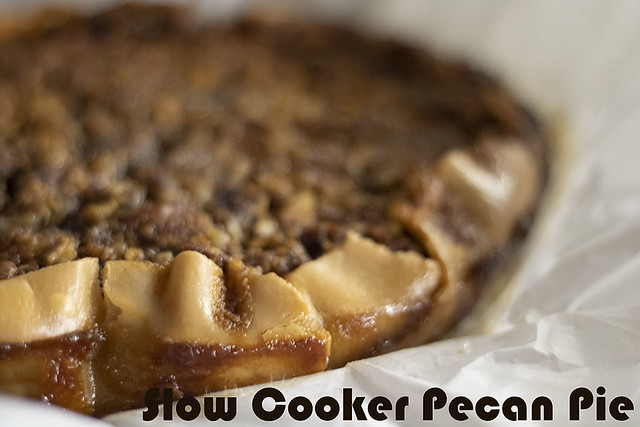
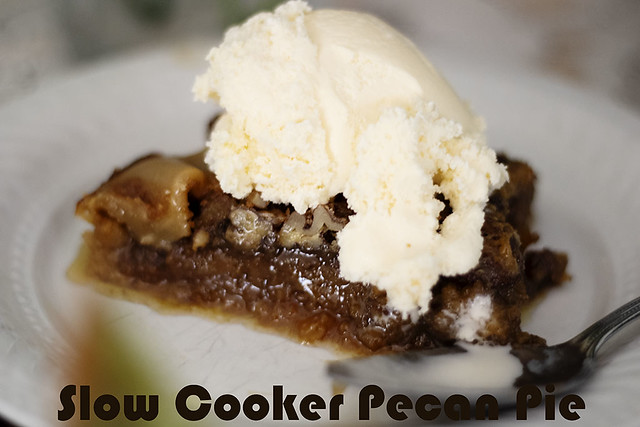
Today I am bringing you a recipe that I just recently tried myself, and it was a huge hit.  As with all new recipes, there are things I often have to change for the next time I make it.  

IMG_3887

 
With regards to this slow cooker pie, I need to keep an eye on it, and probably cut down the cooking time slightly, because some of the edges of the pie were a bit dark and hard from the filling.

Aside from that, this was so good, sooooo good, and I think it will be going on my Thanksgiving menu.  I have a pumpkin pie one to try as well, in the slow cooker, and if that one turns out good as well, then it will go on the menu right alongside the pecan pie.

If anything, the fact that it is cooked in the crockpot, and I don't need to faff over it, is a huge plus.


IMG_3888

Slow Cooker Pecan Pie 
 Source:  The Country Cook
 
 
Ingredients 
1 refrigerated pie crust 
4 large eggs, lightly beaten 
1 ⅓ cups light corn syrup 
 1 cup sugar 
⅓ cup salted butter melted
 ⅛ teaspoon cinnamon (optional) 
2 teaspoons vanilla extract 
2 cups pecan halves, divided use 
 
 
Instructions 
 
Line a 6-quart oval slow cooker with parchment paper (12.5 inch x 16 inch). Press the paper down into the slow cooker to create an outline of the bottom of the slow cooker. Remove parchment paper and place unrolled pie crust onto the parchment paper (lining it up with the creases from the outline in the parchment paper). 
 
Gently roll up the edges of the pie crust and make small indentations to help the crust stick to the parchment paper and to keep in the filling better. Place parchment paper/pie crust into slow cooker (pastry should extend 2 to 3 inches up the sides). Bend and fold the pastry as needed to get it to fit properly. In a bowl combine the eggs, corn syrup, sugar, melted butter, cinnamon and vanilla. Whisk until smooth. Stir in 1 cup of the pecans. 
 
Gently pour batter into crust in the slow cooker. Then top with remaining cup of pecans. Placing them evenly in a pattern to make a nice presentation. Place a layer of paper towels on top of the slow cooker then cover with the lid. Cook on high for 3 to 3 ½ hours or until filling is puffed and set. Turn off slow cooker. Let stand, uncovered, 1 hour. 
 
Cut and serve straight from the slow cooker. Or gently lift the parchment paper out of the slow cooker, then slice and serve. 
 
IMG_3890

IMG_3893


Thursday, September 08, 2022

{ Toucinho do Ceu }

Today I am bringing you a Portuguese recipe, well, Brazilian, so from my paternal grandfather's side.  This is one of the easiest desserts you will put together, but it is so good, like so so soooooo good.  It tastes phenomenal.
 
So what about that name?  What does it mean?  Well if we are to directly translate from Portuguese, it means Bacon from Heaven!  
 
I don't know why that name came about, or who decided that was the perfect name for this cake, but I'm good with it, since I love bacon, and this dessert is Heavenly.  Kinda makes sense then doesn't it?

However you may feel about the name, this is the perfect dessert when you have company come over and need something to serve.  Just a few ingredients, a quick blend together and that's it.
 
I hadn't made it in a really, really long time, and when I saw one of my favorite Youtubers making it, the craving kicked in.  So thank you to Greice Brigido for the recipe, and a trip down memory lane.

 
IMG_3804

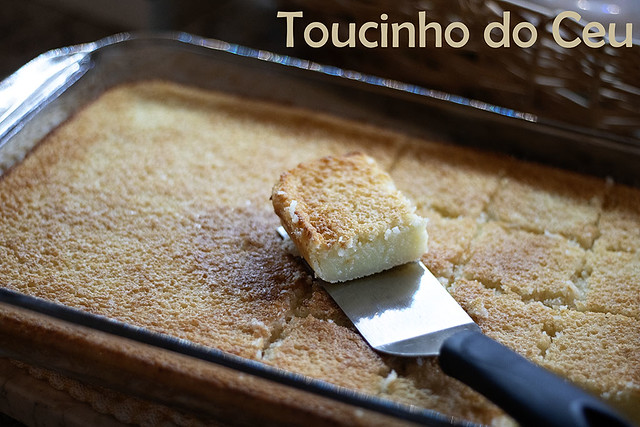
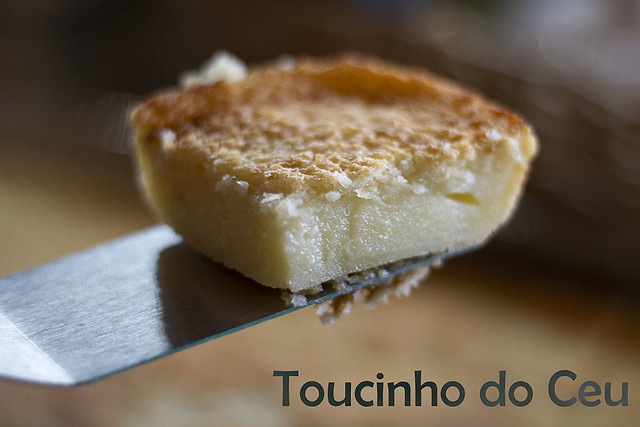
It is a cake/pudding/tart kind of dessert, all thrown together in the blender and then baked to create this creamy interior and a little coconut crunch crust.  Just trust me, make it, you will love it.

IMG_3806

Toucinho do Ceu


Ingredients
600 ml milk
4 eggs
2 cups of sugar
1 cup of flour
3 tablespoons of butter
100 gr coconut


Directions
Put all the ingredients in a blender, and mix until well combined.  Pour into a 13x9 greased baking dish, and bake at 375 for 30 minutes or until golden brown, and the center is set.

Remove, let cool and serve immediately.

You can place it in the refrigerator and it will keep for a few days, although it never EVER lasts that long in my house.

Enjoy!

IMG_3808


Thursday, August 18, 2022

Orange Ricotta Cake

IMG_3403
 
I've been looking through all my old recipes and cookbooks.  If you didn't know, I am obsessed with cookbooks or all shapes and kinds, magazines, church cookbooks....you name it.  

I've amassed quite the collection, enough that I often forget what I have, so it's fun to go back and look.  It's during those moments, that I seem to find the best recipes, the ones that are not only delicious but tried and true, passed down from generation to generation, and the pure definition of comfort food.
 
 IMG_3407

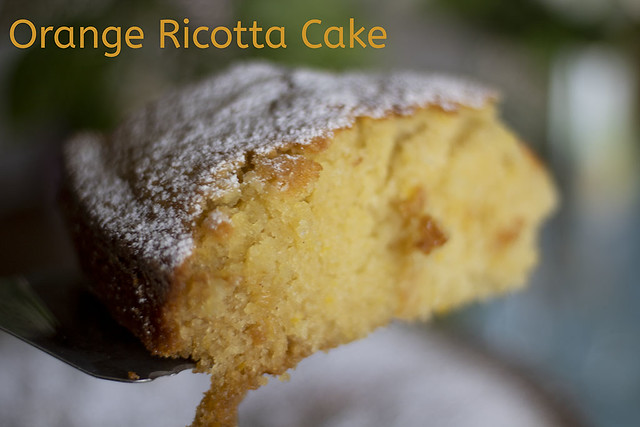
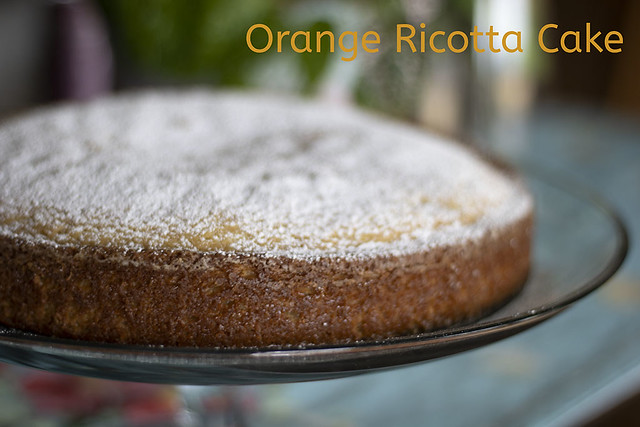
This Orange Ricotta Cake is so unbelievably good.  It may seem like a simple cake, but the flavor packs quite a punch and if you're worried about the Ricotta cheese, don't, you won't even notice it's there, aside from giving the cake a soft and fluffy texture.

I am not a fan of very rich, full of frosting, kind of cakes, I much prefer simple cakes.  They are perfect with a cup of coffee or tea.  So this one, is what I would call one of my favorites, and I do hope you enjoy it too.

IMG_3404

Orange Ricotta Cake

 
3/4 cup of butter
1 and half cups of sugar
15 oz Ricotta cheese (425 Gr) 
3 large eggs
1 and half cups of flour
Zest and juice from one orange
1 teaspoon vanilla extract
1 teaspoon ground cinnamon
1 teaspoon baking soda
1/2 teaspoon of salt


Preheat oven to 350 degrees.

Beat the butter and sugar until creamy and pale yellow.  Add in the eggs one at a time.  Next add the ricotta, the flour, zest and juice from one orange, vanilla, cinnamon, baking soda and salt.  

Mix until well combined.

Pour into a greased and floured cake pan.  (I used my 9 inch springform pan).  Bake at 350 for 45 to 50 minutes, until golden brown and a toothpick inserted in center, comes out clean.

Let cool completely, remove from cake pan and dust with powdered sugar.