Wednesday, November 25, 2020

Chocolate Chip Cranberry Bread

 I picked up a Taste of Home Magazine a while back, mainly because the recipe on the cover caught my eye.  Chocolate Chip Cranberry Bread, yum!

I have never been a huge fan of cranberries, but I do enjoy a cranberry muffin sometimes, and of course I love chocolate, so this seemed like the perfect combination.  And it was!

What you end up with is a super soft and fluffy sweet bread.  You have the sweetness of the chocolate running through but then you get that tartness of the cranberries, that creates just the right combination in each bite.

Since we all have cranberries in our fridges, at this time of year, why not throw a few into this delicious dessert.  Your family will thank you for it.  It is so good, especially with a hot cup of coffee or tea.

 
IMG_0129
 
Chocolate Chip Cranberry Bread
Source:  Taste of Home


2 cups all-purpose flour 
3/4 cup sugar 
2 teaspoons baking powder 
1/2 teaspoon salt 
1 large egg, room temperature 
3/4 cup 2% milk 
6 tablespoons butter, melted 
1 cup fresh or frozen cranberries, halved 
1 cup miniature semisweet chocolate chips 

STREUSEL: 
1/3 cup packed brown sugar 
2 tablespoons all-purpose flour 
1/8 teaspoon ground cinnamon 
2 tablespoons cold butter 
3/4 cup confectioners' sugar 
2 to 3 tablespoons whole milk 


1. Preheat oven to 325°. Line bottom of a greased 9x5-in. loaf pan with parchment; grease parchment. 
 
2. In a large bowl, combine the flour, sugar, baking powder and salt. Whisk the egg, milk and butter; stir into dry ingredients just until moistened. Fold in cranberries and chocolate chips. Transfer to prepared pan. 
 
3. In a small bowl, combine the brown sugar, flour and cinnamon; cut in butter until crumbly. Sprinkle over batter. Bake until a toothpick inserted in the center comes out clean, 60-65 minutes. 
 
IMG_0115
 
4. Cool for 10 minutes; loosen sides of bread from pan. Cool completely before removing from pan. For the glaze, mix confectioners' sugar and 2 tablespoons milk until smooth; if needed, add additional 1 tablespoon milk to reach desired consistency. 
 
Drizzle glaze over top of bread; allow to sit 10-15 minutes before slicing. 
 
IMG_0122

Monday, October 26, 2020

Hearty Breakfast Casserole

_MG_9280 
 
Everyone has their favorite breakfast casserole. That one you keep for special occasions, such as Christmas morning, or when you have family or friends staying over. 
 
I have tried many casseroles, some were good, some were ok.  So it's safe to say that I am always trying new versions, always on the look out for a different one.  
 
But there is a prerequisite for me to give a breakfast casserole a try, they have to be easy, and they have to use ingredients I already have on hand.  
 
_MG_9282 
 
This one comes from one of my newer Gooseberry Patch Cookbooks

It was super quick to make, although the recipe calls for refrigerating overnight, but I didn't, I bake it right away.

It got huge thumbs up from the family and I think it could be easily adapted to whatever ingredients your family prefers, or whatever you have on hand.

The only thing I changed was that I used two different cheeses, and I also added parsley and green onion to the egg mixture.

Give this one a try, and let me know what you think.  

_MG_9281
 

Hearty Breakfast Casserole

Source: Gooseberry Patch Cookbooks


6 to 8 bread slices 
3-oz. pkg. ready-to-use bacon crumbles
1 lb. cooked ham, diced, or ground pork sausage, browned (I used pork sausage)
2 c. shredded Cheddar cheese (I used mozzarella and cheddar)
10 eggs, beaten 
1 c. milk 
1 t. salt 
1 t. pepper 
 
 
Arrange bread slices in a single layer in a greased 13"x9" baking pan; top with bacon and ham or sausage. Sprinkle with cheese. 
 
Whisk together remaining ingredients. Pour egg mixture over top. 
 
Cover with aluminum foil and refrigerate overnight. 
 
Bake, covered, at 350 degrees for 45 minutes to one hour, until center is set. Serves 12.

Thursday, October 08, 2020

Crack Chicken Pierogie Casserole

_MG_9176 

Chicken, Ranch, Bacon, Cheese. I think that is pretty much the best combination on earth.  
 
When you throw it into a casserole, it goes to a new level.  
 
Crack Chicken Pierogie Casserole is another one to add to my fave list.  It was very easy to make, used only a couple of ingredients and the result was a creamy, cheesy, yummy dinner.  I served with it a side salad.
 
Verdict:  Another big thumbs up from the family

_MG_9175 

Crack Chicken Pierogie Casserole
Source:  Plain Chicken
 
 
Ingredients: 
 
2 (16-oz) packages frozen Classic Cheddar Pierogies, thawed 
2 (15-oz) jars Alfredo sauce 
3 cups chopped cooked chicken 
¾ cup cooked chopped bacon 
2 to 3 Tbsp Ranch dressing mix 
1½ cups shredded cheddar cheese 
 
 
Instructions: 
 
Preheat oven to 375ºF. Lightly spray a 9x13-inch pan with cooking spray. Set aside. In a large bowl, combine Alfredo sauce, chicken, bacon, 1/2 cup cheddar cheese and Ranch dressing mix. Add pierogies and toss to coat. Pour pierogies into prepared pan. 
 
Top with remaining cheddar cheese. Bake, uncovered, for 35 to 45 minutes.

Deep Dish Taco Pie

_MG_9147

This past week, I have been trying new recipes, and most of them from the food blog Plain Chicken.  If you haven't yet met Stephanie, then head on over and check out the yummy food she shares.
 
Deep Dish Taco Pie caught my eye immediately.  I love Mexican food and anything casserole, so this one was a must add to my meal plan.
 
The verdict:  A big thumbs up from the family.
 
This makes a huge batch, so unless you are cooking for a crowd, you may want to halve the recipe.


_MG_9144 

Deep Dish Taco Pie 
Adapted from: Plain Chicken 
 
2 lbs ground beef 
1 (1-oz) packets taco seasoning 
2 (5.6-oz) packages Knorr Spanish Rice 
1 (12-oz) package frozen corn kernels, thawed 
1 cup salsa 
3 cups shredded cheddar cheese 
3 eggs 
1½ cups milk 
1 (15-oz) package refrigerated pie crust, 2-count 
 
Instructions: 
 
Preheat oven to 400ºF. Lightly spray a 9x13-inch baking dish with cooking spray. Set aside. In a skillet, brown ground beef till no longer pink, drain. Add taco seasoning and water called for on the package. Cook until all liquid is absorbed. Cook both packages rice as per directions on the packages. 
 
Cool slightly. Lay pie crusts in baking dish. Cover the entire bottom and sides of dish. Press pieces together with fingers. Spread corn kernels over pie crust. Top corn with cooked rice. Top rice with taco meat then cheese. Whisk together eggs, milk, and salsa. 
 
Pour over taco meat. Place on middle rack of oven and back for 30 minutes or until top is starting to brown. Let rest 10 to 15 minutes before cutting. 
 
 
Note: For tips, head on over to Stephanie's original recipe.

Monday, August 24, 2020

Doce Delicia da Casa - House Dessert

Doce Delicia da Casa

I grew up loving the kitchen and loving to cook. From a very young age I wanted play pots and pans and nothing more than to sit at my Great grandmother's feet while she cooked a meal.

But she wasn't the only woman that influenced my huge love for cooking, my grandmothers, my mother, my stepmother and even my dad all played vital parts in it too.

This recipe is one that I learnt how to make when I was in my teens and it's one of the easiest and yummiest quick fixers that I always turn to when looking for a great dessert.....it's also one of the ones always present at our Christmas Eve Meal.

If you're Portuguese, you will no doubt have already tried it, either at home, a friend's or a Portuguese restaurant.  It is usually the House Dessert, the one you will always pick and then devour the minute it hits the table.


Doce Delicia da Casa

Doce Delicia da Casa - House Dessert


1 can of condensed milk
Measurement of the same can, in whole milk
Maria cookies (if you don't have Maria cookies, you can use shortbread or butter)
2 cups of heavy cream
4 eggs, separated
4 tablespoons sugar
Fresh brewed coffee, sweetened to your taste


In a saucepan, add the condensed milk, the 4 egg yolks and the whole milk.  Mix well, place over slow heat and stir constantly until it starts to boil.  Immediately remove off the heat, and pour into a 13x9 baking dish.

Set aside.

Pour the fresh brewed coffee into a bowl.  Dip each of the cookies, one at a time, and lay over the custard in the baking dish.  Continue until you've got a layer of cookies covering the top of the custard.

Beat the egg whites with 2 tablespoons of sugar, until stiff.

In another bowl, beat the heavy cream with the remaining 2 tablespoons of sugar.  Fold the egg whites into the whipped cream until well incorporated, then spread this mixture over the cookies.

Take a cookie or two and crumble over the whipped cream layer.  Refrigerate for at least 4 hours.

Doce Delicia da Casa

Cheesy Tuna Pasta Bake

_MG_8791

Don't you just love a good ol' pasta bake?

I don't know what it is about it, aside from the fact that it is all in one dish, but pasta bakes scream home cooked comfort food, to me.

It's one of those meals that come together pretty quickly, using ingredients you will no likely already have on hand.


_MG_8789

Cheesy Tuna Pasta Bake


1 box rigatoni pasta
3 tbsp butter
Small onion, finely diced
1/4 cup All purpose flour
2 cups milk
Shredded Cheese
Salt and pepper to taste
Nutmeg to taste
3 cans of tuna, drained and flaked
Parsley


Preheat oven to 350 F.

Boil the pasta according to package directions, drain and set aside.

In a saucepan, add the butter and the onion, cook until onion is translucent.  Sprinkle on the flour, stir well, then slowly pour in the milk, stirring constantly to remove any lumps.  Cook for a few minutes until the sauce has thickened


Season with salt, pepper and nutmeg to taste.  Next, add in the tuna and mix well.  Sprinkle on some parsley, then add tuna to the drained pasta in a big bowl, toss together.  Add a little shredded cheese and stir to mix.

Pour mixture into a baking dish, sprinkle on more cheese over the top, and bake for about 15 minutes until cheese is melted and golden brown.  Serve immediately.

_MG_8790

Ikea Style Meatballs

You know how everyone always gushes about the Meatballs at Ikea?  I know, it's a bit strange considering it's a furniture store, but the one thing that everyone always comments on, is the fact that you can get some delicious meatballs for lunch.

I've never been to an Ikea, unfortunately (or maybe fortunately for my wallet), we have never lived near one.

But, I wanted to give the famous meatballs a try, and I looked online for a recipe that I could try and replicate at home.  I found a few but ended up just winging it and using them for inspiration, rather than following a specific recipe to the letter.

Here's the thing though, since I've never actually tried the Ikea meatballs, I can't tell you if they are close to it or not, but I can tell you that they were delicious and a nice change from the usual tomato based sauce, we are so familiar with.

Give these a try and let me know what you think.

_MG_8920

Ikea Style Meatballs


Frozen meatballs
1 Stick of Butter
Flour
2 teaspoons soy sauce
1 tablespoon mustard (I used brown spicy mustard)
Garlic paste
Heavy cream
Chicken stock (homemade or store bought)
Parsley


In a pot, I added the stick of butter and the frozen meatballs, along with a little bit of water.  Turned the heat to medium, popped the lid on and let them cook until completely warmed through.

Next, I sprinkled on some flour and stirred to make sure they were evenly coated.  I poured in about a cup and a half of heavy cream, then added the soy sauce and the mustard.  Also added a little bit of garlic paste to taste.

I had a mason jar with some homemade chicken broth in the fridge, it was about 2 cups of broth.  I added that in, gave everything a good stir, and then simmered for a minute or so just until it was hot and the gravy had thickened.  Sprinkled on some parsley and served immediately over mashed potatoes.

_MG_8919

They were divine.  I hope you give them a try, and if you do, let me know in the comments what you thought.

Sunday, July 19, 2020

Blackberry Jam

_MG_8714

A few weeks ago, my husband, daughter and I, went blackberry picking.  It was so much fun, and we for pretty cheap we brought home quite a lot of blackberries.

I threw 2 pounds in the freezer for later, and then used some of the rest for homemade Blackberry Jam and a Blackberry Cobbler which was to die for as well.

It was pretty easy to make, it doesn't need pectin which I don't always have on hand, so this is a great recipe if you need to use up fruit for a quick delicious jam.

Blackberry Jam

4 cups of blackberries
2 cups of sugar
2 tablespoons of lemon juice


Mix all ingredients in a saucepan.  Crush the berries using the back of a spoon or a potato masher.

Turn the heat on to medium and bring the contents to a boil, simmer for about 15 or 20 minutes until it is thick and has reached the jam point.  The way my great grandmother taught me was by taking a teaspoon of the jam and putting it on a small plate.  Then running the spoon through the jam, if it separates and doesn't run back together, it is ready.

In Portuguese we call it Ponto de Estrada.

Transfer the jam to clean and sterilized mason jars.  If you're not canning, just let it cool and then place in the refrigerator.  If you're not using right away, then you can proceed with canning the usual way.

_MG_8712

Copycat Wingers Sticky Fingers

_MG_8746

It has been a while since I've updated the food blog, my apologies for that.  If you follow me over on my main blog, you will understand that a lot has been going on, and well, life has just knocked us upside the head.

With that said, I've been trying to cut down on my grocery budget, make delicious filling meals, but not spending too much money, especially on meat products.

I've tried to work with what I can find at the store, since many times the meat I want is either not available, too expensive, or we are only limited to 2 which is not easy for someone who buys for 2 weeks at a time.

Anyway, this is one of the meals I made the other day, and it is definitely going on our rotation of favorites.  It is pretty inexpensive to make, and super tasty.

I chose to serve mine as a salad, so we had some salad fixings and then just topped it with the sticky fingers and drizzled on some ranch dressing.  So good!!!

IMG_20200719_134645_464

Copycat Wingers Sticky Fingers


Bag of crispy frozen chicken strips
1/3 cup Frank's Hot Sauce
3/4 cup brown sugar
1/4 cup water


Cook your chicken strips according to package directions.

In a small saucepan, mix the rest of the ingredients and bring to a boil over medium heat.  Stir well, and once the sugar is completely dissolved and it starts bubbling, remove from heat.  Let sit for a few minutes until it thickens slightly.

Place the chicken strips in a bowl, pour on the sauce and stir to coat all the chicken.  Serve immediately with some ranch dressing on the side.


Monday, June 01, 2020

Homemade Cream Cheese

_MG_8565

This recipe should have gone up a long time ago.

It is one of those homemade recipes that needs to be in your binder/folder/recipe box, because I'm pretty sure once you try it you may never go back to store bought cream cheese, again.

It takes but a few ingredients to turn a liter of milk into the creamiest, yummiest cream cheese you've ever tasted.

Let me show you.

_MG_8566

Homemade Cream Cheese

1 litre milk (I used Whole Milk)
4 tablespoons vinegar
2 tablespoons butter
Salt to taste

Add the milk to a saucepan and bring to a boil, just when it starts to bubble up and form that skin on top.  Immediately remove from heat. 

Add the vinegar and stir well.

Let the mixture sit for 5 minutes until the curds start forming and separating from the liquid. 

Next, pour the mixture through a strainer until you get all the liquid out.  Use a spoon if you have to, to help push out all the liquid. 

Put the curds in a blender, add in the butter and salt to taste and blend for 1 to 2 minutes, until it becomes a thick creamy consistency.

Give it a good stir and pour into mason jars.  These will keep in your fridge for about 5 days, though I doubt they'll last that long.


_MG_8570

_MG_8572

I slathered the cream cheese on some fresh out of the oven sourdough bread.  It was divine!!!!

_MG_8573


Give it a go and let me know what you think.  I can tell you that for my family we are not interested in store bought any longer, this one is creamier and much tastier.

Sunday, May 10, 2020

Beef filled Crepes

_MG_8345

I am so blessed to have a heritage that allows me, and my family, to enjoy a myriad of different dishes from different ethnic cuisines.

As you may know, I was born in Mozambique in the East coast of Africa.  When the independence happened in 1974, just a month after I was born, we temporarily moved to Rhodesia, now known as Zimbabwe, and then onto Portugal.  Mozambique was a Portuguese colony, so I am Portuguese but I also have Brazilian on my father's side, my great grandfather and grandmother and their ancestors, were all Brazilian.  Goodness!!!

_MG_8346

From Portugal, to South Africa where I spent most of my childhood and then I married my American husband and have lived in the States for the past 22 years.

_MG_8348

So as you see, I have a lot of influence of different cultures around me, which makes for a constant array of dishes from Portuguese, to Brazilian, South African and American.  Not to mention the Italian, Chinese and Mexican food which I love so much, so yes, a plethora of different food is at our disposal.

The recipe I bring you today is Brazilian.  Super easy to make and a dish I think your family will enjoy.

_MG_8344

Beef filled Crepes

Ground beef
1 medium onion, diced
2 medium tomatoes, diced
2 tablespoons tomato puree
1 tablespoon Garlic paste
Olive oil
Salt and pepper to taste
Parsley
Media Crema

For the crepes:
2 eggs
1 cup of milk
4 tablespoons oil
1 and a half cups of flour
Salt to taste


Add a little drizzle of olive oil to a skillet.  Add in the garlic and onion and cook over medium heat until the onion is translucent.  Next, add in the ground beef and cook until brown.  Once the meat has released all it's liquid and starts to fry, add in your tomato, tomato puree and stir to combine.

Cook over medium heat for a few minutes, until tomato is tender.  You may need to add in a little water.  Season with salt and pepper to taste.  I always add parsley, but if you don't like it you can omit it.

Next goes in a small can of Media Crema.   Mix well, and take off the heat.

For the crepes, you can use the recipe I'm giving you or your favorite crepe recipe.

Make the crepes, allowing 2 for each person.  As I make them, I set them on a plate and roll them up, to keep them warm.

When done, fill each crepe with a bit of the beef filling.

Put a little of the beef mixture on the bottom of a casserole dish.  Then as you fill the crepes, set them in the baking dish.  When done, take any leftover beef filling and spoon over the crepes.  Sprinkle on some shredded cheese and bake at 375 for 5 to 10 minutes until cheese is melted.

Serve immediately!!!

_MG_8347

Thursday, May 07, 2020

Caramelized Banana Upside Down Cake

_MG_8317

Basically, I have a ton of bananas that I bought for baking.  Some of them are going to make some Banana Jam, and if you've never tried that you don't know what you're missing.  Go check out the recipe over here.

I didn't want to make banana bread, I think that's been done to death.  No offense to banana bread, but if there's one thing this quarantine time has taught me, is that everyone and their mother is currently eating and baking them, and I'm a bit sick of seeing it everywhere LOL

_MG_8322

My 17 year old son loves caramelized bananas, and any kind of banana cake, so I figured a caramelized banana cake would be the way to go.

I used the recipe for my grandfather's simple vanilla cake, and just made a quick caramel to hold the bananas in place.....if that makes sense.

Let's just bake and I'll show you.


_MG_8318

Caramelized Banana Upside Down Cake

Simple Vanilla Cake
Sliced bananas
1 cup sugar
1/3 cup water


In a small saucepan, mix the water and the sugar until sugar is dissolved.  Turn the heat to low, and let the mixture turn into a syrup.  I don't stir it, I just let it sit until it starts turning a nice golden brown.  Don't turn the heat too high or it will crystallize.

Once done, pour into a spring form pan.  Mine was a 9 inch.  Take the sliced bananas and make a layer over the caramel.

Take the vanilla cake batter, and slowly pour over the bananas and caramel.  Bake at 350 for about 35 to 40 minutes, or until a toothpick inserted in the center comes out clean.

Pull cake out of the oven, place over a cake plate and carefully invert.  Remove the side and bottom of pan.  If any bananas stick to the bottom, just scoop them out and pop them back on the cake.

That's it.  Simple, easy and soooo yummy.

_MG_8319

Monday, May 04, 2020

Homemade Strawberry Shortcake

_MG_8275

I was at the grocery store on Friday and the strawberries were pretty inexpensive, only $2.99 a punnet.  I grabbed two because not only do we love strawberries on their own, or sprinkled with some sugar and dipped in whipped cream, but strawberry shortcake is one of those simple desserts that is perfect for warm weather.

Usually I would buy the packs from the supermarket, you know the ones with the already made shortcake?  But here's the thing, homemade is always better and I find the ones from the store get a little rubbery and chewy over time.

_MG_8276

So I went on a hunt for a simple recipe that would produce flaky yummy shortcake, and as always, Sally's Baking Addiction came through.  I can't stress enough how much her website has changed my baking life.  There is not one single recipe that I have tried that didn't turn out right.

Now, let's make some shortcake.  I am only sharing the shortcake part of the recipe because that is all that I used.  But if you're wanting to make the full recipe including preparing the strawberries and making your own whipping cream, please head on over and check out the full recipe on Sally's site.

_MG_8277

Homemade Strawberry Shortcake
Adapted recipe from: Sally's Baking Addiction


3 cups (375g) all-purpose flour* (spoon and leveled)
1/4 cup (50g) granulated sugar
2 Tablespoons baking powder (yes, Tablespoons!)
1 teaspoon salt
3/4 cup (180g) unsalted butter, cold and cubed
1 cup (240ml) cold buttermilk*
2 Tablespoons (30ml) heavy cream (or buttermilk)
coarse sugar, for sprinkling


Preheat oven to 425°F (218°C). Mix the flour, granulated sugar, baking powder, and salt together in a large bowl or in a large food processor. Whisk or pulse until combined. Add the cubed butter and cut into the dry ingredients with a pastry cutter or by pulsing several times in the processor. Pulse until coarse crumbs form. If you used a food processor, pour the mixture into a large bowl.

Pour buttermilk on top. Stir everything together until just about combined– do not overwork the dough. The dough will look like shreds and be very crumbly. Turn the dough out onto a work surface and gently mold it together in a ball using your hands. Gently flatten until it is evenly 1/2 inch thick. Cut into 3-inch circles. Re-roll any scraps until you have about 12 biscuits.

Arrange in a 10-inch cast iron skillet or close together on a lined baking sheet. (Make sure they’re touching.)

Brush the tops with 2 Tablespoons heavy cream (or buttermilk) and sprinkle with coarse sugar. Bake for 15 minutes or until biscuits are golden brown on top. Remove from the oven and allow to cool for 10 minutes before assembling.


Slice the biscuits in half and layer with strawberries and whipped cream. Serve immediately.

Sunday, April 12, 2020

Honey Butter Rolls

_MG_8015
If you're looking for a sweet, soft and amazingly fluffy dinner roll, then look no further.

After trying many dinner roll recipes, I have to say that this may just have become my families favorite.  The recipe once again comes from Sally's Baking Addiction.  That is two recipes now that I have tried from Sally's website, that have been a huge success.

Be sure to head on over to her site and check out her wonderful recipes.

The only change I made to Sally's recipe was that I used all purpose flour instead of bread flour.  I have struggled to find flour lately and bread flour is practically non existent at the moment.

Aside from that, followed it to a Tee and I'm glad I did.


_MG_8017

Honey Butter Rolls


1 cup (240ml) whole milk, warmed to about 110°F*
2 and 1/4 teaspoons Red Star® Platinum yeast
1/2 teaspoon granulated sugar
1/4 cup (84g) honey
1 large egg + 1 egg yolk
1/4 cup (60g) unsalted butter, melted and slightly cooled
1/2 teaspoon salt
3 and 1/2 cups (452g) bread flour (spoon and leveled)

Topping

1/4 cup (60g) unsalted butter, very soft
2 Tablespoons (42g) honey


Pour warm milk into the bowl of a stand mixer fitted with a dough hook attachment. Or, if you do not own a stand mixer, a regular large mixing bowl. Sprinkle yeast and 1/2 teaspoon sugar on top of the milk. Give it a light stir with a spoon and allow to sit for 5 minutes. The mixture should be frothy after 5 minutes. If not, start over with new yeast.

If you do not have a mixer, you can mix by hand in this step. With the stand mixer running on low speed, add the honey, egg, egg yolk, melted butter, salt, and 3 cups of flour. Beat on low speed for 1 minute, then add remaining 1/2 cup of flour. Beat on low speed for 1 minute as it all combines. The dough should be thick, yet soft. And only slightly sticky. It should pull away from the sides of the bowl as it mixes. When it does, it is ready to knead. If, however, the dough is too sticky to handle– add more flour, 1 Tablespoon at a time. Make sure you do not add too much extra flour; you want a soft, slightly sticky dough.

Form dough into a ball and turn it out onto a lightly floured surface. Knead for 2 minutes, then place into a greased bowl– I usually just use olive oil or nonstick spray. Turn the dough over to coat all sides. Cover the bowl with plastic wrap and place it in a warm environment to rise until doubled, about 2 hours. For this warm environment, I preheat the oven to 200°F (93°C) then turn the oven off and place the bowl inside the warm-ish oven.

Once doubled in size, punch down the dough to release any air bubbles. Remove dough from the bowl and turn it out onto a lightly floured surface. Punch down again to release any more air bubbles if needed. Using a sharp knife, cut the dough in half. Cut each half into 8 equal pieces for a total of 16 pieces that are about 1/4 cup each– golfball size, give or take. They don’t need to be perfect! Shape into balls as best you can and arrange in a greased 9×13 baking pan. Loosely cover with plastic wrap and allow to rise until doubled in size and puffy, about 1 hour.

Preheat oven to 350°F (177°C). Bake the rolls for 18-21 minutes until the tops are golden brown and the edges of each roll look cooked. While the rolls bake, mix the topping ingredients together to make a creamy honey butter. Remove the rolls from the oven when they are done and brush or spread a generous amount of honey butter onto each warm roll. Serve with any remaining honey butter.

Cover leftovers and keep in the refrigerator for up to 1 week or freeze for up to 3 months, then thaw overnight in the refrigerator. Warm up in a 300°F (149°C) oven for 10 minutes.

Friday, April 10, 2020

Hot Cross Buns with Orange Gaze

Hot Cross Buns

I don't know about you, but every year I look forward to Easter.  The main reason of course is because of what it represents, and as a Christian it is a huge celebration for myself and my family.

However, I have to be honest and admit that the other reason I look forward to Easter, is because of the Hot Cross Buns.  My word.

It's not like I can't make them any other time of the year, but truthfully, I don't.  I make them once a year and that's it, so we always look forward to them, my daughter especially who is a huge fan of any kinda of yeasty bread concoction.

Hot Cross Buns

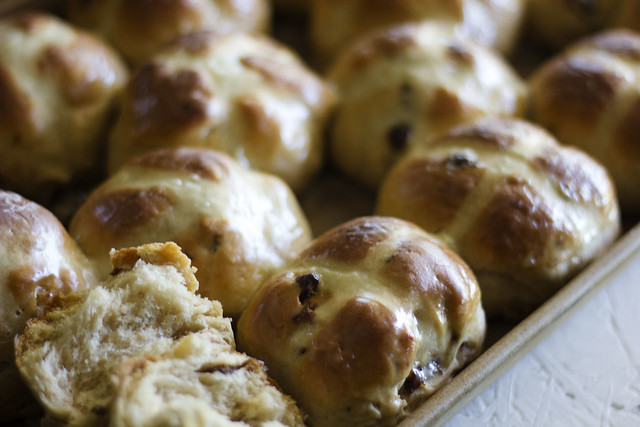
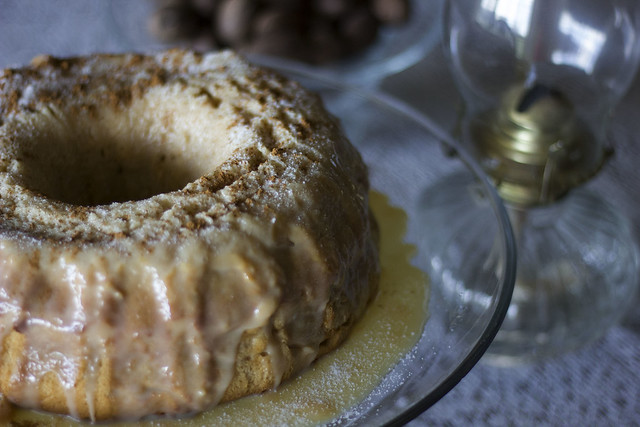
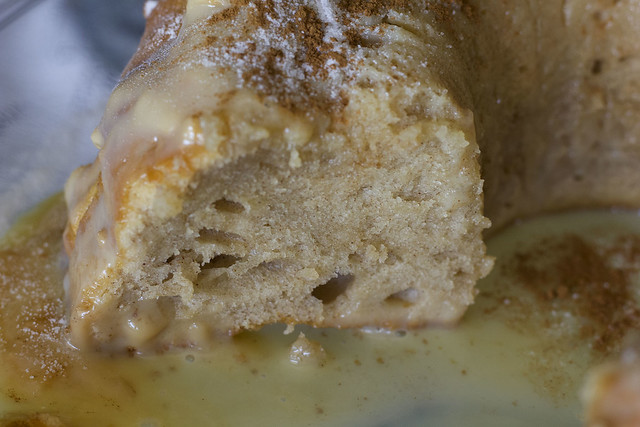
Although I already have a recipe on the blog, there are so many out there, and I've tried quite a few.  Some I had great results, others not so much.  When I saw the recipe for these Hot Cross Buns with an Orange Glaze, I just knew I had to try them.  Sally's Baking Addiction didn't disappoint, the result is a super soft, perfectly spiced dough, and when you add in the orange glaze at the end, it takes it to another level.

Keep in mind, these are not very sweet at all, which is fine with me, but if you want a sweet dough you may need to adjust accordingly.

Now let me give you the recipe so that you have plenty of time to still whip up a batch for Easter Sunday.  Or Saturday, or Monday, or any day of the week, really.

I am already looking forward to a toasted hot cross bun slathered in butter and enjoyed with a hot cup of coffee, for breakfast.  Yum!

Hot Cross Buns

Hot Cross Buns with Orange Glaze


3/4 cup (180ml) whole milk, warmed to about 110°F
2 and 1/4 teaspoons active dry yeast or instant yeast (1 standard packet)
1 teaspoon granulated sugar
1/2 cup (100g) packed light or dark brown sugar
5 Tablespoons (70g) unsalted butter, softened to room temperature and cut into 5 pieces
1/2 teaspoon pure vanilla extract
2 large eggs, at room temperature
1 teaspoon salt
1 and 1/4 teaspoons ground cinnamon
1/2 teaspoon ground nutmeg
1/2 teaspoon ground allspice
3 and 1/2 cups (435g) all-purpose flour or bread flour (spoon & leveled)*
1 cup (140g) raisins or currants*

Flour Cross

1/2 cup (60g) all-purpose flour or bread flour
6–8 Tablespoons (90-120ml) water

Orange Icing

1 cup (120g) confectioners’ sugar
3 Tablespoons (45ml) fresh or bottled orange juice (or use milk and a splash of vanilla extract for plain icing)


Prepare the dough: Whisk the warm milk, yeast, and 1 teaspoon of granulated sugar together in the bowl of your stand mixer fitted with a dough hook or paddle attachment. Cover and allow to sit for 5 minutes.

Add the brown sugar, butter, vanilla extract, eggs, salt, cinnamon, nutmeg, allspice, and 1 cup (125g) flour. Beat on low speed for 30 seconds, scrape down the sides of the bowl with a rubber spatula, then add the remaining flour and the raisins. Beat on medium speed until the dough comes together and pulls away from the sides of the bowl, about 2 minutes. Dough should be a little sticky and soft. If it’s too sticky and not pulling away from the sides of the bowl, mix in additional flour 1 Tablespoon at a time. *If you do not own a mixer, you can mix this dough with a large wooden spoon or rubber spatula. It will take a bit of arm muscle!*

Knead the dough: Keep the dough in the mixer and beat for an additional 2 minutes or knead by hand on a lightly floured surface for 2 minutes.

1st Rise: Lightly grease a large bowl with oil or nonstick spray. Place the dough in the bowl, turning it to coat all sides in the oil. Cover the bowl with aluminum foil, plastic wrap, or a clean kitchen towel. Allow the dough to rise in a relatively warm environment for 1-2 hours or until double in size. (I always let it rise on the counter. Takes about 2 hours.

Grease a 9×13 inch baking pan or two 9-inch square or round baking pans. You can also bake the rolls in a cast iron skillet or on a lined baking sheet.

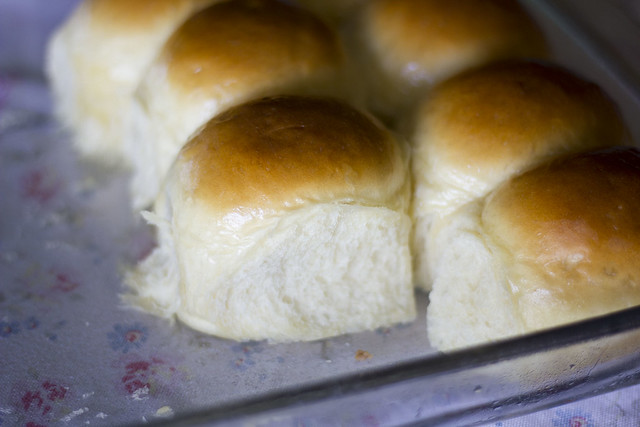
Shape the rolls: When the dough is ready, punch it down to release the air. Divide the dough into 14-16 equal pieces. (Just eyeball it– doesn’t need to be perfect!) Shape each piece into a smooth ball, pinching it on the bottom to seal. I do this entirely in my hands and you can watch in the video tutorial for my dinner rolls. Arrange in prepared baking pan.

2nd Rise: Cover shaped rolls with aluminum foil, plastic wrap, or a clean kitchen towel. Allow to rise until puffy, about 1 hour.

Preheat oven to 350°F (177°C).

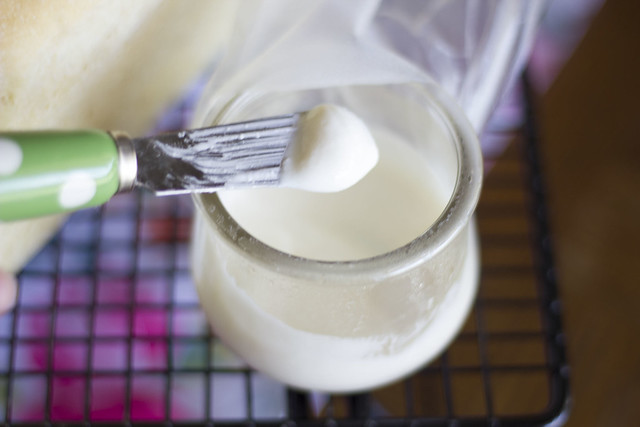
Add the cross: Whisk the cross ingredients together, starting with 6 Tablespoons of water. You want a thick paste that will pipe easily. Add remaining water if needed. Spoon paste into a piping bag or zipped-top bag. (No need to use a piping tip if using a piping bag.) Snip off a small piece at the corner. Pipe a line down the center of each row of buns, then repeat in the other direction to create crosses.

Bake the rolls: Bake for 20-25 minutes or until golden brown on top, rotating the pan halfway through. If you notice the tops browning too quickly, loosely tent the pan with aluminum foil. Remove from the oven and allow rolls to cool for a few minutes as you prepare the icing.

Make the icing: Whisk the icing ingredients together, then drizzle or brush on warm rolls. Serve immediately.

Cover leftover rolls tightly and store at room temperature for 1-2 days or in the refrigerator for up to 1 week.

Hot Cross Buns

Tuesday, March 24, 2020

Churros Cake

Churros Cake

Stop what you're doing, go into your kitchen, and get this cake baking in the oven.  I don't care what you go do for the next 40 to 50 minutes while it bakes, but you have to get this cake in the oven, like NOW.

I am always in the kitchen and usually have a cake baked every week, or some other type of sweet treat or dessert.  I just love having that special something for the kids, for the husband, or for me to enjoy on a lazy afternoon, with a cup of coffee.

The first time I made this cake, I was a little apprehensive, only because I wasn't quite sure how the whole condensed milk in the bottom of the cake pan, was going to work out.  But the minute that I inverted that cake into the cake platter, I got it, and you will too.

So, let's get going.  You don't need anything too out there, matter of fact, you should have all these ingredients in your pantry, and since we are all under quarantine anyway, it may just be the perfect moment to whip up something special for your family.

You won't regret it, and if you're anything like me, it may just become your favorite cake.

Sorry Tres Leches, but the Churros cake may have just surpassed you.


Churros Cake

Churros Cake


1 can condensed milk
1 cup sugar
3 eggs
3/4 cup oil
1 cup milk
1 tablespoon ground cinnamon
2 cups flour
1 tablespoon baking powder (I would actually suggest using 2 teaspoons instead, as the whole tablespoon sometimes makes the quite dense)


Preheat the oven to 350º F.

Grease a bundt cake pan with either butter and flour, or non stick spray.   Pour the can of condensed milk into the pan and then place in the fridge to chill, while you prepare the cake batter.

In a big bowl, mix the flour and baking powder, set aside.

In a blender, beat 1 cup sugar, 3 eggs, 3/4 cup oil, 1 cup milk and 1 tablespoon ground cinnamon, for about 3 minutes.

Add the blender mixture into the flour mixture, stir.  Try not to over beat the batter, just mix until all ingredients are combined.

Remove the cake pan from the fridge, and then slowly and very carefully pour the cake batter in, being careful not to mix the batter into the condensed milk. 

Bake for 40 to 50 minutes until a toothpick inserted in center comes out clean.  Remove from oven and let cool down for 5 minutes before inverting onto cake platter.

Churros Cake

Wednesday, March 04, 2020

Roast Chicken Legs and Potatoes

_MG_7575

I have quite a few recipes on the blog, showing you different ways to make roast chicken.  Each is delicious, each is different to the other, and I don't always make my roast chicken exactly the same way.

However, this is another way I make it and just wanted to share with you.  It's a quick way to get some delicious chicken on the table, and your family will no doubt thank you for a yummy, comfort home cooked meal.

Also, before I share the recipe, I wanted to share with you how I prepare my chicken.  This is for any kind of chicken cut you're using, whether it be a whole chicken, a cut up chicken, legs, thighs or breasts.  I use the same process no matter what kind of chicken I'm using.

_MG_7573

So, what I do is place the chicken in a big bowl, cover it with water and then add about 2 or 3 tablespoons of white vinegar, depending on how much chicken I have.  Let sit for 10 minutes then rinse and proceed with recipe.

The reason I do this process, is because the vinegar pulls out all that slime that is usually between the meat and the skin, and it also helps to clean it, obviously.

Right, now that is out of the way, let's get that chicken roasting.


Roast Chicken Legs and Potatoes


Chicken legs (the amount really depends on you, but I used 2 pounds for this recipe)
4 garlic cloves, finely minced (I use 4 teaspoons from my garlic paste)
1 small onion, finely chopped
1 tablespoon Worcestershire sauce
2 tablespoons mustard (I use spicy brown mustard)
2 tablespoons olive oil
1 tablespoon vinegar
1 tablespoon oregano
1 teaspoon paprika
2 tablespoons Aromat (I use aromat, but obviously if you don't have it, omit it)
1 packet of Sazon, your choice flavor
Salt and pepper to taste
Cilantro and Parsley, chopped


Potatoes, cut into fourths (you can peel or leave the skin on)
Olive oil
Salt and pepper to taste
Chili flakes to taste
Paprika


Once you've cleaned your chicken.  Add all ingredients to a big bowl and using your hands, give it all a good mix.  You want the chicken to be completely coated in the seasoning.  Set aside to marinade for about 30 minutes.

In a separate bowl, add the potatoes, drizzle with olive oil, salt, pepper, paprika and chili flakes.  Mix well.

In a large baking sheet, drizzle with olive oil and add the chicken legs, arrange the potatoes around and between the chicken, add remaining marinade from both chicken and potatoes.  Sprinkle with parsley and cilantro.


Bake at 400 degrees for an hour to an hour and a half, until chicken is cooked through and nice and crispy.

You can finish off with chopped green onion, if you wish.