If you love cheesecake, and red velvet cake, then this is the perfect combination for you. So yummy!!!
I made this cheesecake for Valentine's Day, and it was a success. I wasn't quite sure how it would turn out, because to be honest with you, my experiences with cheesecake, are hit or miss. Some are phenomenal, some crack, and I've even made one that completely fell apart.
This recipe seemed like a winner, and it was.
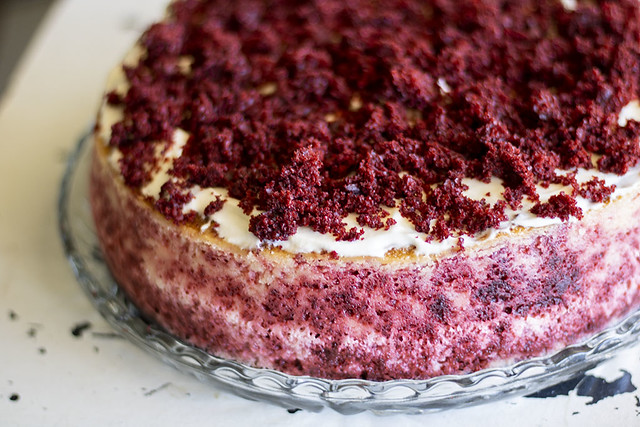
There is only one thing I would change, and that is the amount of red velvet cake that I added to the cheesecake mixture. I found that the amount suggested in the recipe is far too much. Also, make sure that the cake is completely cold before adding it to the cheesecake, or it will fall apart and end up turning the whole cake pink, like mine. Not a bad thing, it was still delicious, but far too much cake for the cheesecake ratio.
Aside from that, it was really and I mean really yummy, and I will be making it again.
The recipe is from Restless Chipotle.

Red Velvet Cheesecake
Cheesecake
- red velvet cake prepared but not baked
- 32 oz cream cheese
- 16 oz sour cream
- 2 cups sugar
- 2 teaspoon vanilla
- 6 eggs
Topping
- 1/2 cup heavy cream
- 1 teaspoonful white chocolate instant pudding mix
- 2 tablespoons of sugar as needed
Instructions
Cheesecake
- Prepare the red velvet cake batter.
- Preheat oven to 375F
- Put about ¼ inch of cake batter in the bottom of a greased and floured 10 inch springform.
- Use the rest of the batter in a 13x9 or 9 inch cake pan.
- Bake cakes 20 minutes or until firm and done.
- Break the cake (NOT the one in the springform) into large chunks and set aside.
- Beat the cheesecake ingredients together until smooth.
- Reserve about ½ cup cake crumbs for the top.
- Fold the remaining cake chunks into cheesecake batter.
- Pour into the springform pan.
- Cover the bottom of the springform with aluminum foil, bringing it up the sides.
- Place pan in larger pan of hot water. Water should come halfway up the sides.
- Bake for 50 minutes.
- Turn oven off and leave door closed for 1 hour. Don’t PEEK!
- Remove from oven, take out of the water bath.
- Let come to room temperature.
- Cover tightly and refrigerate overnight.
Topping
- Whip the heavy cream until it starts to thicken.
- Add the teaspoon of instant pudding mix and 1 tablespoon of sugar.
- Whip until soft peaks form.
- Taste and add more sugar if needed.
- Spoon on top of cooled cheesecake.
- Sprinkle with reserved red velvet cake crumbs.