Tuesday, December 25, 2007

Spaghetti with Bacon and Mushrooms

Now this is one of those I remember my stepmom fixing for us and it brings back such good memories of home and my childhood. I love it.

It's quick and easy to fix and you won't believe how good it tastes.


I start with one small onion, finely diced and in a pot with some olive oil

Slice up a green pepper and add to the onion

2 medium tomatoes, diced and added to the pot too.....

Here's the spices I use, I pretty much stick to these in most every portuguese dish I make.

I just eyeball it, so some salt, pepper, paprika, garlic powder and one bay leaf (you'll remove it once it's ready to serve)

Half a pound of bacon, sliced and added to the pot

Mmmmm doesn't that look good already?

Turn the heat on medium so it can start cooking and give it a good stir.....


About a cup or so of mushrooms, they're sliced but I still run the knife through them to make them smaller.

Now I add one beef bouillon cube, crumbled into the mixture and 1 cup of water

Stir it and let it cook for about 10 minutes or so.....

Throw in some spaghetti, I broke mine in half before dumping it in

Add some more water, enough to cover the spaghetti

Let it simmer until the spaghetti is cooked "al dente", you want it to have a little bite to it still, not be mushy.


Yummy, almost done.....

ENJOY!!!


While the spaghetti was cooking I made some Focaccia to go with. I used my Pizza Dough recipe and then slathered on olive oil, finely diced garlic, a little bit of salt and some oregano. Mmmmmmm!

Rissois de Camarao

I don't think you can go to a portuguese gathering without finding some of these sitting on the table, just waiting for you to dig in.

Growing up I remember these being served at special occasions and especially around Christmas time, we could just run to the local Portuguese Bakeries and pick up a dozen or two, or if we were so inclined and had the time....we made them at home.
Before I was even married I was already learning how to make them so that one day I could too fix this for my family....they now get to enjoy a little of my portuguese heritage and they love it :)


Rissois de Camarao - Portuguese Shrimp Turnovers

[rissois.JPG]

1 lb bag of shrimp (salad shrimp works fine)
1 tbsp butter or margarine
1 cup flour
1 cup water

Filling:
1 small onion, finely chopped
1 tbsp butter or margarine
1 tbsp flour
Salt and pepper to taste
Little bit of milk
Parsley flakes
Red chilli pepper flakes to taste


Boil one cup of water with the margarine and salt...

When it starts boiling, add the flour all at once and start stirring

Stir until the dough forms a ball and pulls away from the sides, then you're going to remove it from the heat. Isn't it neat how it starts forming a ball???

Turn the dough onto a floured surface........

Then you need to knead it until it becomes a nice round ball that is soft to the touch and springs back a little when pressed down.....but don't overwork the dough.

At this point you need to divide the dough in half, form two balls, cover with a kitchen towel and let it cool down.

In a frying pan, add the butter and the diced onion.... cook the onion until it's tender....

Then I add garlic powder, paprika, salt and pepper

Add a little bit of water

Add the shrimp......I use the Salad Shrimp, just open the bag and let it run under some cold water for a bit to thaw.

One tablespoon of flour to help thicken the sauce

And then a little bit of milk

Then in goes the parsley, cook it for a little until thickened, remove from heat and set aside...

Now the dough is cool, so we are going to set it on a floured surface, roll it out and cut it with a round object, I just use one of my tea cups

Place 1 teaspoon of the filling in the middle and fold in half, pressing the edges together

Dip the rissois in beaten eggs and then breadcrumbs

Here they are ready to fry.......yummmmm
At this point you can also freeze them, they keep for about a month. I like doing this because I can pull out a few at a time and quickly fry them for a snack or a light meal served with some salad.

Fry them in hot oil for about 2 to 3 minutes on each side until golden brown.

Monday, December 24, 2007

Menu Plan Monday!

Happy Monday everyone, this is what's on the menu for this week. As always remember that some days I switch meals around or end up not making them if something comes up, but for the most part I stick to everything on here INCLUDING breakfast and lunch.

If you want to join in with your own menu or take a look at all the other ladies participating, I suggest you grab a cup of coffee....a HUGE one LOL and then head over to Laura's blog "I'm an Organizing Junkie", there's so much yummy stuff being shared I'm sure you'll find inspiration for your next week's menus too.

menuplanmonday


MONDAY DECEMBER 17TH, 2007

BREAKFAST: Cinnamon Rolls, Warm Milk

LUNCH: Asian Beef Wraps

DINNER: Christmas Eve Meal: Rissois de Camarao (Portuguese Shrimp Turnovers), Pasteis de Massa Tenra (Beef pastries), Buffalo Chicken Wings, Orange Jelly Roll, Delicious Dessert


TUESDAY DECEMBER 25TH, 2007

BREAKFAST: Bagels w/ cream cheese, Juice

LUNCH: Grilled Cheese and Tomato

DINNER: Leftovers


WEDNESDAY DECEMBER 26TH, 2007

BREAKFAST: Cinnamon Toast, Milk

LUNCH: Egg Rolls, Veggies

DINNER: Fricasse Chicken


THURSDAY DECEMBER 27TH, 2007

BREAKFAST: Cereal, Milk

LUNCH: Chicken Noodle Soup

DINNER: Spaghetti with Bacon and mushrooms

FRIDAY DECEMBER 28th, 2007

BREAKFAST: Muffins, Warm milk

LUNCH: Roast Beef Sandwiches

DINNER: My Homemade Pizza

Sandra's Pizza

SATURDAY DECEMBER 29TH, 2007

BREAKFAST: Sausage Biscuits

LUNCH: Hotdogs

DINNER: Honey Mustard Chicken Fingers

SUNDAY DECEMBER 30th, 2007

BREAKFAST: Pumpkin Pancakes

LUNCH: BLT Sandwiches

DINNER: Portuguese Bean Soup

Sunday, December 23, 2007

Homemade Pizza

I've already posted my Pizza Dough on the blog but this is a step by step of how I make the pizza.
I used my Pizza Dough recipe and just change the toppings to whatever we feel like that day, or what I have available in the fridge......


HONEY PIZZA DOUGH


1 pkg. Quick Rise dry yeast (Red Star)
1 c. lukewarm water
2 tbsp. vegetable oil
1 tbsp. honey
2 1/2 c. flour


In a bowl add 1 cup of lukewarm water and 1 pkg. dry yeast and mix.

Next goes in two tablespoon of oil, 1 tablespoon of honey, then 2 1/2 cups of flour

Now stick your hands in there and mix it up good....I like this part LOL

Cover with a dish towel and let it sit for 5 minutes

In the meantime you can gather your toppings

I used pepperoni, green pepper, onion, mushrooms and cheese....but really you can throw everything in there, well maybe not the kitchen sink......
Uncover the dough and I like to sprinkle some flour on top just so it's easier to remove it without it sticking to everything.

Spray your pizza pan with some non stick cooking spray and throw drop the dough in the middle.

Starting in the middle, using my fingers, I start to push and stretch the dough towards the edges until it covers the whole pan. Now mind you, I'm using a HUGE pizza pan so it will be a thin crust....if you want a thicker, deep dish crust, just double the recipe.
Throw on your toppings and don't forget the cheese.....and pop it into 450º oven for about 10-12 minutes.


Wednesday, December 19, 2007

Portuguese Meatballs

Growing up I vividly remember many many times, sitting in the kitchen while my greatgrandmother fixed lunch or dinner for the family.

I learned how to cook from her, she taught me to love being in the kitchen and love fixing meals and seeing plain ingredients turn into amazingly delicious meals.

One of the things I remember her making was these portuguese meatballs, they're covered in bread crumbs and fried, then served with homemade fries and a portuguese salad.  Makes me want to transport myself back to my childhood in Portugal and sit at the kitchen table watching her....she would be humming over the stove, shouting out reprimands to my brothers and I and sharing stories about her own childhood, her father, her mother, her siblings and how to be the best mother, wife and homemaker.  I miss her!

Anyway, let me show you how these are done, they're quick and easy and the trick is in refrigerating them for a few hours or a whole day just so the flavors really seep through.

Bio's Almondegas - My Greatgrandma's Meatballs


100_2368

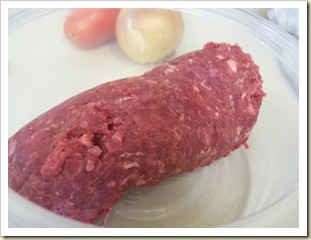
We start with 1 lb of ground beef.

100_2370

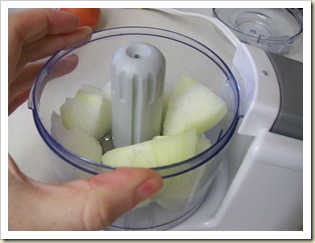
1 small onion finely chopped

 100_2371

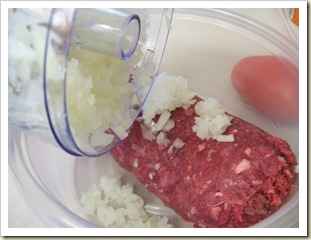
We add the onion to the ground beef.....love love love the smell of onion

100_2372

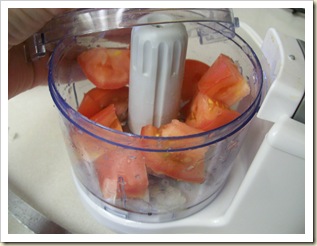
1 small tomato also finely chopped....I just love my little chopper, it helps a LOT

100_2374

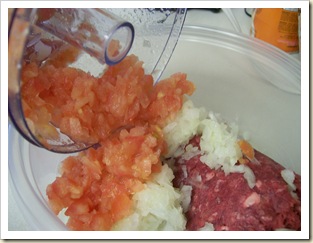
Now go ahead and add the tomato to the bowl

100_2376

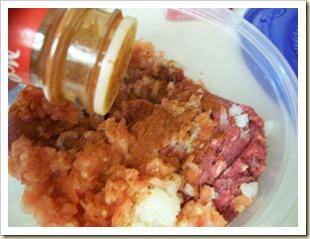
A good sprinkling of paprika...probably like a teaspoon or two...I don't know, honestly I just eyeball everything.

100_2378

Ground black pepper, again just eyeball, if you like a lot of pepper go for it, if not, then just a little

100_2379

Now garlic powder, you can see we love garlic by the big pile of white on the meat mixture LOL 
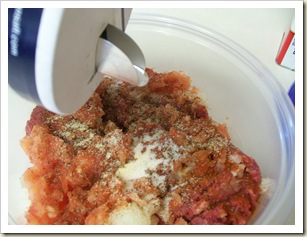
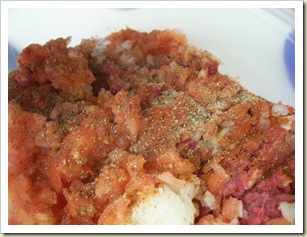
100_2381

some salt

100_2382

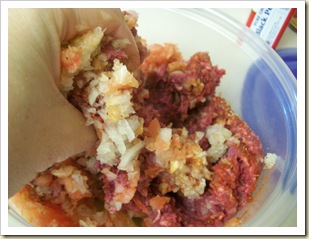
Now stick your hands in there and start mooshing it all up real good...I actually like this part and if you don't feel like doing it, find an unsuspecting child walking around to do it....they'll jump right in.

100_2384

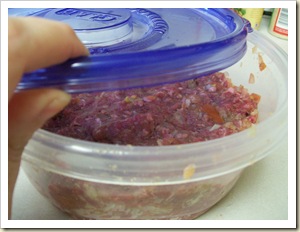
Place the lid on the bowl and pop it in the refrigerator overnight or for a few hours before cooking.

100_2397

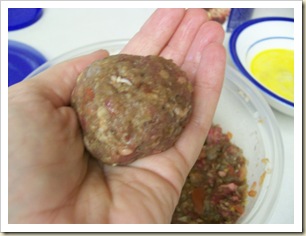
Now we're ready to start cooking so open the bowl and start forming little meatballs.  Look I'm not here to to judge the size and perfectness of the little balls, just do whatever you want.  My greatgrandmother never had a set size, some were bigger than others or they were all big or all small.  Whatever, it's your meat do with it was you please. LOL

100_2401

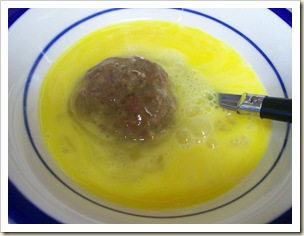
Drop them in a bowl with two beaten eggs and make sure they get a good covering.

100_2402

In another bowl you're going to have breadcrumbs ready and waiting....drop the meatballs into that one next and cover it completely with the breadcrumbs.

100_2404

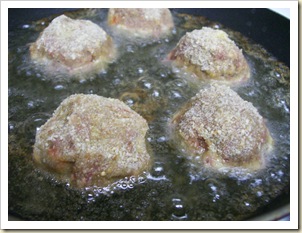
Place them into a skillet with hot oil.  and fry them about 5 or 6 minutes on each side until nice and brown and preferably cooked through *snicker*

100_2412

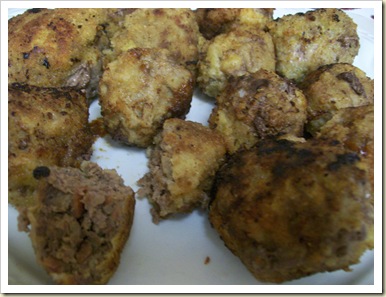
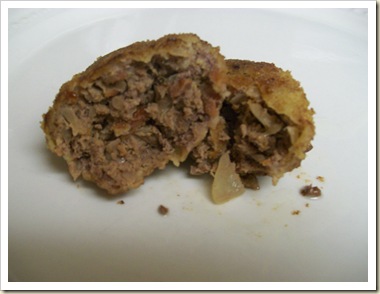
Now tell me you're not dying to eat one of those?  I tell you the onion and the tomato are SOOOO good together.  Look I'll open one up just to show you the inside.

100_2410

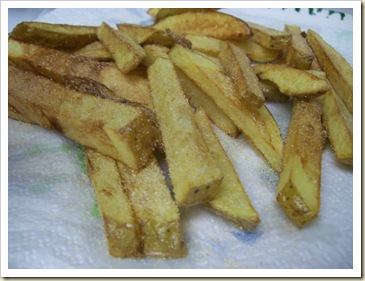
Oh and don't forget to serve these up with a nice salad and some of these yummylicious (I know I know not a word) homemade fries.

100_2405

Go go enjoy.....enjoy your little bit of Portugal in your tummy!