Friday, December 05, 2014

Bake this holiday special with Lucky Leaf

Cherry Pie Cookies

It is that time of the year again, you know, the shopping, the rushing, the family get togethers and the tables laden with delicious goodies for all to enjoy.  Plus, the homemade baked goods.

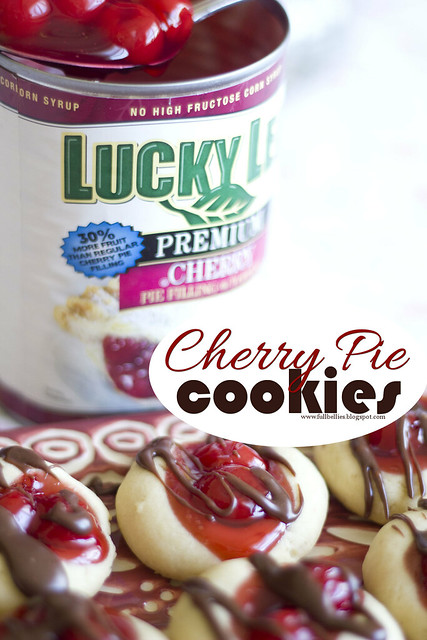
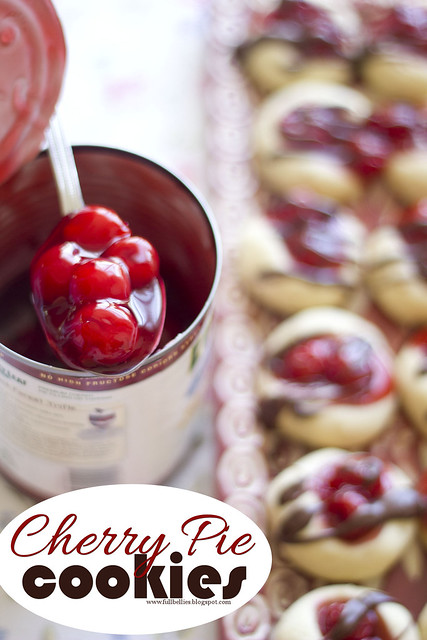
I love Lucky Leaf, I have used the pie fillings for so many years I've actually lost count, and I know that anytime I want a quick dessert, I can turn to my trusty Lucky Leaf Pie Fillings.

The recipe I bring you today couldn't be any easier to prepare, but it is so yummy and it would make wonderful homemade gifts this holiday.

Cherry Pie Cookies

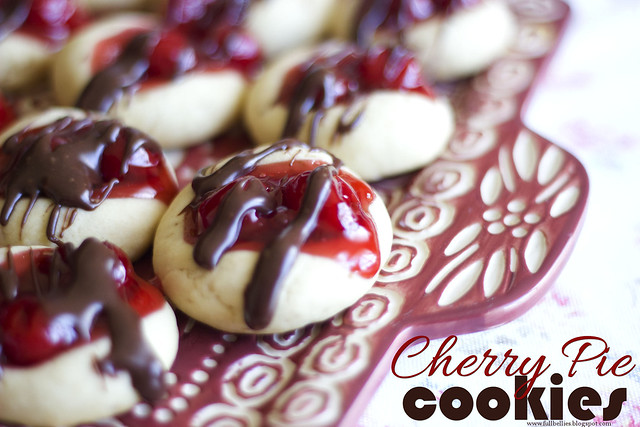
Cherry Pie Cookies.  Oh my!

Have I ever told you how I am not a fan of cherries?  But the only pie filling that is cherry based and I really enjoy is actually the Lucky Leaf?  Go figure.

Anyway, let me show you just how simple these are.  The kids and I are trying to hold off on eating them, or rather eating ALL of them before my husband gets home from school this evening.  I don't know if we'll be able to hold off, but we're sure going to try.

By the way, tomorrow I am going to make the Chocolate Blueberry Pie cookies and I am so excited to try those, but I'll come back and let you know if I do get around to making them and how they were, and obviously share the recipe too :)

Cherry Pie Cookies
Cherry Pie Cookies
Source:  Lucky Leaf

Ingredients
½ cup butter, softened
½ cup margarine, softened
2 cups flour
¾ cup powdered sugar
1 tsp vanilla
1 (21 oz.) Lucky Leaf®
Cherry Pie Filling
½ cup white or milk
chocolate chips

Preheat oven to 325°F.
Mix butter and margarine until fluffy. Add flour, powdered sugar and vanilla just until combined and a soft dough is formed.

Roll the dough into two-inch balls. Place on greased baking sheet or baking sheet lined with parchment paper. Press thumb into center of cookie to make a well. Place cherries into each cookie.

Bake for 12-15 minutes. Allow cookies to cool.

Melt chocolate according to package directions. Drizzle over cookies. Let chocolate set and serve immediately or store in an
airtight container.

Cherry Pie Cookies

What are you baking this holiday season? And how do you use Lucky Leaf in your recipes?

Wednesday, November 26, 2014

Chocolate Chip Bread Pudding

Chocolate Chip Bread Pudding

Food historians trace the history of bread pudding to the early 11th and 12th centuries, as frugal cooks looked for ways to use stale, leftover bread instead of letting it go to waste. In 13th century England, bread pudding was known as “poor man’s pudding,” as it was a popular dish with the lower classes.

While bread pudding is still a way to use up leftover bread, it has gained a reputation as a comfort food and is a featured dessert item in trendy establishments, having shed its humble roots.

I absolutely adore bread pudding. Ever since I was a little girl, my stepmother and grandmother would make bread pudding and it was one of those special desserts reserved for certain occasions, so when it showed up on the dinner table we considered it a treat.

It has been quite a few years since I've made one, but a few weeks ago I gave it a go again and whipped up a Chocolate Chip Bread Pudding.  The recipe, from a vlog I was watching.  I just followed her video and I think she said the recipe is from Nigella Lawson, but I could be mistaken.

Anyway, another very easy dessert and so delicious.

Chocolate Chip Bread Pudding

Chocolate Chip Bread Pudding


4 slices of stale bread, cut into cubes
Chocolate chips, I added in about 1/2 cup of dark and 1/2 cup white chocolate
1/2 cup heavy whipping cream
2 cups milk
3 eggs, whisked
1/4 cup brown sugar

Preheat oven to 350 degrees.  Butter a casserole dish, add the bread cubes to it.  Sprinkle the chocolate chips over the bread.

Chocolate Chip Bread Pudding

In a measuring jug, add the cream and milk.  Whisk the 3 eggs in a small bowl and then add 1/4 cup of brown sugar.  Combine the cream and milk mixture with the egg mixture, give it a good stir.

Pour over the bread then push the bread down to soak it all in.  Let stand for 20 minutes.

Chocolate Chip Bread Pudding

After the 20 minutes have gone by, sprinkle on some more brown sugar over the top and bake for 45 to 50 minutes until nice and brown and puffy.

Once it's cool down, I like to sprinkle powdered sugar on top.  

Chocolate Chip Bread Pudding

Best part about this bread pudding is that it's not overly sweet.

Chocolate Chip Bread Pudding

Nutella No Bake Cheesecake

Ohhhh Nutella how I love thee.

I was watching one of my favorite vloggers, catching up on very old videos of hers and she had made a Nutella No Bake Cheesecake, which is actually a Nigella Lawson recipe.  It looked so easy and so yummy that I immediately bookmarked it to try.

What better day than Thanksgiving to put this beauty on the table?

I am sharing this recipe tonight so that if someone out there is still looking for a simple but yet decadent dessert for tomorrow, they still have time to do it.

I don't have a picture of the sliced cheesecake as it's still in the refrigerator, but I will snap one tomorrow and come and edit this post :)

Nutella Cheesecake

Nutella No Bake Cheesecake
Source:  Nigella Lawson

10 oz graham crackers (I used a sleeve and a half)
5 tablespoons soft unsalted butter
1 x 13 oz jar Nutella (at room temperature)
¾ cup chopped toasted hazelnuts
1 lb cream cheese (at room temperature)
½ cup confectioners' sugar (sifted)


Break the digestives into the bowl of a processor, add the butter and a 15ml tablespoon of Nutella, and blitz until it starts to clump. Add 25g/3 tablespoons of the hazelnuts and continue to pulse until you have a damp, sandy mixture.

Tip into a 23cm/9inch round springform and press into the base either using your hands or the back of a spoon. Place in the fridge to chill.

Beat the cream cheese and confectioners' sugar until smooth and then add the remaining Nutella to the cream cheese mixture, and continue beating until combined.

Take the springform out of the fridge and carefully smooth the Nutella mixture over the base. Scatter the remaining chopped hazelnuts on top to cover and place the tin in the fridge for at least four hours or overnight. Serve straight from the fridge for best results.


Monday, November 17, 2014

Ajo Chicken

Ajo Chicken

When we lived back in Arizona, I picked up a little binder cookbook called A Taste of Arizona.  I was supposed to try out some of the recipes but never got around to doing it.

Two weeks ago when I was organizing my pantry and cookbooks, I came across it again and set it aside for my menu planning.  This chicken dish was one of the first that caught my eye and now I'm so glad I made it.

My husband and kids devoured it, had seconds and thirds and couldn't stop talking about it.  I even had it for lunch the next day and wished I had more.  It's on our favorite list, for sure. 

Ajo Chicken
Ajo Chicken
Source:  A Taste of Arizona

1 teaspoon salt
1/4 teaspoon pepper
1 chicken, cooked and boned
1/2 pound mushrooms
1 cup chicken broth
1 onion, chopped
1 cans diced green chiles
4 cloves garlic, minced
1 tablespoon flour
1/2 cup plain yogurt
1 cup shredded Monterey Jack cheese

Preheat oven to 350 degrees F.  Salt and pepper the chicken and place in a casserole dish.  Melt 1/2 tablespoon of the butter in a skillet and saute the mushrooms.

Scatter the mushrooms over the chicken and pour 1/2 up of the chicken broth over over all.  Cover and bake 10 minutes.

In the same skillet, melt the remaining 1 1/2 tablespoons, butter and saute the onion.  Add chiles, garlic, and flour.  Cook about 1 minute, stirring constantly.

Remove the chicken, from oven and drain off pan drippings.  Combine drippings with the remaining 1/2 cup chicken broth to equal 1 cup of liquid.  Stir liquid into the onion mixture.  Mix in yogurt and heat gently.

Spoon sauce over chicken and top with cheese.  Bake another 15 minutes. 

Ajo Chicken

Friday, October 31, 2014

Victoria Sponge

Victoria Sponge, such a simple treat but amazingly tasty.  I'm not a huge fan of cake, and especially cake with tons of very sweet frosting.  BLECH!

But what exactly is the Victoria Sponge, where did it come from, who first baked it?  Here's a little history for you:


Anna, the Duchess of Bedford (1788-1861), one of Queen Victoria's (1819-1901) ladies-in-waiting, is credited as the creator of teatime. Because the noon meal had become skimpier, the Duchess suffered from "a sinking feeling" at about four o'clock in the afternoon. At first the Duchess had her servants sneak her a pot of tea and a few breadstuffs into her dressing room.

Adopting the European tea service format, she invited friends to join her for an additional afternoon meal at five o'clock in her rooms at Belvoir Castle. The menu centered around small cakes, bread and butter sandwiches, assorted sweets, and, of course, tea. This summer practice proved so popular, the Duchess continued it when she returned to London, sending cards to her friends asking them to join her for "tea and a walking the fields. The practice of inviting friends to come for tea in the afternoon was quickly picked up by other social hostesses.

Queen Victoria adopted the new craze for tea parties. By 1855, the Queen and her ladies were in formal dress for the afternoon teas. This simple cake was one of the queen's favorites. After her husband, Prince Albert, died in 1861, the Queen Victoria spend time in retreat at the Queen's residence (Osborn House) at the Isle of Wight. According to historians, it was here that the cakes were named after her.

I do love a good sponge cake, there's nothing better than a thick slice with a hot cup of coffee.

I had been craving a Victoria Sponge for a few weeks but just never seemed to have the time, and truth be told, I haven't always had the best of luck with sponge cakes, some have been super flops, much to my dismay.

However, this recipe is one that I have had nothing but success with, and it's now my go to Victoria Sponge.

As for the filling, I like to use homemade whipped cream, but in a pinch whipped topping from the store will work too.

Give this one a go and let me know how you liked it.

Victoria Sponge
Victoria Sponge
Adapted from:  Keep Calm and Bake

1 1/4 cups self rising flour, sifted (if you don't have, just use plain flour and add 2 teaspoons of baking powder)
3/4 cup sugar
3/4 cup soft margarine
3 large eggs
1 tsp vanilla extract
1 tbsp strawberry jam (you can use blackberry or raspberry too)
Whipped Cream (you can use whipped topping)
Powdered sugar for dusting

Preheat oven to 325 degrees F.  Grease and line two 8 inch round sandwich pans.  Put all the ingredients except the jam and powdered sugar into the bowl of a standing mixer.  Beat the living daylights out of them.  You can also use an electric hand whisk.

When the batter is very pale, fluffy and almost mousse-like, divide it between the prepared pans and smooth out.  Bake for about 20 minutes or until they are springy to the touch and a toothpick inserted in center comes out clean.

Cool the cakes on a wire rack.  When they are cold, sandwich them with jam and the whipped cream and dust the top with powdered sugar.

Thursday, October 30, 2014

Wendy's Copykat Chili

How cool are those Copykat recipes?  I have been a huge fan of the site for so many years now, I just love knowing that if I want to recreate a specific favorite dish from a restaurant, I can do so at home.  Love that!

With the weather cooling down around here I start craving stews, soups and chili's, and I do enjoy Wendy's Chili.

Wendy's CopyKat Chili
Copykat Wendy's Chili

2 pounds fresh ground beef
1 quart tomato juice
1 (29-ounce) can tomato puree
1 (15-ounce) can red beans, drained
1 (15-ounce) can pinto beans, drained
1 large onion, chopped (about 1 1/2 cups)
1/2 cup diced celery
1/4 cup diced green bell pepper
1/4 cup chili powder (you may want to use less, as some people find this is too much)
1 teaspoon ground cumin (if you like real flavor, add more)
1 1/2 teaspoons garlic powder
1 teaspoon salt
1/2 teaspoon ground black pepper
1/2 teaspoon oregano
1/2 teaspoon sugar
1/8 teaspoon cayenne pepper

In a skillet, brown the ground beef; drain. Put the drained beef and the remaining ingredients in a 6-quart pot. Cover the pot; let it simmer for 1 to 1 1/2 hours, stirring every 15 minutes.

Wendy's CopyKat Chili

Pull Apart Pepperoni Garlic Knots

Pull Apart Pepperoni Garlic Knots

These were SO good.  I've been trying to use my cast iron skillet more, researching recipes and finding yummy treats to make.

I recently made a Foccaccia that was to die for, so when I saw these Garlic Pepperoni Knots, I knew my boys especially would love it, and they did.

It's so easy to make.  I adapted it slightly by using my own pizza dough and it turned out really well.


Pull Apart Pepperoni Garlic Knots
Adapted from: Serious Eats


2 tablespoons unsalted butter
2 tablespoons extra-virgin olive oil, plus more for drizzling
4 ounces pepperoni, cut into 1/4-inch squares
Pinch red pepper flakes
6 medium cloves garlic, minced (about 2 tablespoons)
1/4 cup chopped fresh parsley leaves
2 tablespoons minced fresh chives (optional)
1/2 cup grated Parmesan cheese, plus more for sprinkling
Flour for dusting
My Homemade Honey Pizza Dough
1/4 cup grated Pecorino Romano cheese
Pizza Sauce


Heat butter and oil in a 10-inch cast iron skillet over medium heat until butter melts and foaming subsides. Add pepperoni and cook, stirring, until pepperoni begins to crisp, about 2 minutes. Add pepper flakes and garlic and cook, stirring, until fragrant, about 1 minute. Add parsley and chives and stir to combine. Transfer mixture to a large bowl and stir in Parmesan cheese. Do not wipe out skillet.

On a lightly floured surface, divide dough into two even pieces. Working one piece at a time, roll or stretch into an oblong about 8 inches long and 4 inches wide. With a bench scraper or knife, cut crosswise into 12 strips. Repeat with other half of dough.

Pull Apart Pepperoni Garlic Knots

Tie each strip into a knot and transfer to bowl with pepperoni/garlic mixture. Toss and fold with your hands until every knot is thoroughly coated in mixture. Transfer the knots to the skillet in a single layer. Drizzle with more olive oil, cover tightly with plastic, and set aside until doubled in size, about 4 hours. Alternatively, refrigerate until doubled in size, 12 to 16 hours.

Pull Apart Pepperoni Garlic Knots

When ready to bake, preheat oven to 425°F and adjust oven rack to center position. Unwrap garlic knots. Sprinkle with Romano cheese. Transfer to oven and bake until golden brown and crisp, 25 to 30 minutes.

Remove from oven and immediately brush with more extra-virgin olive oil and sprinkle lightly with more Parmesan. Serve right away with warmed sauce on the side.

Pull Apart Pepperoni Garlic Knots

Teriyaki Chicken Casserole

Teriyaki Chicken Casserole

Here is a really yummy casserole for those who enjoy Teriyaki Chicken.  It was a bit time consuming but only because I made the Fried Rice too, if you already have leftover fried rice I think it would work pretty well in this dish.

It got a big thumbs up from the recipe and I even enjoyed it the following day for lunch.

Teriyaki Chicken Casserole


Teriyaki Chicken Casserole


3 cups fried rice
1 breast of chicken
1 small package (found in produce department) stir fry vegetables including broccoli, sprouts, carrots and snow peas
teriyaki sauce
3/4 cup LOW SODIUM soy sauce
1/2 cup water
1/3 cup brown sugar
1 tablespoon honey
3/4 teaspoon ground ginger
1 teaspoon sesame oil
1 small garlic clove, minced fine
2 tablespoons corn starch
2 tablespoons cold water


Make the fried rice per the link above.
Heat the oven to 350 degrees.

Teriyaki sauce
in a medium saucepan, stir together the soy sauce, water, brown sugar, honey, ground ginger, sesame oil, and garlic. bring to a boil and cook for 1 minute.
in a small bowl, stir together the water and cornstarch. add 1 teaspoon of the hot soy mixture to the cornstarch mixture and then slowly pour everything into the boiling soy mixture, whisking until it begins to thicken. set aside.
Place the chicken in a baking dish and pour 1 cup of the teriyaki sauce over the chicken. Bake for 30 minutes, remove from the oven and shred.
Steam the veggies and then add the veggies, rice and chicken to an 8x9" baking dish. Add 3 tablespoons of the leftover teriyaki sauce and stir to combine. Place the dish back in the oven for 15 minutes, remove from the oven and drizzle with a little more sauce. Serve immediately.

Notes
Using low sodium soy sauce is a must! It's less salty!

Teriyaki Chicken Casserole

Wednesday, October 29, 2014

Zucchini and Squash Casserole

I am a huge fan of Zucchini and any kind of Squash, and  if I can pair those up with some cheesy goodness, then I'm one happy girl.

This is such a quick and easy casserole to throw together, makes a perfect side dish when you're looking for something quick.

I use Zucchini and whatever Squash I can find at the store, this time it was yellow squash.  I don't have a set amount of either to use, it just depends on what I am in the mood for.  If you prefer Zucchini certainly add more of that in, or if you prefer the yellow squash then add more of that one.


Zucchini and Squash Casserole

Zucchini and Squash Casserole

4 zucchini, washed and sliced
2 yellow squash, washed and sliced
Fresh basil, chopped
Green onions, sliced
Salt and Pepper
Garlic Powder
Onion Flakes
Oregano
Shredded cheese
Olive Oil

In a big bowl, combine all the ingredients, pour into a casserole dish and bake at 350 degrees for about 20 minutes or until zucchini and squash are tender and cheese is melted.

Friday, October 10, 2014

Spinach Turkey Burgers

Spinach Turkey Burgers

Usually burgers, for us, means Summer....but you know, when the Fall weather starts coming around, as much as I love it, sometimes I yearn for a juicy burger straight from the grill.

It so happened that last week I was craving burgers, and I also got some reduced price meat at my commissary so burgers went on the menu plan.

I have tried so many different variations of burgers, cheesy or bacon, barbecue, spicy, mild, you name it.  I do however really enjoy Turkey and decided to go with that, I will use the other ground beef for something else later on in the week.

This recipe comes from one of my Taste of Home cookbooks, and I don't have to tell you how much I love Taste of Home, if you've been following my blog for a while you will know that to be true.

These were SO good, and I made double the recipe which yielded me some extra burgers for us for lunch and for my husband to take to college today.

Spinach Turkey Burgers

1 cup stuffing mix, finely crushed
1/3 cup chicken broth
1/2 teaspoon Italian seasoning
1/4 teaspoon salt
1/4 teaspoon pepper
1 package (10 ounces) frozen chopped spinach, thawed and squeezed dry
1 pound ground turkey
4 sandwich buns, split
Cheese slices, lettuce leaves and tomato slices, optional

Directions

In a large bowl, combine the stuffing mix, broth, Italian seasoning,
salt, pepper and half of the spinach (save remaining spinach for
another use). Crumble turkey over mixture and mix well. Shape into
four 3/4-in.-thick patties.
Grill, uncovered, over medium-hot heat or broil 3-4 in. from the heat
for 3-4 minutes on each side or until a meat thermometer reads
165° and juices run clear. Serve on buns with cheese, lettuce
and tomato if desired.

Yield: 4 servings.

Spinach Turkey Burgers

Tuesday, October 07, 2014

Comments and other things.....

Now that I have gotten all the recipes on the blog, I wanted to come in and chat real quick, mostly about the comments section, but some other things too.

I try to reply to as many of you as I can, but it's easier when I can reply through email and unfortunately a lot of you have your emails disabled, so I am not able to do that.

I have decided that I will just start replying in the actual comments section.  It's not my preferred method of doing it, but it's better than nothing right?

I get a lot of questions about the recipes, sometimes wanting clarification on a certain ingredient or asking how to do a certain thing, and unfortunately I can't reply to a lot of them because of the issue I stated above.

So, I will start replying in the comment section.

If you have a question or simply leave a comment, you can come back and check for my reply.  I know it's not the best option for most, I speak for myself and I don't always have the time or remember to go back and check on blogs I've commented in.  For that I apologize, but really, I don't know how else to fix this issue.

Right....so now that it's out of the way, I hope you will enjoy your visit to my food blog, take your time, browse through the different options on the linkbar and if you do find a recipe that catches your eye, I hope you will try it and enjoy it :)

Feel free to pin the recipes, just please remember to add a link back to my blog. 

I am also breaking down the recipe posts so that instead of it showing the whole post, it will just show the very beginning and you can click the Read More link on the bottom to go to the actual recipe.  I think it will clean up things around here a bit more.

I have had to turn off automatic comments as I was getting flooded with spam, unfortunately they will all now have to be verified and approved by me.  Sorry about that.

Lastly, I have also added a list of some of my favorite food blogs which I hope you will enjoy browsing :)

There, all business is taken care of, now we can all get back to our cooking, right?

Slow Cooked Cubed Steaks

As the temperatures cool down, I start using my crockpot more.  Stews, soups, and all sorts of delicious meals that I can pop in in the morning, and have ready by dinner time.

I haven't always had the best of luck with slow cooked meals though, for a long time, or rather I should say, when I first started using one, I couldn't get it right.

The food seemed to be bland, or it was really watery, or sticking to the sides.  It was always something, but as the time went on I became more confident and actually started the Slow Cooking Thursdays over on my main blog.

Since then, I have made so many good meals in the crockpot, and am still to this day enjoying trying new ones out.

A few weeks ago, Mari from My Little Corner of the World, shared this yummy recipe on my Slow Cooking Thursday.  I love cubed steaks and so it went on the next menu plan.

It was a huge hit, very tasty and very simple to prepare.  Give it a try and let me know what you think.

Slow Cooked Cubed Steaks

Slow Cooked Cubed Steaks
Source:  My Little Corner of the World

Cube Steaks with Gravy
1/3 cup flour
6 beef cube steaks
1 tablespoon vegetable oil
1 large onion, sliced and separated into rings
3 cups water, divided
1 envelope brown gravy mix
1 envelope mushroom gravy mix
1 envelope onion gravy mix
Hot mashed potatoes or cooked noodles

Place flour in large, resealable plastic bag. Add steaks, a few at a time and shake until completely coated. In a skillet, cook steaks in oil until lightly browned on each side. Transfer to slow cooker. Add onion and 2 cups water. Cover and cook on low for 8 hours or until meat is tender.
In bowl whisk together gravy mixes and remaining 1 cup of water. Add to slow cooker; cook 30 minutes longer.
Serve over mashed potatoes or noodles.
Yield: 6 servings

Slow Cooked Cubed Steaks

Oreo Dessert

Oreo Dessert

Let's just say that this dessert was quite a mission to put together.  Not because it's difficult, or requires anything fancy, but merely for the fact that I forgot to buy one of the ingredients I needed for the recipe I was following, and then I went in search of similar recipes and couldn't find any that I could make.

I was always missing one ingredient or more.

I almost gave up, but I was really craving an Oreo dessert so I continued on the hunt, thankfully finding one that I knew I could make, just had to adapt slightly as I had no chocolate pudding, so I used vanilla instead.

Oreo Dessert
Oreo Dessert
Adapted from:  Brown Eyed Baker


For the Crust:
1 (15.35-ounce) package Double Stuff Oreo Cookies
½ cup butter, melted and slightly cooled

For the Cream Cheese Layer:
8 ounces cream cheese
1 cup powdered sugar
1 (8-ounce) tub Cool Whip

For the Pudding Layer:
1 (5.1-ounce) box instant chocolate pudding
3½ cups milk

For the Topping:
1 (8-ounce) tub Cool Whip

Directions:

1. Make the Crust: Place the Oreo cookies in a large ziploc bag and crush with a rolling pin. The pieces should be in small crumbs, but still a little chunky, not completely fine crumbs. Set aside ½ cup of the crumbs for the topping, then transfer the remaining crumbs to a 9x13-inch pan and use a fork to mash them up a bit. Pour the melted butter over top and use the fork to combine, making sure that all of the crumbs are moistened. Press into an even layer on the bottom of the pan. Refrigerate while the cream cheese layer is prepared.

2. Make the Cream Cheese Layer: In a mixing bowl, beat the cream cheese on medium speed until light and fluffy, about 3 minutes. Reduce the speed to medium-low and gradually add the powdered sugar until it is all incorporated. Increase the speed to medium and beat for 30 seconds. Using a rubber spatula, gently fold in the Cool Whip. Spread in an even layer over the crust. Refrigerate while the pudding layer is prepared.

3. Make the Pudding Layer: In a large bowl, whisk together the pudding mix and milk for 2 minutes. Let sit for 5 minutes to allow it to set. Use an offset spatula to spread the pudding in an even layer over the cream cheese mixture.

4. Spread the remaining 8-ounce tub of Cool Whip on top and sprinkle with the reserved Oreo crumbs. Cover and refrigerate for 2 hours before serving.

Oreo Dessert

One Pot Chicken and Rice Casserole

One Pot Chicken and Rice Casserole

Chicken and Rice.  Something so simple but kicked up with Spanish inspired flavors.

This recipe comes from one of my favorite, favorite food blogs.  Marie at The English Kitchen.  I love her, she is the sweetest lady and she can cook some of the best meals ever.  I think something else that I really enjoy about her recipes, is that they are nothing fancy, just good home cooked comforting meals, and that is what I'm all about.

My husband is not a huge fan of Chicken and Rice, and this has to do with the fact that when he was deployed over in Bahrain, many many years ago, that is basically all he ate for months on end.

I've slowly gotten him used to it over the years, and now he loves my Portuguese Oven Baked Chicken.  He also really enjoyed this meal.

One Pot Chicken and Rice Casserole

One Pot Chicken and Rice Casserole
Source:  The English Kitchen

2 TBS olive oil
210g of long grain rice (I used 1 and 1/2 cups)
500g chicken breast pieces (a generous pound) cut into cubes
1 medium onion, peeled and chopped
1 small green pepper, trimmed, seeded and chopped
250g of chestnut mushrooms, sliced (I used a small can)
1 fat clove of garlic, peeled and finely minced
1/2 tsp smoked Spanish paprika
salt and pepper to taste
pinch of oregano
1 400g tin of chopped tomatoes in tomato juice (14 oz tin) undrained
1 tin of water
1 TBS chicken stock powder
grated cheddar cheese to serve

Heat 1 TBS of the oil in a large skillet. Add the rice and stir so that the rice is lightly coated with the oil. Cook over medium heat, stirring frequently, until the rice begins to brown. Scoop out and set aside. Heat the remaining oil in the pan. Add the mushrooms. Cook, without stirring, until they begin to brown. Stir and add the onions and peppers. Cook for several minutes until the vegetables begin to soften. Add the chicken pieces and garlic. Cook for about 5 minutes, stirring occasionally, until the chicken is almost cooked through. Season to taste with salt and pepper and add the paprika and oregano. Stir in the tin of tomatoes, the water, stock powder and the rice. Bring to the boil, then reduce to a low simmer. Cover and cook for 20 to 25 minutes, until all of the liquid has been absorbed by the rice. Serve hot, with or without cheese sprinkled on top.

Chicken Parmesan Baked Spaghetti

Another pasta dish, of course.  Is there anything easier than pasta when you're running short on time?

This recipe comes from Gimme Some Oven, I love her recipes she has some of the best, yummiest food out there.

I had to adapt it slightly because even though I wrote down Ziti pasta on my grocery list, I ended up coming home without it.  Go figure!

So I went with spaghetti noodles, but then, get this, I realized that I didn't have enough, and was already in the middle of preparing the meal....so I grabbed the only other past I had in the house, which turned out to be lasagna noodles.  I broke those into small pieces and added it to the spaghetti, which means I ended up with a bit of a smorgasbord of pastas.

It doesn't matter though, it worked, the family loved it and didn't even seem to notice.

Enough jabbering, let's get on with the recipe.

Chicken Parmesan Baked Spaghetti

Chicken Parmesan Baked Spaghetti
Adapted from:  Gimme Some Oven

Prep Time: 15 minutes
Cook Time: 30 minutes
Total Time: 45 minutes
Yield: About 6-8 servings


12 ounces spaghetti noodles
2 cups shredded, cooked chicken (I used chicken thighs, boiled and then shredded)
1 (25 ounce) jar Tomato-Basil Pasta Sauce
1 1/2 cups shredded Mexican blend cheese
1/3 cup freshly-grated Parmesan cheese
1/4 cup packed fresh basil leaves, roughly chopped


Preheat oven to 375 degrees F.

Cook the pasta al dente in a large stockpot of well-salted boiling according to package instructions. Drain. Return pasta to the stockpot and add chicken and tomato sauce. Gently toss to combine until the pasta is evenly coated.

Pour half of the pasta into a greased 11x7-inch or 9x13-inch baking dish. Sprinkle evenly with 1 cup of mozzarella cheese, half of the Parmesan cheese and half of the basil. Layer the remaining half of the pasta evenly on top. Sprinkle evenly with the remaining 1/2 cup of mozzarella cheese.

Bake for 20-25 minutes until the cheese is melted and just barely starts to turn golden. Remove and sprinkle immediately with the remaining Parmesan cheese and fresh basil. Serve warm.

Chicken Parmesan Baked Spaghetti

Pork Chop Casserole

My family loves pork chops, but I sometimes get tired of preparing them the same way, either fried, or breaded or grilled.

I'm always on the hunt for a different way to make them, and when I came across this recipe at Bev Cooks, I had to give it a try.  I was a little reluctant at first, as I have never made pork chops in a casserole, but I have to tell you that it was delicious and the whole family enjoyed it.

Pork Chop Casserole

Pork Chop Casserole
Source:  Bev Cooks


What it took for 4 to 6:

* 5 boneless pork chops, cut in half (making 10 small chops, which is obvious, because you know how math works. sorry)
* 1/2 cup all-purpose flour
* 3 large red potatoes, cut into 1/8″ slices (use a mandolin if you have one!)
* 1/2 white onion, thinly sliced into rings (use that mandolin)
* 1 (10 3/4 oz) can cream of mushroom soup
* 1 1/2 cup shredded cheddar cheese
* salt and pepper, to taste
* parsley, for garnish
* vegetable oil, for frying


Preheat oven to 375.

Place the flour in a shallow dish and lightly dredge each pork chop through the flour, shaking off any excess flour. Shake that thang. Season both sides with salt and pepper.

Heat 2-3 Tbs. of oil in a large skillet over medium-high. Place the chops in the pan and brown on both sides. It’s okay if it doesn’t cook all the way through. We have baking yet to do. Oh that rhymed.

Arrange the bottom of a 9×13 baking dish with half the potato slices. Overlap just tad. Then arrange the browned chops on top of the potatoes, followed by the remaining potato slices. Then arrange the onion rings on top of the taters. Sprinkle with a little salt and pepper.

Pour the cream of mushroom soup into a medium bowl. Fill 3/4th of the can with water, then add to the cream of mushroom. Whisk to combine. Evenly pour over the casserole.

Top with shredded cheese and bake for 30 to 45 minutes, or until the potatoes are tender and fork pierce-able.

Garnish with parsley and serve!

Pork Chop Casserole

Wednesday, September 24, 2014

Laura Ingalls Wilder Gingerbread

As the temperatures cool down and we head into Fall, I immediately turn to spices and brown colors and anything ginger and pumpkin. 

I have made Gingerbread before but hadn't yet tried the Laura Ingalls Wilder recipe, and I have been asked a couple times if I had the recipe, so I decided that today was the day.

It smells amazing as it is baking!

Gingerbread

Laura Ingalls Wilder's Gingerbread

Mix together:
1 C. brown sugar
½ C. shortening
1 C. molasses

Add:
2 t. baking soda that has been dissolved in
1 C. boiling water

Sift together then add:
3 C. flour
1 t. cinnamon
1 t. ginger
1 t. cloves
1 t. nutmeg
1 t. allspice
½ t. salt

Add last:
2 eggs, well beaten

Bake at 350 in a greased 9 x 13″ pan until toothpick inserted in center comes out clean.

- Laura Ingalls Wilder

Gingerbread

Monday, September 22, 2014

Yummy Hero Sandwiches

I have had this recipe for so many years.  I actually first got it out of one of my little cookbooks, you know those small pamphlet like soft cover books?  I want to say it was from Pillsbury but I'm not 100% on that.

Anyway, it is a recipe that I have kept on hand for many years, since my children were toddlers, and I remember making it quite a few times for us when we had family visiting.  I know my brother in law really enjoyed it too.

If you're looking for a quick yummy Friday night treat, then this is it.  I love the fact that you can change up the ingredients to suit your taste.  Don't like the chicken?  Use ham.  Don't want green pepper, omit.  Change it up, fix it how you like but do give it a try, you will most definitely enjoy it.


Yummy Hero Sandwiches


1 medium onion, halved, thinly sliced
1 medium bell pepper, any color, thinly sliced
2 (13 7/8 ounce) cans refrigerated prepared pizza crust
2 tablespoons Dijon mustard
1/2 lb thinly sliced cooked chicken
3 ounces turkey pepperoni, thinly sliced ( approx 40 pieces)
8 ounces cheddar cheese, thinly sliced
1 egg
1 teaspoon sesame seeds


Heat oven to 400º.  Grease 13x9 inch pan with cooking spray.

In a non stick skillet spray veggie cooking spray and add onions and peppers; cook 3 to 5 minutes, stirring occasionally, until tender.
Unroll 1 can of dough; place in pan starting at center, press out dough just to the edge of the pan (do not go up the sides).

Spread mustard over dough.  Top evenly with chicken, pepperoni, onion mixture and cheese.
Unroll remaining can of dough over cheese, stretching to edges.  In a small bowl, beat egg; brush over top.  Sprinkle with sesame seeds.

Bake 23 to 28 minutes or until golden brown and thoroughly heated.  Let stand 10 minutes.

Cut into 8 pieces to serve.

Yummy Hero Sandwiches

Saturday, August 30, 2014

Hot and Spicy Lasagna

A few years ago, and I mean quite a few years ago, my daughter was still about 2 or 3 years old, and we had gone to Oklahoma to visit my mother in law.

Hot and Spicy Lasagna

One of the things she made for us to eat, was her Hot and Spicy Lasagna.  I remember that I loved it so much and asked her for the recipe.  Instead of scribbling it down on a piece of paper, she actually bought me her church cookbook, which included this recipe plus a few others from her mother, sister and niece.  A real treasure for me.

Hot and Spicy Lasagna

I love this little book, I think that church cookbooks tend to hold some of the best homemade recipes.

I hope you enjoy this recipe as much as we do.

Hot and Spicy Lasagna

Hot and Spicy Lasagna
Credit: Pat Bourland

1 lb. hot sausage
1 clove garlic, minced
1 Tbsp basil flakes
1 1/2 tsp. salt
1 can (10 oz) diced tomatoes and green chiles
2 (6 oz) cans tomato paste
10 oz. lasagna noodles
24 oz. creamy cottage cheese
1/2 c. grated Parmesan
2 beaten eggs
1/2 tsp. pepper
2 Tbsp. parsley flakes
1 lb. Mozzarella cheese, sliced

Brown sausage slowly;  spoon off excess fat.  Add garlic, basil, flakes, salt, tomatoes and green chilies and tomato paste;  simmer, uncovered for 30 minutes, stirring occasionally.  Cook noodles in large amount of boiling water until tender;  drain.  Rinse;  drain again.

Combine remaining ingredients except Mozzarella cheese.  Place 1/2 of the noodles in 13 x 9 x 2 inch baking dish;  spread 1/2 of the cottage cheese filling over noodles.  Add 1/2 of the Mozzarella cheese and 1/2 of the meat sauce.  Repeat layers.  Bake at 375 for 30 minutes.

Hot and Spicy Lasagna

Friday, August 29, 2014

Cherry Cheese Coffee Cake

It has been such a long time since I've last had this coffee cake.  I always wonder why I stop making something, or tend to forget about it, when it's something that I know I love.

This Cherry Cheese Coffee Cake is a Pampered Chef Recipe.  I can actually remember the very first time I tried it.  I was hosting a Pampered Chef Party at my house, when we still lived on base in Idaho.  The hostess had asked me to pick a few things for her to prepare and I honestly didn't know what to pick because I hadn't tried anything at all, so this was her suggestion.

I remember that I kept thinking that it was so easy to make, and obviously wondered if it would taste good.

One bite and I was hooked.  Since then it has become one of our favorites and I have tried it with apple, strawberry, lemon, blueberry and raspberry fillings, each one just as good as the other.

Last weekend I went to a barbecue at my brother's house, it was sort of a last minute thing and I didn't know what to take.  I don't even know how I remembered this dessert, but I'm glad I did because I happened to have everything on hand.

Give it a try if you haven't before, I can almost guarantee that you will love it just as much as I do.

Cherry Cheese Coffee Cake

Cherry Cheese Coffee Cake

Cake & filling
2 (8 oz. each) pkgs. refrigerated crescent rolls
8 oz. cream cheese
1/4 cup powdered sugar
1 egg
1/2 tsp. vanilla or almond extract
21 oz. can cherry pie filling

Glaze
1/2 cup powdered sugar
2-3 teaspoons milk

Preheat oven to 350 degrees F. Unroll crescent dough and arrange 12 of the triangles in a circle with wide ends toward the outside edge of the Large Round Stone - the points will not meet in the center. Lightly flour and roll out the seams making a 14" circle with a 3" hole in the center. Combine the cream cheese, powdered sugar, egg & vanilla and spread over dough. Top with pie filling. Cut each of the 4 remaining triangles into thirds (starting at the wide end opposite the point and cutting lengthwise to the point). Arrange over filling evenly in spoke-like pattern. Press ends to seal at center and outer edges. Bake 25-30 minutes or until golden brown. Cool slightly. Mix powdered sugar and milk until glaze consistency and drizzle over coffee cake.

Cherry Cheese Coffee Cake