Wednesday, May 23, 2012

Gooseberry Patch Cookbook Winner

Thank you all for participating.  Wish I could each of you a copy of the cookbook :)


I used Random.org and the winning number was:

#12 - Christina Duffney


Congratulations Christina, I will be contacting you shortly.

Tuesday, May 22, 2012

Lemon and Orange Bars

My husband is crazy for lemon bars.  It is his favorite thing on earth.

Now, he's kind of like me,  in the sense that we are not big sweet fans.  We are not into cakes and pies and cookies etc.  It's just MEH!

Lemon and Orange Bars

If it's there and I'm offered a slice, I'll eat it but it's not something I will go out of my way to have, hence the reason you see more dinners etc on the blog than actual desserts.

But this is the one thing that we do enjoy, and him more than I.

Today he is turning 39 years old and instead of the usual cake, I made him Lemon Bars but with Orange too.  So it's more of a citrus bar which is perfect for this time of the year.

Lemon and Orange Bars

These are SO good and they look so pretty too.  Give it a try. By the way, these came from the Good Food Magazine, June 2012 issue. The directions are for grams and ml. But here is a great link to visit to help you convert.

Lemon and Orange Bars

Lemon and Orange Bars


For the base:

250gr of flour (2 cups)
85gr of powdered sugar (3/4 cup)
175gr of butter, cut into small pieces (3/4 cup)

For the topping:
2 lemons and 1 large orange
4 large eggs
400gr sugar (I think that's too much, I only used 1 cup)
50gr flour (1/2 cup)


Heat oven to 375 degrees.

Line a 9 x 12 inch pan with parchment paper and set aside.

In your standing mixer, beat together the flour, sugar and butter until it forms crumbs. (I beat mine a little longer because I got distracted with a kid, so mine came out more bound like a dough, still good though)

Press into the prepared pan. Pop in the oven for 20-25 minutes until pale golden.

Finely grate the zest from the lemons and the orange.

Lemon and Orange Bars

Then squeeze out all the juice into a cup. You will need the juice from both lemons and the orange.

Lemon and Orange Bars

Whisk together the eggs and sugar, then add the zest and the juice, add the flour and mix well.

Lemon and Orange Bars

Pour over the base and bake for another 15 to 20 minutes, just until the topping has set. Remove from oven and let cool completely in the pan.

When cool, lift the parchment paper out, and then dust heavily with powdered sugar.

Enjoy :)

Lemon and Orange Bars

Monday, May 21, 2012

Mini Breakfast Jars

I was at the store the other day and found the really small 4 oz. mason jars.

Of course being the mason jar addict that I am, I couldn't exactly leave them there, so home they came with me.

Mini Breakfast Jars

Fast forward to today, and I was sitting at the kitchen table writing up some menu plans, and I sometimes like to add breakfast and lunch, even though we usually don't change that up very much.  As I was writing down muffins and yogurt with fresh berries, I had sort of a light bulb moment go off.

I thought, why not mix both up in the small jars, I mean muffins and yogurt together actually sounds really good.  And then throw in the fresh berries....and Yum!

Mini Breakfast Jars

I set to work right away.

All I did was use the little packs of muffin mix that you get at the store.  I had mixed berry
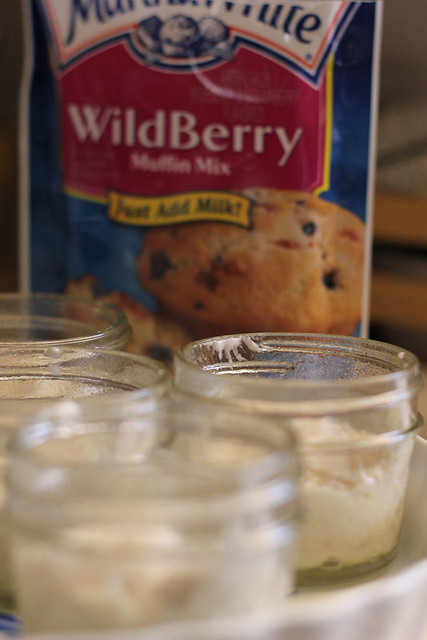
Mini Breakfast Jars

and chocolate chip

Mini Breakfast Jars

and apple cinnamon.  I decided to leave the apple one for now, and experimented with the other two.

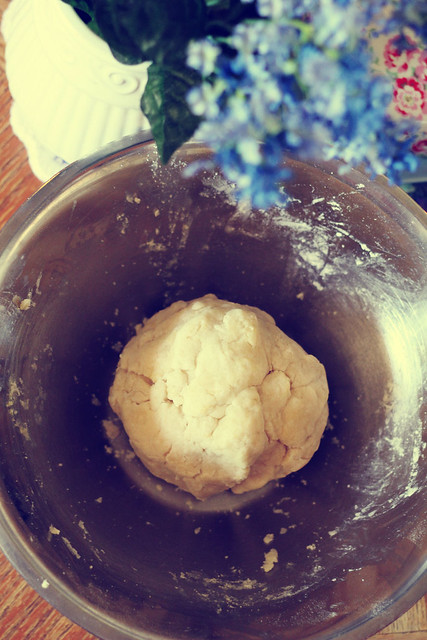
Mix according to directions, then spoon a little less than a 1/4 cup of the batter into each jar.

Bake in a 350 degree oven for about 25 minutes or until a toothpick inserted near the center, comes out clean.

Mini Breakfast Jars

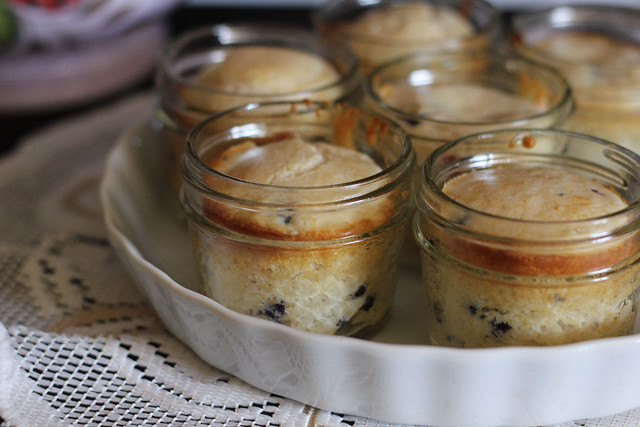
Let it cool completely.  At this point, if you are making a huge batch, I would suggest freezing them just as they are, they should keep for about a month,  which is how long my muffins usually keep in the freezer.

Mini Breakfast Jars

The rest of the jars, I'm assuming will last a day or two in the fridge once you add the yogurt and the fruit.  Though, I can tell you, I don't think they'll last that long at ALL.

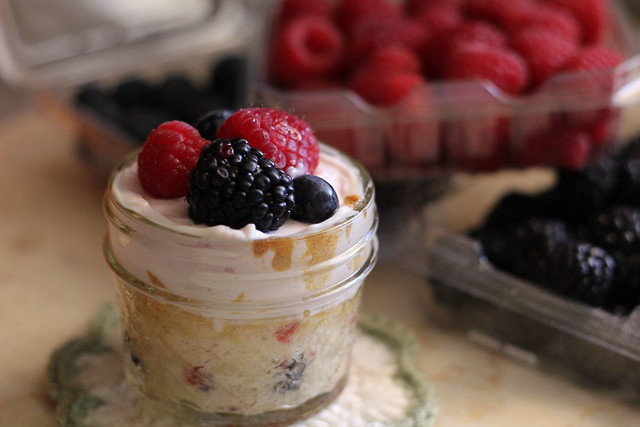
Spoon on some of your favorite yogurt, I think the combination of flavors if what makes this fun.  For these I had Vanilla and Strawberry Greek Yogurt so that is what I used.

Mini Breakfast Jars

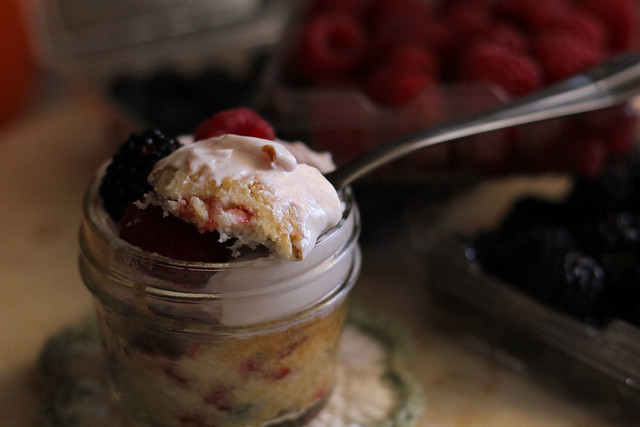
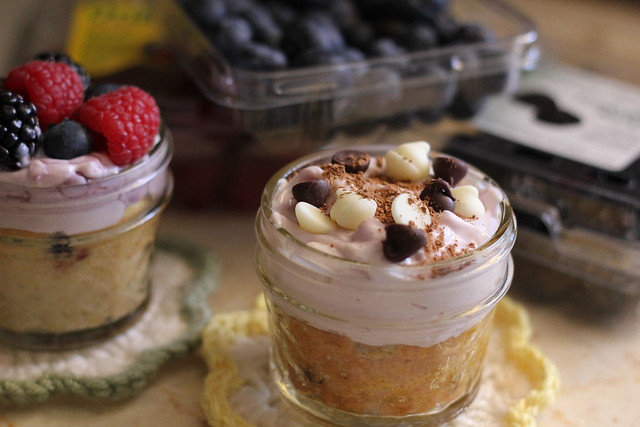
For the mixed berry muffin base, spoon on some strawberry yogurt (keep in mind you'll need to put a lid on these).  Add a few fresh berries.  Pop the lid on and into the fridge it goes.

Mini Breakfast Jars

For the chocolate chip base, I used vanilla yogurt, sprinkled on some chocolate chips and a little bit of powdered cocoa.  YUM!

Mini Breakfast Jars

I'm thinking tomorrow I'll make a batch of the apple cinnamon and use vanilla yogurt, then top with some apple slices and a sprinkling of cinnamon.

Oh I can't wait to try different flavor combos.  Quick, easy, simple breakfast and I'm already thinking when my hubby and I are watching our weight, I can use low fat/low calorie muffins and yogurt mixes :)

Mini Breakfast Jars

The perfect lids for these, are the Plastic Storage Caps. I actually need to get some more. You can find them at Walmart, or buy them on Amazon.

I'm using 4 oz  mason jars for these which you can also purchase at Amazon, or Walmart or your local Ace Hardware too.

Saturday, May 19, 2012

Amish Chicken Pot Pie

I often find myself just browsing through my cookbooks, reading the stories that go with the recipes, looking at the beautiful pictures, sifting through the ingredients etc.

Even though I've read The Amish Cook at Home a gazillion times already, I still pull it out and sit and read.

Amish Chicken Pot Pie

It was during one of these times that I once again happened across the page with the Chicken Pot Pie.

Now I've made chicken pot pie many times before and I've even shared the recipe here on the blog, but I figured, you know, Amish cooking is to me the epitome of comfort food and I've yet to try one of the recipes in this book that I didn't enjoy.  I'm SO glad I decided to put aside my preconceived notions of "it's just another pot pie", and gave this one a try.

YUM!

So simple, and yet so delicious.  Do give a try. This recipe makes 2, 9 inch pies, I halved it for myself and still ended up with 2 pies so I'm not sure what happened there LOL Maybe my pie dish is not deep enough or it's too small, but regardless, I now have an extra pie to pop in the freezer.

Amish Chicken Pot Pie

Chicken Pot Pie


2 cups peeled diced potatoes (I left the skin on my red potatoes)
1 3/4 cups sliced carrots
2 sticks of butter
2/3 cup chopped onion
1 cup all purpose flour
1 3/4 teaspoons salt
3/4 teaspoon ground pepper
2 tablespoons chicken soup base
3 cups chicken broth
1 1/2 cups of milk
4 cups cubed cooked chicken
1 cup frozen or fresh green peas
4 disks homemade pie dough


Preheat oven to 375 degrees F.

Combine the potatoes and carrots in a large saucepan. Cover with water and boil until almost tender, 12 to 15 minutes. Drain and set aside.

Amish Chicken Pot Pie

Melt the butter in a large saucepan over medium heat and saute the onion until tender, about 5 minutes. Stir in the flour, salt and pepper and chicken soup base until blended.

Gradually whisk in the broth and milk. Bring to a boil and cook, whisking constantly, until thick, about 2 minutes. Stir in the chicken, peas, potatoes and carrots. Remove from the heat.

Amish Chicken Pot Pie

Roll out two disks of pastry to 1/8 inch thickness. Line two 9 inch pie pans with the pastry and trim to a 1/2 inch overhang. Spoon the chicken mixture into the pastry shells. Roll out 2 more pastry disks to a 1/8 inch thickness. Cover the pie pans with the pastry and trim to a 1 inch overhang. Fold the dough under and crimp the edges.
Cut decorative slashes in the tops of the pies. Bake until golden brown, about 30 minutes.

Amish Chicken Pot Pie

Amish Homemade Pie Dough

Here's a great pie dough recipe from the Amish Cook at Home Cookbook.

It's great for a sweet or savory pie, such as the Chicken Pot Pie I'm sharing tonight.

Amish Homemade Pie Dough

Homemade Pie Dough


3 cups all purpose flour
1 teaspoon salt
1 cup lard (I use shortening)
1 large egg
1/3 cup cold water
1 tablespoon apple cider vinegar

In a large bowl, combine the flour and salt. Stir to blend. Add the lard and rub it into flour with your fingertips until the mixture resembles coarse crumbs. Add the egg, water, and vinegar and stir with a fork until the dry ingredients are moistened.

Form the dough into a ball and divide that into 3 balls.

Amish Homemade Pie Dough

Form a ball into a disk and roll it out into a 1/8 inch thickness on a floured surface. Fit the dough into a 9 inch pie pan and trim the edges into a 1 inch overhand.

Fold the dough under and crimp the edges. If not using now, form the remaining 2 balls of dough into disks, place each in a resealable plastic bag and freeze for up to 3 months.