Showing posts with label breakfast. Show all posts

Monday, May 31, 2021

Banana Crumb Coffee cake

Banana Crumb Coffee Cake

 
I have a very similar recipe, already here on the blog. But can we ever have too many banana cake recipes?   I don't think so. 
 
Well bananas are my favorite fruit, right up there with strawberries.  When it comes to dessert though, I am not a huge fan of strawberry anything, I much prefer banana flavored.  I guess that's a good thing because bananas are one of those foods in my kitchen that go bad really quickly, so I'm always on the lookout for a good way to use them up.
 
If you're looking for a few recipes to make using your ripe bananas, just do a quick search here on the blog, I have a quite a few waiting for you to try.
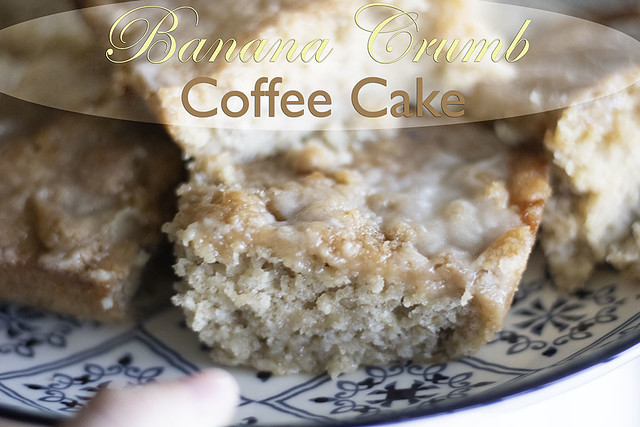


Banana Crumb Coffee Cake 

The trick to this amazing coffee cake, is to layer the batter and the topping. 
 
Ask me if I did that this time? 
 
No, no I didn't.  I was quickly getting this recipe together, in the middle of cooking dinner, and proceeded to dump the whole batter in.  When I realized what I had done, I grabbed a spoon and just stirred it all up, then added the topping.
 
Not what it is supposed to be, at all, but you know the taste is still there and that is what matters.
 
Besides, who has never made a mistake in the kitchen?  Cause this girl right here, still makes quite a few to this day.  You would think that with as much as I cook and bake, and how much time I spend in the kitchen, I would be an expert, but nope, mistakes are still made.
 
Anyway, this is the perfect coffee cake for a breakfast, a brunch, an afternoon dessert or a family get together.
 
So good!
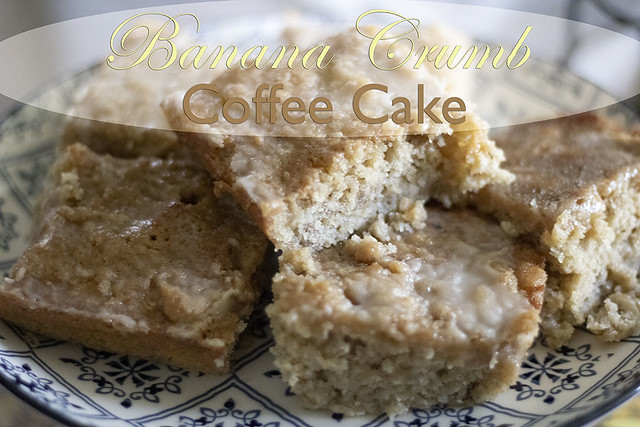
 
Banana Crumb Coffee Cake
 
 
Banana Crumb Coffee Cake
 
 
Ingredients
Crumb Layers 
1/2 cup cold butter (8 tablespoons), cut into small cubes  
1 cup all purpose flour 
1 cup packed light brown sugar 
1/2 cup granulated sugar 
1 tsp ground cinnamon 
 
Cake 
2 cups all-purpose flour 
3 tsp baking powder 
1 tsp ground cinnamon 
1 tsp salt 3 ripe bananas, peeled and mashed 
1/2 cup butter, softened to room temperature 
1 cup granulated sugar 
2 large eggs 
1 tsp vanilla 
1 cup milk 
 
Glaze
1 cup powdered sugar 
1-2 tbsp 
 
 
Instructions 
Preheat oven to 350º F. Grease a 9" x 13" baking dish with butter or cooking spray; set aside. 
 
In a large bowl, use your hands or two forks to crumble together the cold butter cubes, flour, sugars, and cinnamon until the mixture resembles a crumbly topping. Set aside the crumb mixture. 
 
In a large bowl, whisk together flour, baking powder, cinnamon, and salt. Set aside. In a stand mixer, mix softened butter on medium until creamy, about 2 minutes. 
 
Add the sugar and mix for another minute, until well incorporated. Then add the eggs, vanilla, and mashed bananas, and mix just until ingredients are incorporated (do not overmix!) 
 
Turn the mixer down to low, and alternate mixing in milk and flour until all ingredients are combined. 
 
Pour half of the cake mixture into the prepared baking dish. Top with ⅓ - ¼ of the crumb mixture. Then pour the remaining cake mixture on top of that layer and finally, top evenly with the remaining crumb topping. 
 
Bake at 350º for 50-55 minutes, until a toothpick comes out clean. 
 
 
To make the glaze: 
In a small bowl, whisk together the powdered sugar and 1 tablespoon of milk. Add more milk as needed until you get the glaze consistency you prefer. Set aside. 
 
Cool at room temperature for 5-10 minutes before drizzling the glaze over the top, slicing, and serving.

Monday, October 26, 2020

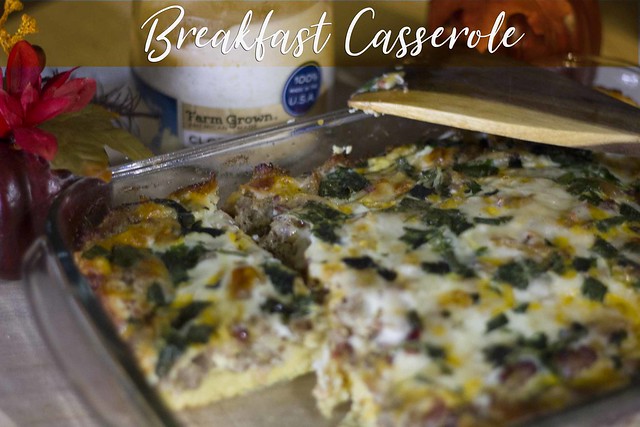
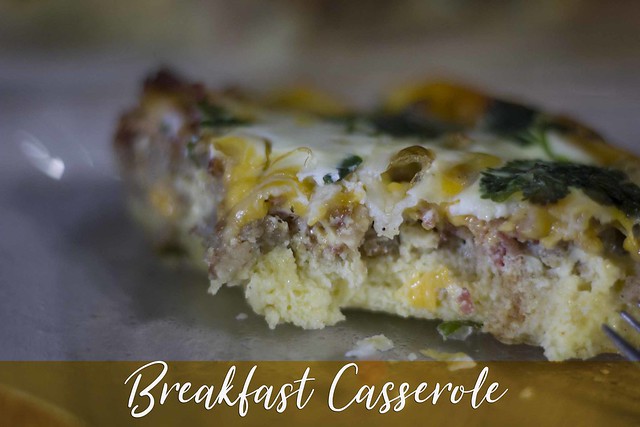
Hearty Breakfast Casserole

_MG_9280 
 
Everyone has their favorite breakfast casserole. That one you keep for special occasions, such as Christmas morning, or when you have family or friends staying over. 
 
I have tried many casseroles, some were good, some were ok.  So it's safe to say that I am always trying new versions, always on the look out for a different one.  
 
But there is a prerequisite for me to give a breakfast casserole a try, they have to be easy, and they have to use ingredients I already have on hand.  
 
_MG_9282 
 
This one comes from one of my newer Gooseberry Patch Cookbooks. 

It was super quick to make, although the recipe calls for refrigerating overnight, but I didn't, I bake it right away.

It got huge thumbs up from the family and I think it could be easily adapted to whatever ingredients your family prefers, or whatever you have on hand.

The only thing I changed was that I used two different cheeses, and I also added parsley and green onion to the egg mixture.

Give this one a try, and let me know what you think.  

_MG_9281
 

Hearty Breakfast Casserole

Source: Gooseberry Patch Cookbooks


6 to 8 bread slices 
3-oz. pkg. ready-to-use bacon crumbles
1 lb. cooked ham, diced, or ground pork sausage, browned (I used pork sausage)
2 c. shredded Cheddar cheese (I used mozzarella and cheddar)
10 eggs, beaten 
1 c. milk 
1 t. salt 
1 t. pepper 
 
 
Arrange bread slices in a single layer in a greased 13"x9" baking pan; top with bacon and ham or sausage. Sprinkle with cheese. 
 
Whisk together remaining ingredients. Pour egg mixture over top. 
 
Cover with aluminum foil and refrigerate overnight. 
 
Bake, covered, at 350 degrees for 45 minutes to one hour, until center is set. Serves 12.

Monday, April 22, 2019

Hashbrown Casserole


Anytime we go to Cracker Barrel, when they ask me what sides I want, Hashbrown casserole is always one of the choices.  So good!!!

It may be because I'm obsessed with potatoes and could eat them every day, any way, without getting sick.  Or it could be that I just love casseroles, and this one is yummy and creamy and perfect for a breakfast get together, or a breakfast for dinner, or heck even as a side dish for  a weekday dinner. 

Whatever you decide, just make it, you won't regret it.


Hashbrown Casserole


30 oz frozen shredded hash brown potatoes thawed
2 tbsp olive oil
1 yellow onion diced
3 large garlic cloves minced
1/4 cup all purpose flour
2 cups whole milk (can use reduced fat if needed)
1 cup chicken stock
1 cup sour cream
8 oz shredded sharp cheddar cheese
1 1/2 tbsp minced parsley (can use dried parsley if needed)
salt
fresh cracked black pepper
1 cup shredded sharp cheddar cheese topping


Preheat oven to 350 and grease a 9x13 casserole baking dish. Preheat medium pot over medium heat on stove-top.

Add oil, heat it through and add onions. Saute onions until they start to brown. Smash and mince garlic and add it to the onions. Stir and saute until fragrant.

Sprinkle flour over the onions and stir well. Stir for a few seconds and start slowly pouring in chicken stock, while stirring. Pour in milk after that while stirring as well.
Let the mixture heat through and start to thicken.

Stir in sour cream, cheese, salt, and pepper. Let the mixture cook and thicken as the cheese melts. Taste to make sure you have enough seasoning. Stir in parsley.

Mix hash browns and cheese sauce in a large bowl and spread the mixture in the prepared casserole dish. Make sure it's all spread evenly throughout.

Spread some more cheese on top and bake for 35-40 minutes, until casserole browned and bubbles around the edges.
 

Sunday, May 07, 2017

{ Cast Iron Buttermilk Biscuits }

 
I woke up this morning craving biscuits and gravy for breakfast.

I have to tell you a funny story first.  I'm sure most of you know that before moving to the United States, I lived in South Africa.  We spoke English but with a British/Afrikaans kind of accent, but for the most part everything derived from England's English, so we used terms like Flat (apartment), biscuits (cookies), jelly (jelly-o), Jam (jelly), boot (trunk), chips (fries) and so on.

When I met my husband, who is American, I found some of the words a bit strange and had a hard time understanding what he was referring to.

The first time he mentioned a Sausage Biscuit for breakfast, I almost puked, because in my mind I picture a sausage flavored cookie LOL  And let's not even mention Biscuits and Gravy, that was even worst.

It took me moving to the States to finally realize that what was referred to as biscuits here, was what we referred to as scones in South Africa.


Long story short, I finally tried the biscuits and gravy and sausage biscuits and fell in love.

Fast forward to today, this morning actually, and I wanted some biscuits and gravy but I wanted a new recipe to try, more specifically one that I could use my cast iron skillet with.  I've been trying to use it more and get it nice and seasoned.

I happened upon this recipe on the Lodge Cast Iron website, gave it a try and it was delicious.  Hope you enjoy it as well :)


Brigg's Buttermilk Biscuits


2 cups self-rising flour, plus extra for dusting counter
½ cup (1 stick) chilled unsalted butter, plus an additional 2 tablespoons melted butter
¾ cup buttermilk
3 tablespoons melted shortening


Preheat oven to 450°F. Place a 10.25-inch cast iron skillet into the oven to preheat.
Measure the self-rising flour into a large mixing bowl.

Using the coarse side of a hand grater, quickly grate 1 stick (½ cup) cold hard butter into the self-rising flour. Working quickly, use fingers to gently distribute the shredded butter into the self-rising flour.

Add the buttermilk, then stir until just combined.

Turn onto a lightly floured surface and, using floured fingers, quickly pat to approximately the size of an 8.5x11" sheet of paper, which will be about ½" to ¾" thick. Very lightly dust the surface of the dough with flour from your fingertips, then fold the sheet of dough into thirds, as when folding a business letter. Repeat the patting, dusting, and folding steps seven times, or fewer if you feel the dough begin to tighten–overworked dough makes for a tough biscuit! The final time, pat the dough to a rectangle slightly larger than the size of your skillet. Using a round biscuit cutter or a drinking glass, cut into about 7 round biscuits. Gather up the scraps to form the 8th biscuit by hand.

With a handle mitt, carefully remove the preheated skillet from the oven. Drop melted shortening into the preheated skillet, then return to oven for a couple of minutes, until it is melted. Place each biscuit into the skillet and, using a fork, immediately turn to coat both sides with shortening.
Place the hot skillet into the oven, and reduce the oven temperature to 425°F. Bake until tops of biscuits are golden brown, about 12-18 minutes.
Remove from oven. Brush tops with additional melted butter. Serve while hot!

Tuesday, February 07, 2017

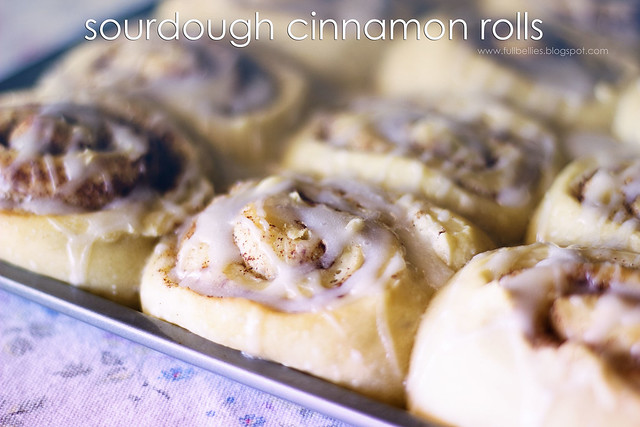
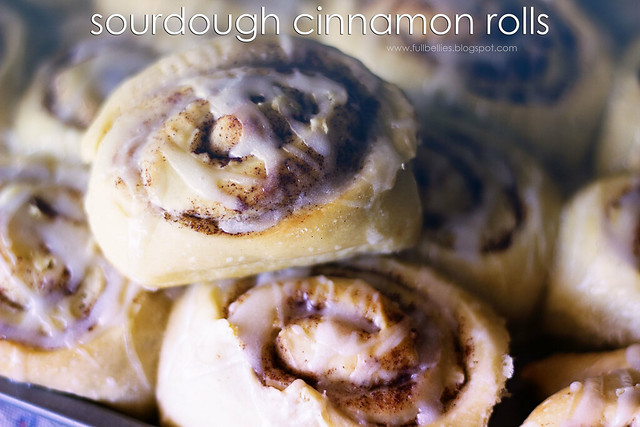
Sourdough Cinnamon Rolls


Sourdough bread is one of those things that I enjoy but don't always make, maybe because it involves having the sourdough starter and I don't remember to make it that often.

But once in a while, I get one going and then just keep it in the fridge and make bread and cinnamon rolls until it runs out.  Now you can keep feeding it, of course, but after about a week I'm done using mine and just prefer to restart again a few months later.

Last week I quickly threw together a starter, fed it and left it in my fridge.  I made a loaf in the bread machine, and then two days ago I started a sourdough bread and cinnamon roll dough.

I've shared the recipe for the sourdough starter and bread before, but here is the recipe for the cinnamon rolls.  This recipe is from one of my Amish Cookbooks, which I absolutely adore.

Enjoy!!!

Sourdough Cinnamon Rolls

Sourdough Cinnamon Roll
Makes 24 large rolls

Sourdough bread dough, prepared through first rise
6 tablespoons of butter or margarine, softened
1 cup packed brown sugar
3 teaspoons ground cinnamon

ICING
1/3 cup margarine or butter, softened
1 teaspoon vanilla extract
4 cups sifted powdered sugar
1/2 cup milk

After the dough has risen overnight, punch it down and divide in half, form two dough balls.
Take one ball of dough and roll it out as thin as you can on a floured surface.  Brush the dough with half of the melted butter.  Sprinkle half of the sugar and half of the cinnamon.

Roll up like a jelly roll, then cut each roll into 1/2 to 3/4 inch slices.  Place slices 1/2 inch apart in a greased jelly roll pan, cover with waxed paper.  Repeat with the second ball of dough.  Then let both  rise for 4 hours.

Preheat oven to 350 degrees.  Bake until golden brown about 20 minutes.  Remove from oven and let cool slightly.

For the icing, mix butter with vanilla and 1 cup of powdered sugar.  Gradually add milk and remaining powdered sugar until smooth.  Drizzle over the rolls.

Sourdough Cinnamon Rolls

Friday, April 29, 2016

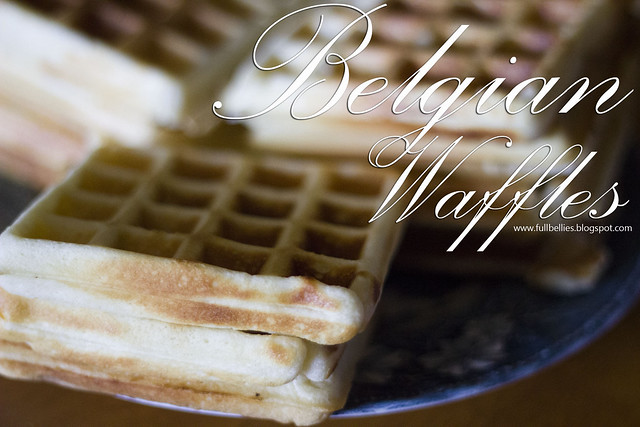
Belgian Waffles

We all have waffle recipes, some we love more than others, some are plain and simple, others are more elaborate like Waffles with Vanilla Custard, or  Banana Nut Buttermilk Waffles.

But there are times when one wishes to try a good ol' Belgian Waffle.

This recipe is super simple to make, they taste pretty good and they also create a nice crispy edge, which personally I love.


Belgian Waffles


2 cups flour
4 teaspoons baking powder
1⁄2 teaspoon salt
1⁄4 cup sugar
2 eggs, separated
1⁄2 cup oil
2 cups milk


Sift the dry ingredients together in a large bowl.  Separate the eggs.

In small bowl, beat egg whites until stiff.

Mix together the egg yolks, milk and oil and stir slightly.  Add to dry ingredients and mix well.
Fold in beaten egg whites.

Use 1/4 cups mix per waffle in your hot waffle iron.

April 28, 2016

Monday, June 22, 2015

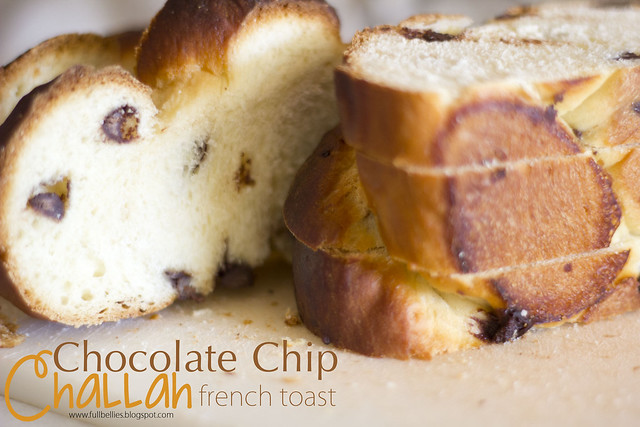
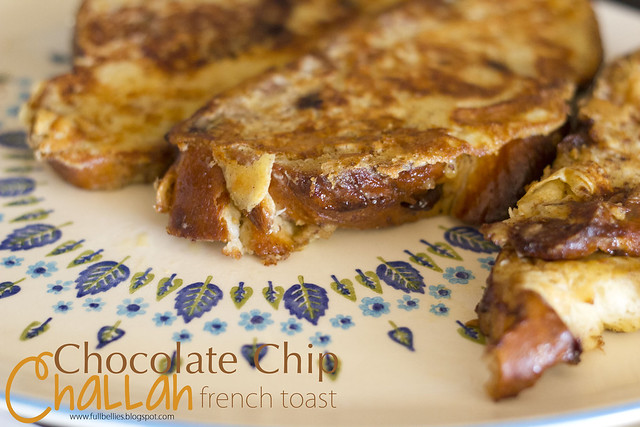
Chocolate Chip Challah French Toast

Back in April I made a Challah Bread for Easter weekend, a chocolate chip Challah bread.  It was so good and so simple to make.

I used a recipe from the Cuisinart website, I was looking for an easy Challah Bread recipe, if there was such a thing and I lucked out because this one really is as easy as it claims and it's delicious too.

I had leftover Challah and made French Toast the next day.  It was AMAZING!!!

I'm giving you the recipe for the Bread and you can just use your favorite French Toast version to complete it.
Easy Ten-Minute Challah Bread


one package of active dry yeast
3 cups unbleached, all-purpose bread flour
2 eggs
4 heaping tablespoons sugar
1 teaspoon vanilla
4 tablespoons oil
1 teaspoon salt
1/2 cup warm (105-110°F) water
1 egg mixed with water for egg wash
handful of sesame or poppy seeds
cooking spray

Instructions

Sprinkle yeast over water in a small bowl or cup, add sugar and watch it bubble, about five minutes.
Pour the above mixture into a food processor; add flour and then the rest of the ingredients. Mix and let it rise (It's okay to cover and leave it in the food processor or remove it to a greased bowl and cover) for about an hour.
Punch down the dough (press pulse a few times) and let it rise again (about an hour).
THEN:
Separate the dough into four pieces. Use three to make the main bread, and use the fourth piece to make a smaller braid that you’ll pinch into place on top of the main braid. Place the braided dough into a greased bread pan and cover with greased plastic wrap (PAM is easy to use.). Let it rise another hour.
Paint with egg wash (egg and water whisked together). Sprinkle with sesame or poppy seeds.
Bake for 45 minutes in a 350° oven.

Chocolate Chip Challah French Toast

Variations:
For savory: Saute' finely chopped onion in olive oil. Roll onion in dough (No braiding with this version). Sprinkle some onion on top of egg wash (in place of sesame seeds) for an Onion Challah.
For sweet:
Before separating into four pieces, knead about 1/2 cup raisins OR 1/2 cup chocolate chips into dough.

Chocolate Chip Challah French Toast

Thursday, March 27, 2014

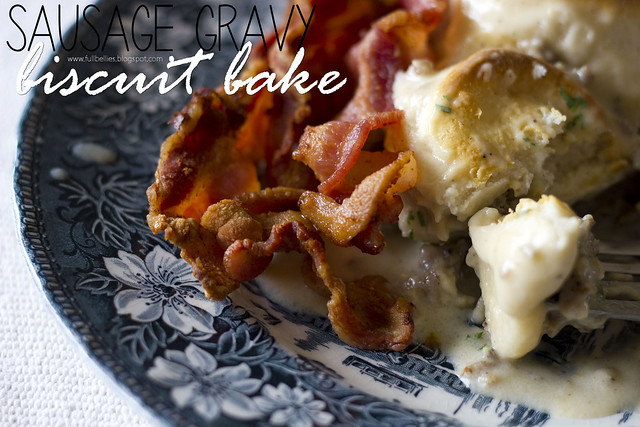
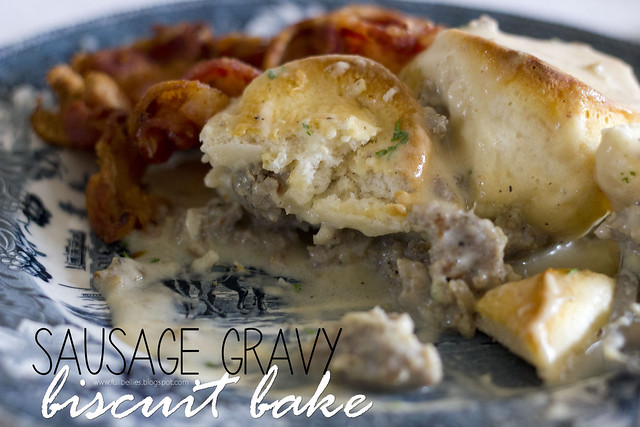
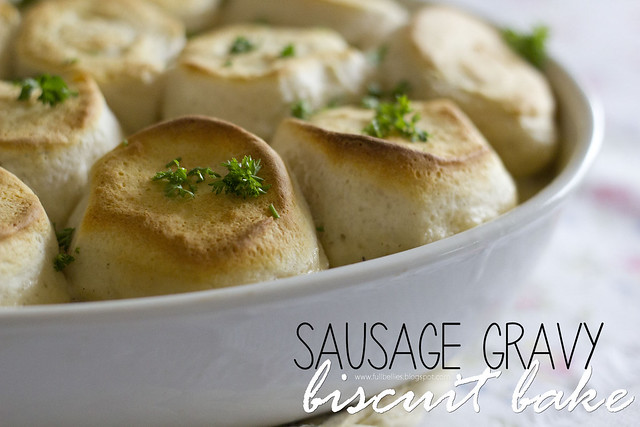
Sausage Gravy Biscuit Bake

Sausage gravy biscuit bake

Breakfast for dinner, need I say more?

I love love love, and love, like really love having breakfast for dinner.  Did I say I love it?  I know not everyone does, but for me, I would eat breakfast anytime of the day, every day.

Honestly, it was so good that I will definitely make it again.

Sausage gravy biscuit bake
Sausage Gravy and Biscuit Bake
Adapted from:  The Slow roasted Italian

1 lb sage breakfast sausage
4 Tbsp unsalted butter
4 Tbsp all-purpose flour
3 cups milk
2 tsp fresh ground black pepper
Optional garnish: fresh parsley, chopped
Refrigerated Biscuits

Preheat oven to 375°F.

In a large (10”) oven safe skillet over medium high heat, cook sausage until lightly browned. Use a slotted spoon remove sausage from skillet and place in a bowl.


Add butter to hot skillet and whisk until melted. Sprinkle flour over butter and whisk together. Allow mixture to bubble for 2 minutes to cook out the flour-y taste, whisking occasionally.

Add milk and whisk to combine, be sure to pick up the little sausage bits on the bottom of the skillet (they add a lot of flavor). Allow gravy to come to a bubble, about 3 minutes. Mixture will start to thicken as it cooks. Add sausage back to skillet/ Add black pepper and stir to combine. Remove from heat.

Pour sausage gravy into a casserole dish.  Add biscuits all around dish. 

Bake for 10-12 minutes until biscuits are lightly browned, you may have to turn your pan half way through cook time if you oven does not cook evenly.

Remove from oven, sprinkle with fresh parsley.

Serve and enjoy!

Sausage gravy biscuit bake

Wednesday, November 20, 2013

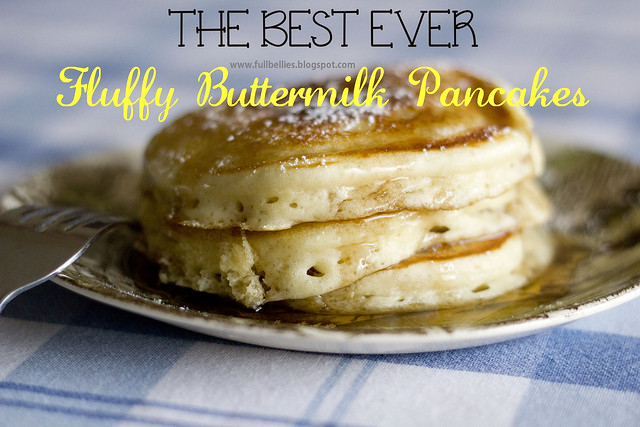
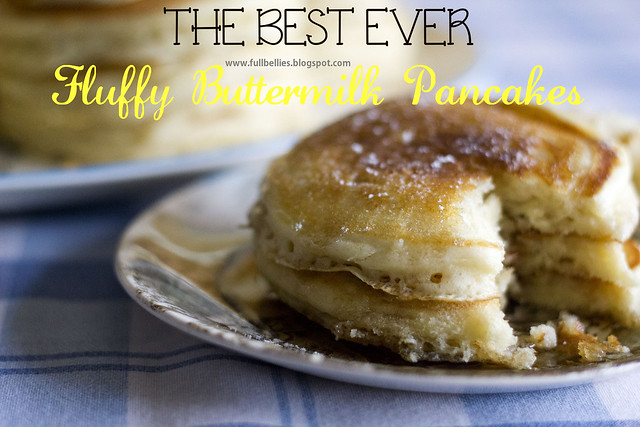
Best Ever Fluffy Buttermilk Pancakes

I love a good pancake, dripping with butter and drizzled with delicious syrup.

I don't make them too often as breakfast around here is usually a bowl of cereal or oatmeal, toast and other easy things.  But once in a while I really crave a good pancake and not out of a box mix (though I do use those too).

Enter the fluffiest buttermilk pancakes you could ever have.  These come from the great food blog The Slow Roasted Italian.  So very yummy!

The key really is to let the batter sit for an hour or overnight, that is what will give you super fluffy pancakes, though if you make them right away you will still get pretty fluffy ones.

The best ever fluffy buttermilk pancakes

The Best Ever Fluffy Buttermilk Pancakes
Source:  The Slow Roasted Italian
Serves 6

2 cups all purpose flour
¼ cup granulated sugar
2 teaspoons baking powder
1 teaspoon baking soda
2 beaten eggs
2 cups buttermilk
¼ cup unsalted butter, melted
¼ teaspoon kosher salt
1 tablespoon vanilla extract

In a large bowl combine flour, sugar, baking powder and baking soda. Whisk to combine. Add eggs, buttermilk, butter, salt and vanilla. Stir until just combined. Do not over stir or you will have flat pancakes.

Set aside on the counter for an hour, or place in the refrigerator overnight.

Ladle ¼ cup batter on a hot non stick skillet, over medium heat. Cook until pancakes are golden brown around the edge and bubble appear around the edges. Flip and cook until done.

Serve and enjoy!

The best ever fluffy buttermilk pancakes

Monday, December 17, 2012

Cinnamon Roll Pancakes

I've had these babies in sight for a long long time.

It was one of those recipes that I ran across a while back and then kept putting it off to try, well, today was the day. And now I regret not trying them months back because I've been missing out on some yumminess.

Careful though, can't enjoy these every morning, but for a holiday or a special occasion they are perfect.

Recipe comes from Recipe Girl and she has some other variations to try, like the Pumpkin Cinnamon Roll and even Gingerbread Roll Pancakes. You bet I'll be trying those soon.

On to the recipe........


Cinnamon Roll Pancakes

Cinnamon Roll Pancakes

CINNAMON FILLING:
4 tablespoons (1/2 stick) unsalted butter, just melted (not boiling)
1/4 cup + 2 tablespoons packed light brown sugar
1/2 tablespoon ground cinnamon

CREAM CHEESE GLAZE:
4 tablespoons (1/2 stick) unsalted butter
2-ounces cream cheese, at room temperature
3/4 cup powdered sugar
1/2 teaspoon vanilla extract

PANCAKES:
1 cup all-purpose flour
2 teaspoons baking powder
1/2 teaspoon salt
1 cup milk
1 large egg, lightly beaten
1 tablespoon canola or vegetable oil


Prepare the cinnamon filling: In a medium bowl, stir together the butter, brown sugar and cinnamon. Scoop the filling into a quart-sized heavy zip baggie and set it aside (see *Tips below).

Prepare the glaze: In a small pan, heat the butter over low heat until melted. Turn off the heat and whisk in the cream cheese until it is almost smooth. Sift the powdered sugar into the pan, stir and add in vanilla extract. Set the pan aside while you make the pancakes.

Prepare the pancake batter: In a medium bowl, whisk together the flour, baking powder and salt. Whisk in the milk, egg and oil, just until the batter is moistened (a few small lumps are fine).

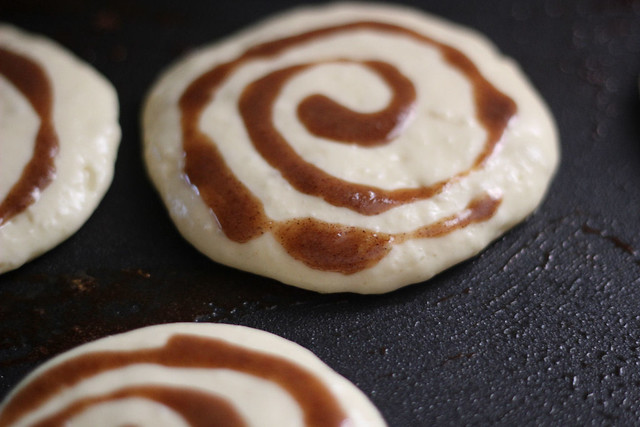
Cook the pancakes: Heat a large, nonstick skillet over medium-heat and spray with nonstick spray. Use an ice cream scoop (or 1/3 cup measuring cup) to add the batter to the pan. Use the bottom of the scoop or cup to spread the batter into a circle (about 4-inches in diameter). Reduce the heat to medium low. Snip the corner of your baggie of cinnamon filling and squeeze the filling into the open corner. When your pancake begins to form bubbles, add the filling. Starting at the center of the pancake, squeeze the filling on top of the pancake batter in a swirl (just as you see in a regular cinnamon roll).

Cinnamon Roll Pancakes

Cook the pancake 2 to 3 minutes, or until the bubbles begin popping on top of the pancake and it's golden brown on the bottom. Slide a thin, wide metal spatula underneath the pancake and gently but quickly flip it over. Cook an additional 2 to 3 minutes, until the other side is golden as well. When you flip the pancake onto a plate, you will see that the cinnamon filling has created a crater-swirl of cinnamon. Wipe out the pan with a paper towel, and repeat with the remaining pancake batter and cinnamon filling. Re-warm the glaze briefly, if needed. Serve pancakes topped with a drizzle of glaze.

Cinnamon Roll Pancakes


*Quick and easy tip: Use a boxed pancake mix as the base for this recipe.
*Tips for the cinnamon filling: Before swirling, open up the baggie again and give it a good stir to re-incorporate any butter that may have separated from the sugar. You want the mixture to thicken a bit- it's best when it's similar to the squeezing texture of a tube of toothpaste, which will happen if you leave it at room temperature for several minutes. Don't try to use the filling for the pancake swirl unless it has thickened as it will be too runny to make a solid swirl.

*Keep the heat low or your pancakes might cook up too quickly. Don't flip them until you see those bubbles starting to pop on top. Flip them with a wide spatula so you can grasp the whole thing without batter and filling dripping all over the place!

Thursday, July 05, 2012

Cinnamon Roll Snails

Another cute idea to serve up for breakfast to the kids.

Cinnamon Roll Snails

Have had this one in my "to try" list for a long time, found at Cute Food for Kids.

Cinnamon Roll Snails

Cinnamon Roll Snails

Pillsbury Jumbo size cinnamon rolls
Toothpicks
Marshmallows
Food marker


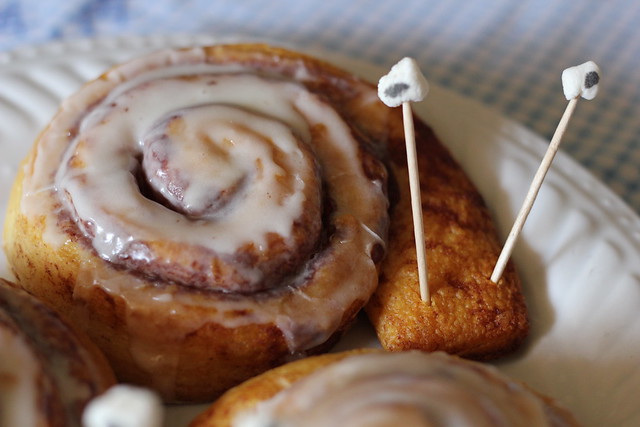
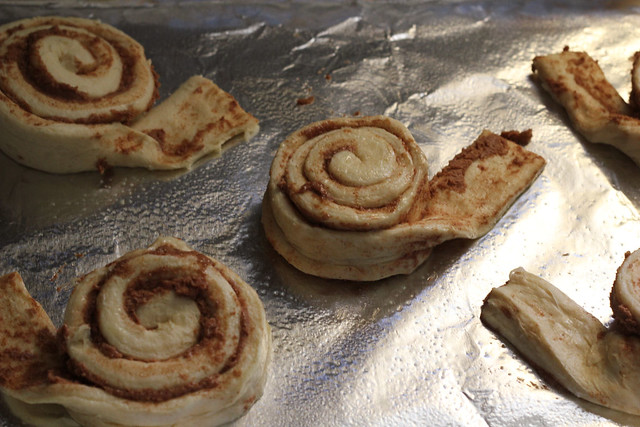
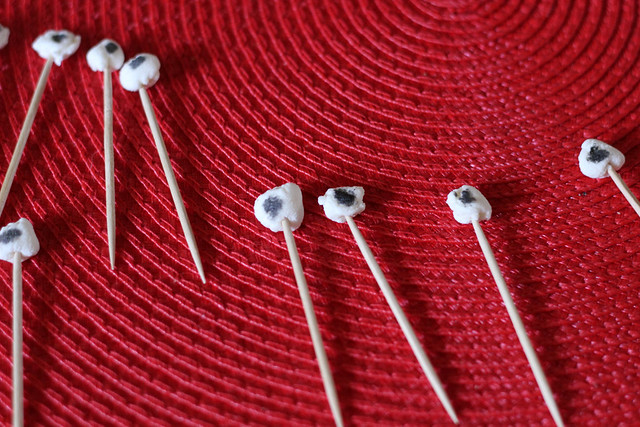
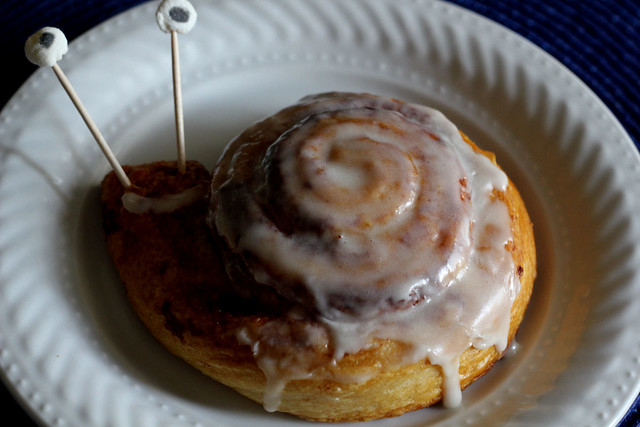
Set the cinnamon rolls on a greased cookie sheet, or foil lined sheet as I have done.  Unroll the cinnamon roll a little to make the neck and head of the snail.

Cinnamon Roll Snails

You can trim the tip to make it more rounded but I didn't do that.

Bake according to the package directions, which should be 350 degrees for 16 to 22 minutes until nice golden brown and top looks dry.

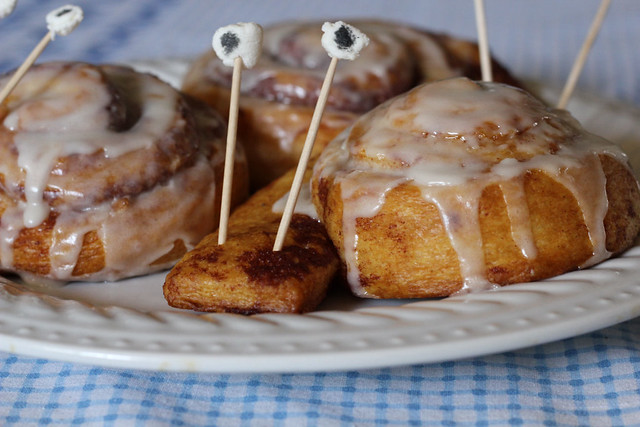
In the meantime, make the eyes using toothpicks, mini marshmallows (I didn't have mini ones so I just tore off little pieces and rolled them into a ball.  Draw a black dot with the food marker.

Cinnamon Roll Snails

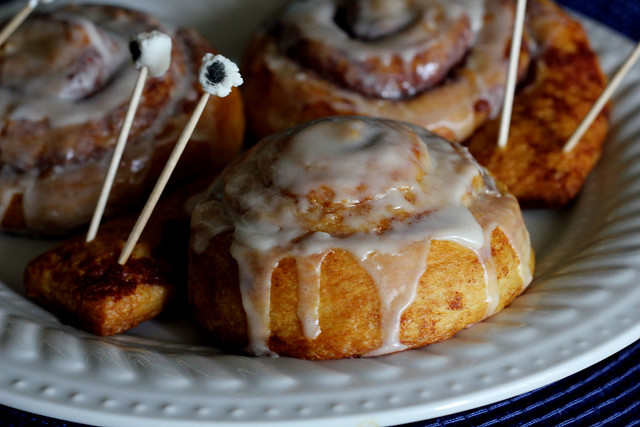
When the buns are done, remove from the heat.  Let cool a little, then slather on some icing on the shell.  Pop on the eyes and you can even do a little mouth if you wish.

Cinnamon Roll Snails

Enjoy! My kids thought they were the cutest things on earth, and I have to agree. I think next time I'll make homemade tiny cinnamon rolls for little snails.

Cinnamon Roll Snails

Monday, May 21, 2012

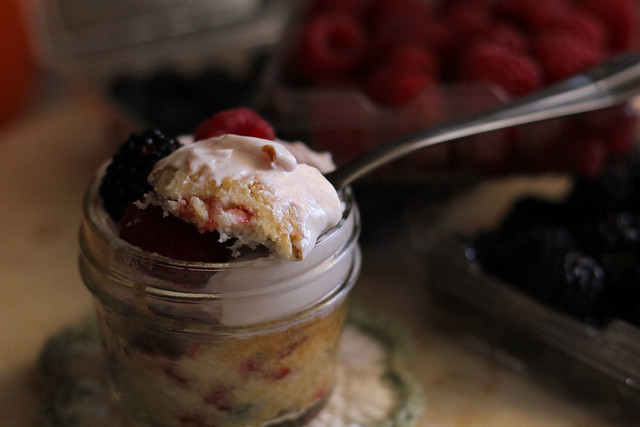
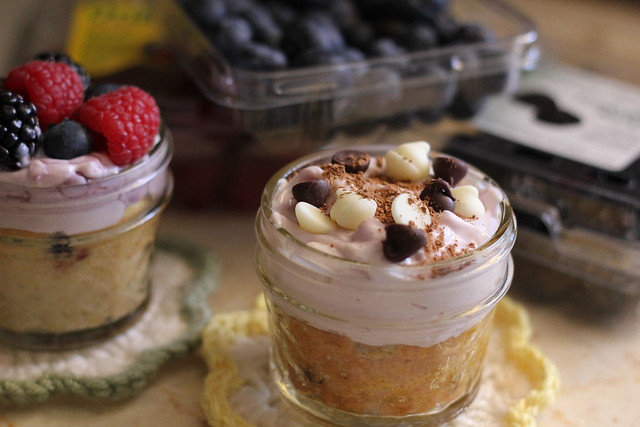
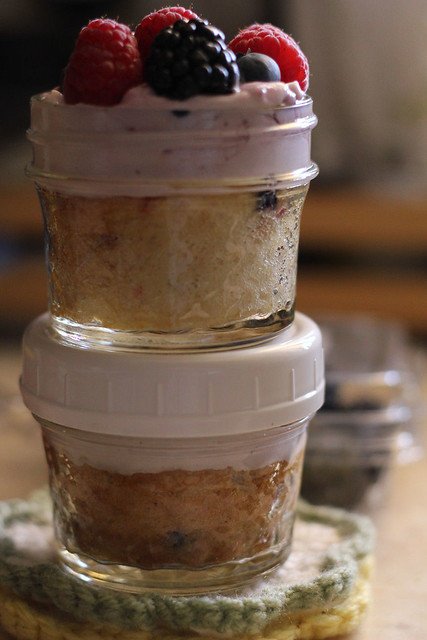
Mini Breakfast Jars

I was at the store the other day and found the really small 4 oz. mason jars.

Of course being the mason jar addict that I am, I couldn't exactly leave them there, so home they came with me.

Mini Breakfast Jars

Fast forward to today, and I was sitting at the kitchen table writing up some menu plans, and I sometimes like to add breakfast and lunch, even though we usually don't change that up very much.  As I was writing down muffins and yogurt with fresh berries, I had sort of a light bulb moment go off.

I thought, why not mix both up in the small jars, I mean muffins and yogurt together actually sounds really good.  And then throw in the fresh berries....and Yum!

Mini Breakfast Jars

I set to work right away.

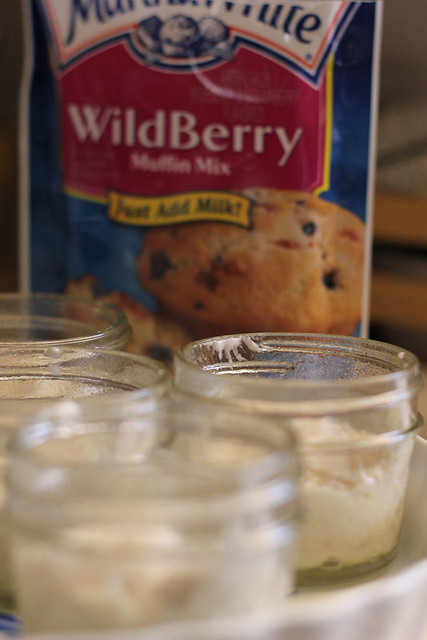
All I did was use the little packs of muffin mix that you get at the store.  I had mixed berry

Mini Breakfast Jars

and chocolate chip

Mini Breakfast Jars

and apple cinnamon.  I decided to leave the apple one for now, and experimented with the other two.

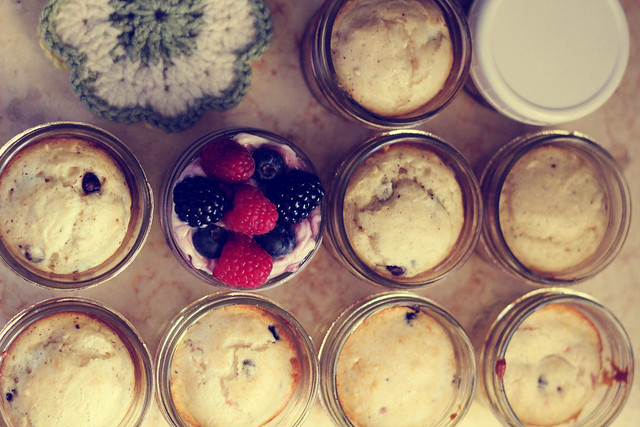
Mix according to directions, then spoon a little less than a 1/4 cup of the batter into each jar.

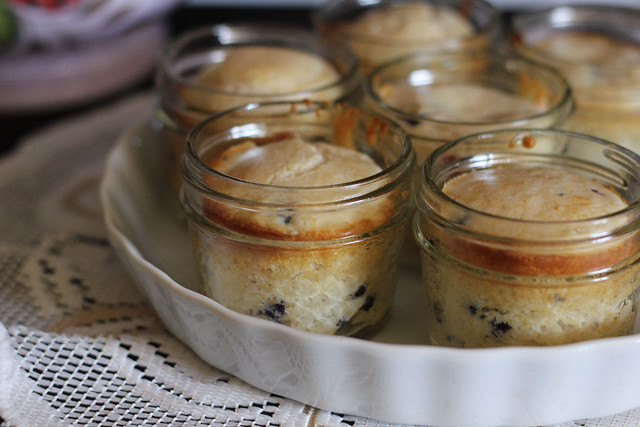
Bake in a 350 degree oven for about 25 minutes or until a toothpick inserted near the center, comes out clean.

Mini Breakfast Jars

Let it cool completely.  At this point, if you are making a huge batch, I would suggest freezing them just as they are, they should keep for about a month,  which is how long my muffins usually keep in the freezer.

Mini Breakfast Jars

The rest of the jars, I'm assuming will last a day or two in the fridge once you add the yogurt and the fruit.  Though, I can tell you, I don't think they'll last that long at ALL.

Spoon on some of your favorite yogurt, I think the combination of flavors if what makes this fun.  For these I had Vanilla and Strawberry Greek Yogurt so that is what I used.

Mini Breakfast Jars

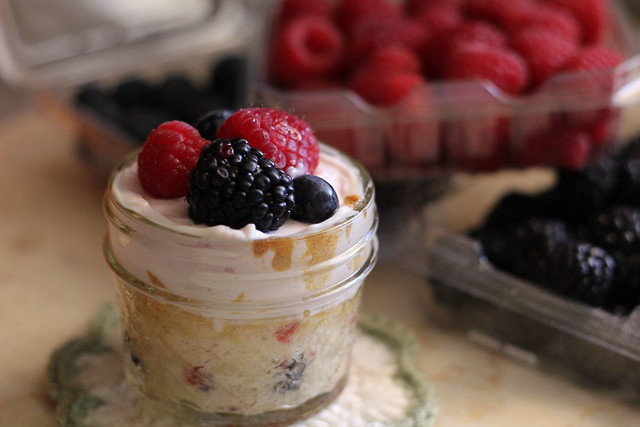
For the mixed berry muffin base, spoon on some strawberry yogurt (keep in mind you'll need to put a lid on these).  Add a few fresh berries.  Pop the lid on and into the fridge it goes.

Mini Breakfast Jars

For the chocolate chip base, I used vanilla yogurt, sprinkled on some chocolate chips and a little bit of powdered cocoa.  YUM!

Mini Breakfast Jars

I'm thinking tomorrow I'll make a batch of the apple cinnamon and use vanilla yogurt, then top with some apple slices and a sprinkling of cinnamon.

Oh I can't wait to try different flavor combos.  Quick, easy, simple breakfast and I'm already thinking when my hubby and I are watching our weight, I can use low fat/low calorie muffins and yogurt mixes :)

Mini Breakfast Jars

The perfect lids for these, are the Plastic Storage Caps. I actually need to get some more. You can find them at Walmart, or buy them on Amazon.

I'm using 4 oz  mason jars for these which you can also purchase at Amazon, or Walmart or your local Ace Hardware too.

Sunday, April 29, 2012

Refrigerator Oatmeal

I recently started purging my facebook of all the crazy pages I have liked over the years, and have been replacing them with things that make me smile.

I love seeing my news feed, filled with homemaking, recipes, farming, gardening etc.

2012_04290008

This morning, one of new favorite FB pages posted a link to this Refrigerator Oatmeal.  Refrigerator Oatmeal!!!

Now I've tried overnight oatmeal in the crockpot, but I honestly had no idea you could make it in the refrigerator and then to be able to go crazy with all the flavor combinations.  Oh boy.

I bookmarked the page and this afternoon while doing my usual Sunday replenishing of cookie jars, canning, lunches for the week etc, I made a few jars of this oatmeal to enjoy for breakfast this coming week.

These are SO SO easy to put together, I'm just in awe.  Can't wait to try the first one tomorrow and see how it turns out.

Monica from the Yummy Life gives us a bunch of different flavors to try such as Mango Almond, Blueberry Maple, Apple Cinnamon,  Banana Cocoa....as well as the basic recipe, which is....

old fashioned rolled oats (not instant, quick, or steel-cut)
Greek yogurt (regular yogurt is thinner; if you use it, you'll need to reduce the amount of milk); read my post for easy instructions for straining regular yogurt to make Greek yogurt.
milk (I used skim, but any kind will work)
chia seeds; I bought mine at Whole Foods; available on
half pint (1 cup) mason jars


I am not using Chia seeds, so had to change it a little.  The recipes below are adapted from Monica's.

2012_04290007

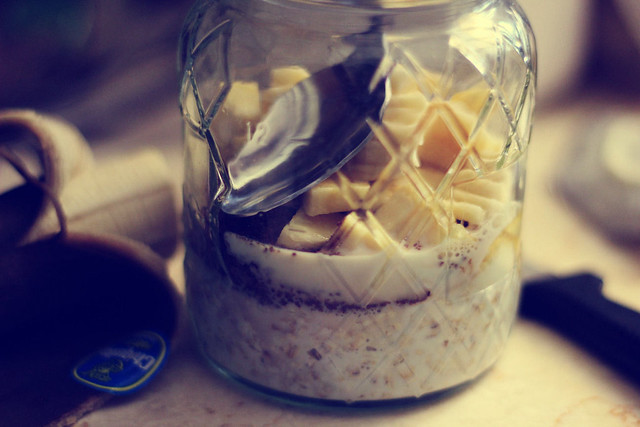
Refrigerator Banana Chocolate Oatmeal


1/4 cup uncooked old fashioned oats
1/4 cup whole milk
1/4 cup Vanilla Greek yogurt
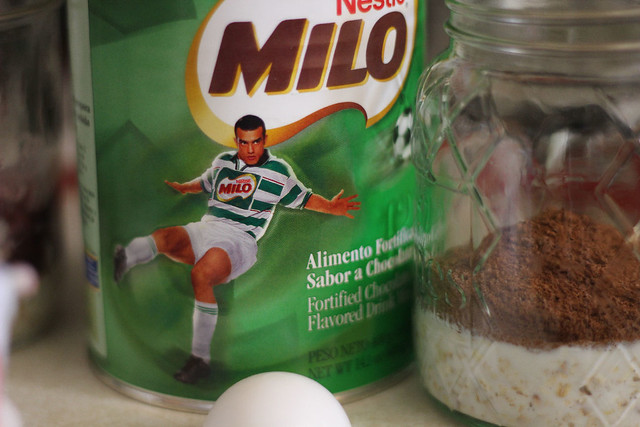
1 tablespoon Milo chocolate drink
1 teaspoon honey
1/2 a banana or enough to fill jar

In a half pint (1 cup) jar, add oats, milk, yogurt, milo and honey. Put lid on jar and shake until well combined. Remove lid, add bananas and stir until mixed throughout. Return lid to jar and refrigerate overnight or up to 2 days. Eat chilled.

2012_04290009

Refrigerator Peanut Butter and Banana Oatmeal


1/4 cup uncooked old fashioned oats
1/4 cup whole milk
1/4 cup Vanilla Greek yogurt
1 teaspoon peanut butter
1 teaspoon honey
1/2 a banana or enough to fill jar

In a half pint (1 cup) jar, add oats, milk, yogurt, peanut butter and honey. Put lid on jar and shake until well combined. Remove lid, add bananas and stir until mixed throughout. Return lid to jar and refrigerate overnight or up to 2 days. Eat chilled.

2012_04290006

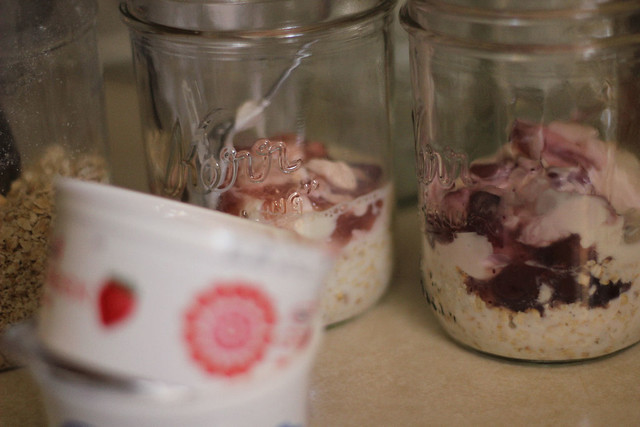
Refrigerator Strawberry Oatmeal


1/4 cup uncooked old fashioned oats
1/4 cup whole milk
1/4 cup strawberry Greek yogurt
1 teaspoon honey

In a half pint (1 cup) jar, add oats, milk, yogurt, and honey. Put lid on jar and shake until well combined. Refrigerate overnight or up to 2 days. Eat chilled.

2012_04290011

Refrigerator Blueberry Oatmeal


1/4 cup uncooked old fashioned oats
1/4 cup whole milk
1/4 cup blueberry Greek yogurt
1 teaspoon honey

In a half pint (1 cup) jar, add oats, milk, yogurt, and honey. Put lid on jar and shake until well combined. Refrigerate overnight or up to 2 days. Eat chilled.

2012_04290012