Monday, August 24, 2020

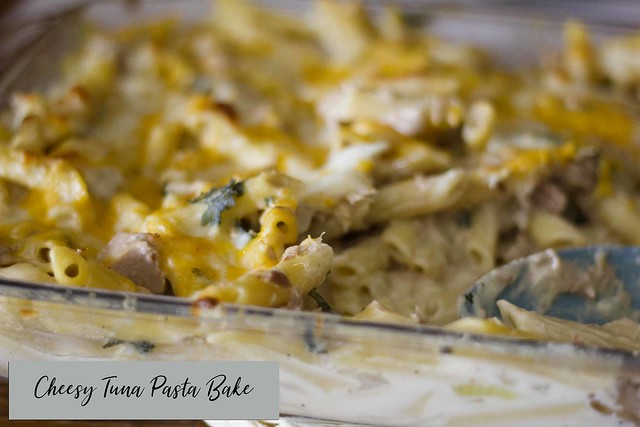
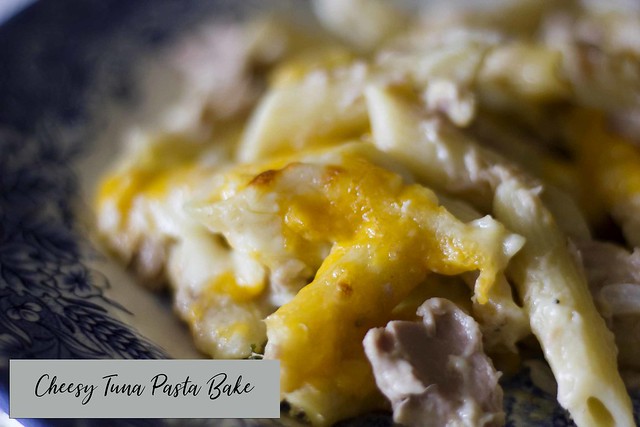
Cheesy Tuna Pasta Bake

_MG_8791

Don't you just love a good ol' pasta bake?

I don't know what it is about it, aside from the fact that it is all in one dish, but pasta bakes scream home cooked comfort food, to me.

It's one of those meals that come together pretty quickly, using ingredients you will no likely already have on hand.

_MG_8789

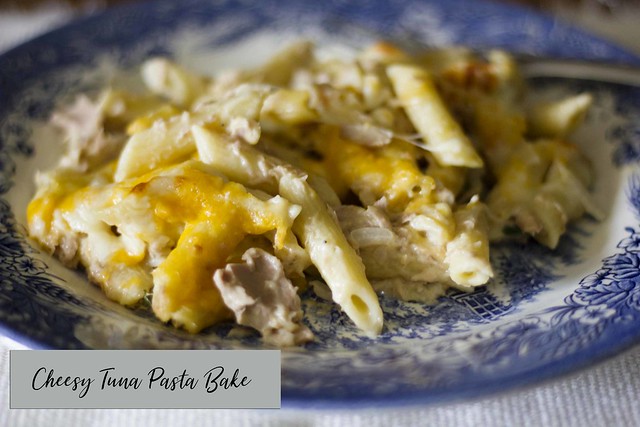
Cheesy Tuna Pasta Bake


1 box rigatoni pasta
3 tbsp butter
Small onion, finely diced
1/4 cup All purpose flour
2 cups milk
Shredded Cheese
Salt and pepper to taste
Nutmeg to taste
3 cans of tuna, drained and flaked
Parsley


Preheat oven to 350 F.

Boil the pasta according to package directions, drain and set aside.

In a saucepan, add the butter and the onion, cook until onion is translucent.  Sprinkle on the flour, stir well, then slowly pour in the milk, stirring constantly to remove any lumps.  Cook for a few minutes until the sauce has thickened


Season with salt, pepper and nutmeg to taste.  Next, add in the tuna and mix well.  Sprinkle on some parsley, then add tuna to the drained pasta in a big bowl, toss together.  Add a little shredded cheese and stir to mix.

Pour mixture into a baking dish, sprinkle on more cheese over the top, and bake for about 15 minutes until cheese is melted and golden brown.  Serve immediately.
_MG_8790

Ikea Style Meatballs

You know how everyone always gushes about the Meatballs at Ikea?  I know, it's a bit strange considering it's a furniture store, but the one thing that everyone always comments on, is the fact that you can get some delicious meatballs for lunch.

I've never been to an Ikea, unfortunately (or maybe fortunately for my wallet), we have never lived near one.

But, I wanted to give the famous meatballs a try, and I looked online for a recipe that I could try and replicate at home.  I found a few but ended up just winging it and using them for inspiration, rather than following a specific recipe to the letter.

Here's the thing though, since I've never actually tried the Ikea meatballs, I can't tell you if they are close to it or not, but I can tell you that they were delicious and a nice change from the usual tomato based sauce, we are so familiar with.

Give these a try and let me know what you think.

_MG_8920

Ikea Style Meatballs


Frozen meatballs
1 Stick of Butter
Flour
2 teaspoons soy sauce
1 tablespoon mustard (I used brown spicy mustard)
Garlic paste
Heavy cream
Chicken stock (homemade or store bought)
Parsley


In a pot, I added the stick of butter and the frozen meatballs, along with a little bit of water.  Turned the heat to medium, popped the lid on and let them cook until completely warmed through.

Next, I sprinkled on some flour and stirred to make sure they were evenly coated.  I poured in about a cup and a half of heavy cream, then added the soy sauce and the mustard.  Also added a little bit of garlic paste to taste.

I had a mason jar with some homemade chicken broth in the fridge, it was about 2 cups of broth.  I added that in, gave everything a good stir, and then simmered for a minute or so just until it was hot and the gravy had thickened.  Sprinkled on some parsley and served immediately over mashed potatoes.

_MG_8919

They were divine.  I hope you give them a try, and if you do, let me know in the comments what you thought.

Sunday, July 19, 2020

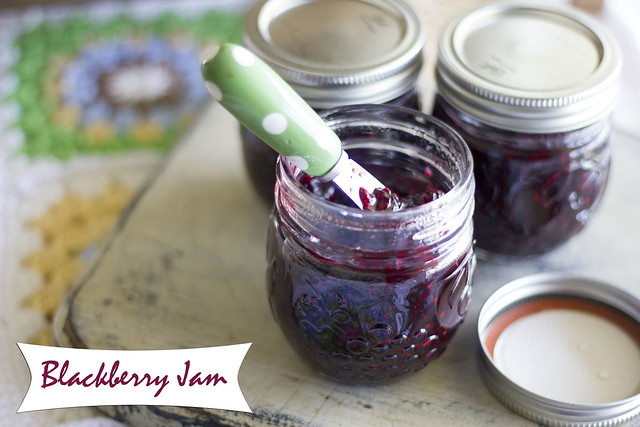
Blackberry Jam

_MG_8714

A few weeks ago, my husband, daughter and I, went blackberry picking.  It was so much fun, and we for pretty cheap we brought home quite a lot of blackberries.

I threw 2 pounds in the freezer for later, and then used some of the rest for homemade Blackberry Jam and a Blackberry Cobbler which was to die for as well.

It was pretty easy to make, it doesn't need pectin which I don't always have on hand, so this is a great recipe if you need to use up fruit for a quick delicious jam.

Blackberry Jam

4 cups of blackberries
2 cups of sugar
2 tablespoons of lemon juice


Mix all ingredients in a saucepan.  Crush the berries using the back of a spoon or a potato masher.

Turn the heat on to medium and bring the contents to a boil, simmer for about 15 or 20 minutes until it is thick and has reached the jam point.  The way my great grandmother taught me was by taking a teaspoon of the jam and putting it on a small plate.  Then running the spoon through the jam, if it separates and doesn't run back together, it is ready.

In Portuguese we call it Ponto de Estrada.

Transfer the jam to clean and sterilized mason jars.  If you're not canning, just let it cool and then place in the refrigerator.  If you're not using right away, then you can proceed with canning the usual way.

_MG_8712

Copycat Wingers Sticky Fingers

_MG_8746

It has been a while since I've updated the food blog, my apologies for that.  If you follow me over on my main blog, you will understand that a lot has been going on, and well, life has just knocked us upside the head.

With that said, I've been trying to cut down on my grocery budget, make delicious filling meals, but not spending too much money, especially on meat products.

I've tried to work with what I can find at the store, since many times the meat I want is either not available, too expensive, or we are only limited to 2 which is not easy for someone who buys for 2 weeks at a time.

Anyway, this is one of the meals I made the other day, and it is definitely going on our rotation of favorites.  It is pretty inexpensive to make, and super tasty.

I chose to serve mine as a salad, so we had some salad fixings and then just topped it with the sticky fingers and drizzled on some ranch dressing.  So good!!!

IMG_20200719_134645_464

Copycat Wingers Sticky Fingers


Bag of crispy frozen chicken strips
1/3 cup Frank's Hot Sauce
3/4 cup brown sugar
1/4 cup water


Cook your chicken strips according to package directions.

In a small saucepan, mix the rest of the ingredients and bring to a boil over medium heat.  Stir well, and once the sugar is completely dissolved and it starts bubbling, remove from heat.  Let sit for a few minutes until it thickens slightly.

Place the chicken strips in a bowl, pour on the sauce and stir to coat all the chicken.  Serve immediately with some ranch dressing on the side.


Monday, June 01, 2020

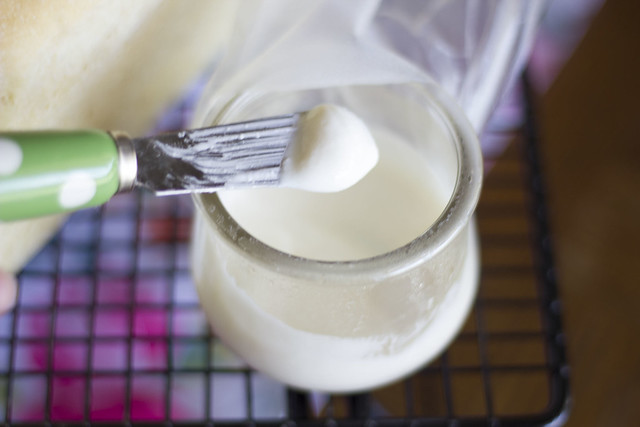
Homemade Cream Cheese

_MG_8565

This recipe should have gone up a long time ago.

It is one of those homemade recipes that needs to be in your binder/folder/recipe box, because I'm pretty sure once you try it you may never go back to store bought cream cheese, again.

It takes but a few ingredients to turn a liter of milk into the creamiest, yummiest cream cheese you've ever tasted.

Let me show you.

_MG_8566

Homemade Cream Cheese

1 litre milk (I used Whole Milk)
4 tablespoons vinegar
2 tablespoons butter
Salt to taste

Add the milk to a saucepan and bring to a boil, just when it starts to bubble up and form that skin on top.  Immediately remove from heat. 

Add the vinegar and stir well.

Let the mixture sit for 5 minutes until the curds start forming and separating from the liquid. 

Next, pour the mixture through a strainer until you get all the liquid out.  Use a spoon if you have to, to help push out all the liquid. 

Put the curds in a blender, add in the butter and salt to taste and blend for 1 to 2 minutes, until it becomes a thick creamy consistency.

Give it a good stir and pour into mason jars.  These will keep in your fridge for about 5 days, though I doubt they'll last that long.


_MG_8570

_MG_8572

I slathered the cream cheese on some fresh out of the oven sourdough bread.  It was divine!!!!

_MG_8573


Give it a go and let me know what you think.  I can tell you that for my family we are not interested in store bought any longer, this one is creamier and much tastier.