Monday, February 19, 2018

Biscoitos (Portuguese Cookies)

I grew up in Portugal, and always with my greatgrandmother in the house.  She was the matriarch, the one that oversaw the cooking and pretty much kept a close eye on everyone and everything that was going on.

While my parents had to work, it was my greatgrandma that watched us during the day, cooked our meals, waited for us at the door when we returned from school and then made dinner for everyone.

I learned a lot with her.

One of the fondest memories I have, are of these cookies sitting in a big glass jar.  There would be tons of these always available, and as we walked by the counter, my brothers and I would snatch a few to enjoy.

I will say that they are not very sweet at all, which to me is perfect as I much prefer simple cookies that I can have with a cup of coffee or tea. 

When I first made them, I was worried my husband and kids would not enjoy them, because they're not really the type of cookie they're used to, but they all love them just as much as I, and now I make sure to always have a batch on hand :)

I have my greatgrandma's recipe written down somewhere, just need to fish it out, but this recipe comes from Easy Portuguese Recipes.  It's pretty much the exact recipe that I have written down :)


Biscoitos

3 cups flour
1/2 cup sugar
1 pinch salt
3 teaspoons baking powder
3 eggs
8 tablespoons butter, melted
1 egg for brushing on the cookie (or you can use milk if you prefer)


Preheat the oven to 375 degrees.  Beat together the flour, sugar, salt, and baking powder.

Add the eggs and the melted butter.  Pinch off small balls of dough, about an inch in size, then roll into a log and overlap the ends, making a bow.

Place on a lightly greased baking sheet. 

 
Brush the cookies with some beaten egg, or a little bit of milk if you prefer.


Bake for about 15 minutes or until cookies are brown.  Remove from oven and let cool.

Keep either in a glass container, or in a ziploc bag.  They will keep for quite a few weeks, but they don't usually last very long in my house.

Tuesday, January 09, 2018

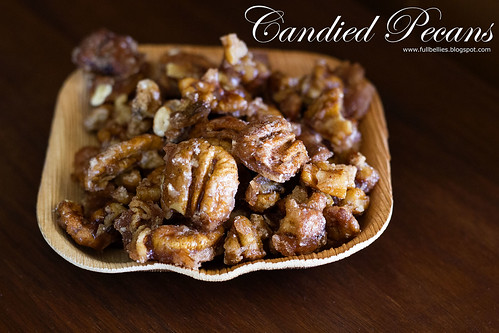
Candied Pecans


I still have quite an abundance of pecans in my freezer, from our harvest last year.

One of the family's favorite ways to eat pecans, as a snack, is Candied Pecans.

Crunchy, sweet, cinnamon flavored and just the perfect little snack not only around the holidays but any time in the year.

I got the recipe over at A Dish of Daily Life, and it's been sitting in my Bookmarks for quite a long time, and I mean a long time, couple years.  Once we started harvesting our Pecans and realized how many I had, I pulled out all my pecan recipes and this one was a must try.

They are quite addictive so be forewarned.

Candied Pecans

Candied Pecans

2 cups sugar
1 teaspoon ground cinnamon
1/4 teaspoon cream of tartar
1/2 cup boiling water
3 cups pecan halves
1 teaspoon vanilla

Instructions

Stir together the sugar, cinnamon, cream of tartar, and boiling water in a small saucepan.
Cook over medium heat, stirring constantly, until mixture comes to a boil.
Continue to cook at a slow boil over medium heat for about 8 minutes or so, stirring constantly.
Remove saucepan from heat, and stir in pecans.
Let cool for a few minutes, and then add vanilla, and continue to stir until pecans are evenly coated.
Pour pecans onto a sheet of parchment paper.
Separate nuts that have clumped together with a fork.
Let cool.
Store in an airtight container at room temperature for up to 2 weeks.

Thursday, December 28, 2017

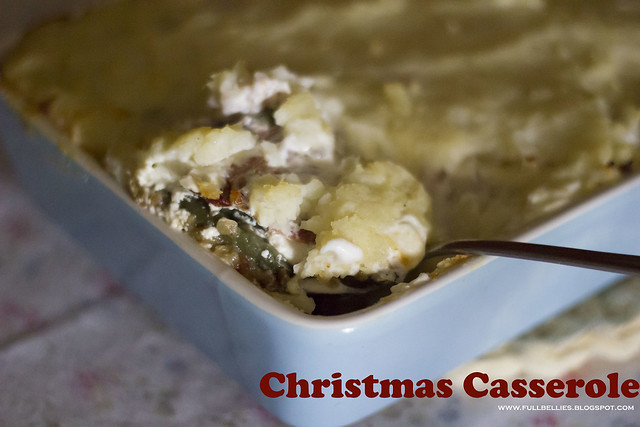
Christmas Casserole - Using Leftovers


I love the holidays and all the food that goes with it, but when Christmas is done, after a few days I'm a bit tired of all the leftovers in the fridge.

There's only so much heating up of ham and potatoes a person can stand before getting sick of it.  One thing I like doing with leftovers, is to make it into a casserole, add a few spices here and there and make a new dish that won't have everyone turning their noses up at.....not to mention, it's a great way to use up the leftovers and not throw anything away.

Just use whatever you have on hand.  I've done similar one for Thanksgiving leftovers too.

_MG_0009
Christmas Casserole

Leftover baked ham
Leftover mashed potatoes
Leftover veggies (this time I had a green bean casserole)
Shredded cheese
Heavy cream 

In a baking dish, layer half of the potatoes, top with diced baked ham, and the green bean casserole.  I seasoned it to my liking with some more salt, pepper and garlic powder.

Next I sprinkled on some shredded cheese and poured about a cup of heavy cream over.

Top with the remaining potatoes, smooth out and pop in a 375 degree oven for about 30 minutes, or until heated through and bubbly.


Tuesday, November 07, 2017

{ Christmas Fruit Cake }


 It's that time of the year.  By now, if you're going to be making Fruit Cakes for Christmas, you need to start baking them or at the very least figuring getting all your ingredients ready to go.  The sooner you make them, the better they turn out.

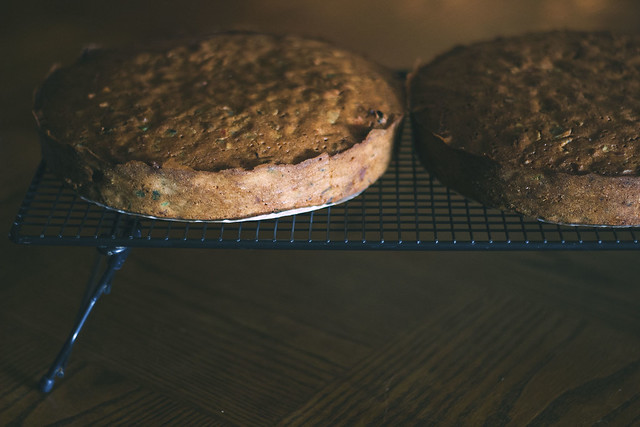
I actually made my first in October, and today I made another two.  I'm using a completely different recipe, one which I got from one of my favorite vloggers Helen from Wright At Home on Youtube.

This is her grandmother's recipe, and I truly believe that the best recipes are those handed down from generation to generation.  Too often I see people trying to create shortcuts or substitute this for that ingredient in an attempt to make things more glamorous, but it doesn't always turn out well.  It's been my experience that the simplest of ingredients and the simplest of recipes are often the best ones.

This was my first time using Helen's recipe, and I think it may just become my go to and favorite for the holidays.

Christmas Fruit Cake


Christmas Fruit Cake
Source: Helen Wright

200 gr flour
200 gr butter
200 gr sugar (I used half light brown sugar and half white)
4 eggs
800 gr fruit
half tbsp salt
4 tbsp spice and cinnamon
1/4 cup chopped cherries
1/2 cup chopped pecans
1/4 cup raisins
1 teaspoon vanilla extract


In a bowl, mix all the ingredients, until well incorporated.  I used my kitchenaid which made it easier to mix everything.

Line a cake pan.  The recipe didn't specify the size, but I used a round 8 inch pan for mine.  Make sure to line the bottom and sides of the pan.  Most fruit cakes require you to then wrap the pan in newspaper or brown paper and tie it, but this recipe didn't say to do that.

I was wondering if it would affect the bake, but it didn't and it baked up beautifully.

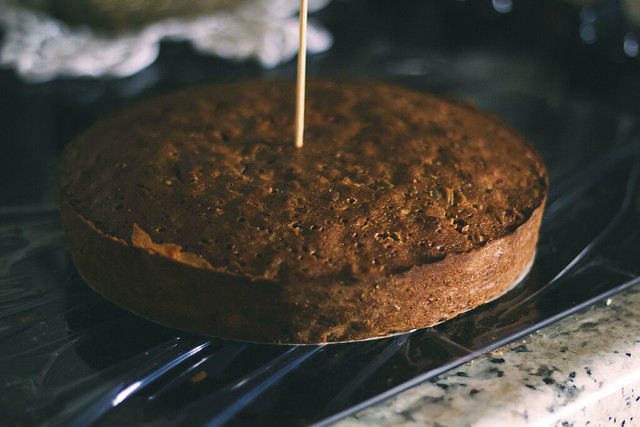
Bake in a preheated oven at 350 for one hour and a half to two hours.  The cake is ready when you insert a wooden skewer and it comes out completely dry.  Helen actually makes it a point to say that is what her grandmother used to say, so it needs to be absolutely dry which will help it keep for a long time once it's out of the oven.

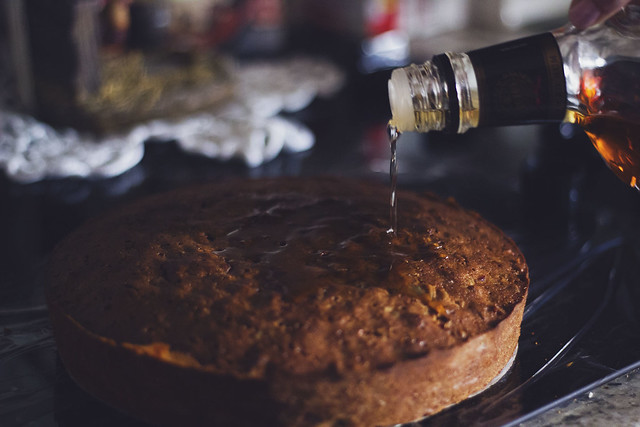
Once baked, removed from oven and allow to cool completely, then poke holes with a wooden skewer and pour over either whiskey, brandy or rum. 

Christmas Fruit Cake

I use rum in my cakes, that's our preference.  There really is no measurement but if you need to measure then I would say about 2 tablespoons or so.

Christmas Fruit Cake

Allow it soak in, then double wrap the cake in saran plastic wrap, then double layer of aluminum foil.  You can keep the cakes in a tupperware cake box, or as they are, but keep them out of sunlight and in a dark spot.  I keep my cakes in the pantry.

Every week, until Christmas, unwrap them and feed them again with more drink of your choice.  These cakes will keep for a really long time.

Enjoy :)

Friday, October 27, 2017

Vanilla Popcorn


Hey everyone, I know it's a been a while but I have a great recipe to share with you today.

As the year winds down and the holidays kick in, I find myself in the kitchen more.  Holiday baking is something I love doing and I tend to start pretty early, around the beginning of November, even though this year, I seem to have got right into it a little earlier than usual.

I've made one Christmas Fruit Cake already and will be making more this weekend.

But, when it comes to holiday baking, one of the things we most enjoy is snack foods, and I'm talking anything from chocolate peanut clusters to cookies and of course, popcorn.

Vanilla Popcorn is this year's choice, and if you've never made it before, you're going to want to try it.  I think it may even become one of your family's favorite.

Word of advice, make lots of it, because it goes fast.

Word of caution, it is not exactly healthy and it's extremely addictive, I could easily go through a whole batch on my own, so I have to control myself.

Anyway, enough talking let's make popcorn :)

Vanilla Popcorn

Vanilla Popcorn

12 cups popped popcorn (I used 1/2 cup of kernels)
1 cup sugar
1/4 cup white corn syrup
1/2 tsp salt
1 stick butter or margarine
1/2 tsp baking soda
1 tsp vanilla


In a pot add about 3 tablespoons of oil. Turn the heat on, and add 3 kernels of the popcorn to the pot. Once they pop, add the remaining kernels and cover. Shake gently over the heat as the rest of the popcorn pops, to prevent it from burning. Once the popping stops, remove from heat but keep the lid on for a few seconds more in case of any last minute kernels that may pop. Remove any unpopped kernels and pour into a big mixing bowl.

In a microwave safe bowl, add the sugar, corn syrup, salt, and butter, microwave for 30 seconds and give it a stir, then microwave for 2 minutes. Remove, stir again, and microwave for another 2 minutes. Once the time is up, carefully remove the bowl from the microwave (remember it's going to be super hot).

Add baking soda and vanilla and stir until it starts to foam. It will also thicken slightly. Pour over the popcorn and mix very well. Try to be quick because the caramel will start to harden.

Preheat the oven to 300 degrees, spread the popcorn on a cookie sheet, lined with parchment or foil. Bake for 20 to 30 minutes, making sure to stir every 10 minutes or so. Keep an eye on it though so you don't burn the sugar.

Remove from heat, let cool slightly and enjoy. It will be delicious and crunchy!!!