Monday, July 22, 2013

Portuguese 10 Egg White Cake - Bolo das 10 Claras

I don't even remember when I got this recipe, but it's always been one of my go to, easy cakes to make. Mainly because it always seems to turn out great and since I'm not a huge baker, I don't have to worry about messing it up.

You have no idea how much taking a cake out of it's mold, scares me. I have to talk myself into doing it LOL

I'm sure you've noticed that I don't have a huge collection of desserts on this blog.  Not like 90% of the other food blogs who are filled with yummy sugary goodies.

Bolo das 10 claras

The reason is simple, not only am I not a huge baker, but I have always preferred salty to sweet, and I will take a plate of comfort food over a slice of cake, any.day.

Anyway, tonight the Pastor of our new church, is coming over with his wife to get to know us.  I'm not a very outgoing person, am actually quite shy and don't really care for people in my house.  Weird huh? LOL

But I decided that I should bake something instead of just giving them store bought cookies.  So after some thinking I narrowed it down to this cake, and so it is.

If you like pound cake, you'll enjoy this one, it's simple, plain but with a hint of lemon.

Bolo das 10 claras
Bolo das 10 Claras
Portuguese 10 Egg White Cake

10 egg whites
pinch of salt
2/3 cup softened butter
1 and half cups sugar
3 tablespoons of milk
2 cups of flour
1 teaspoon of baking powder
Juice and rind of 1 small lemon

Preheat oven to 350 degrees.  Grease a cake pan with butter and flour.

Start by adding the egg whites to a big bowl, add in a pinch of salt and beat until firm.

In a separate big bowl, beat the softened butter and sugar until creamy.   Add the lemon juice and rind and the milk.  Mix well.  Add in the flour and the baking powder and mix until all ingredients are well combined.

Take a spoonful of the egg whites and add to the cake mix, slowly fold them in from bottom to top without beating.   Keep adding spoonfuls at a time and folding in gently until all the egg whites are mixed in.

Pour into the cake pan, sprinkle sugar on top to give it a nice crunchy crust and bake for 35 minutes or until golden brown and cake is done.

Remove from pan and serve.

Saturday, July 20, 2013

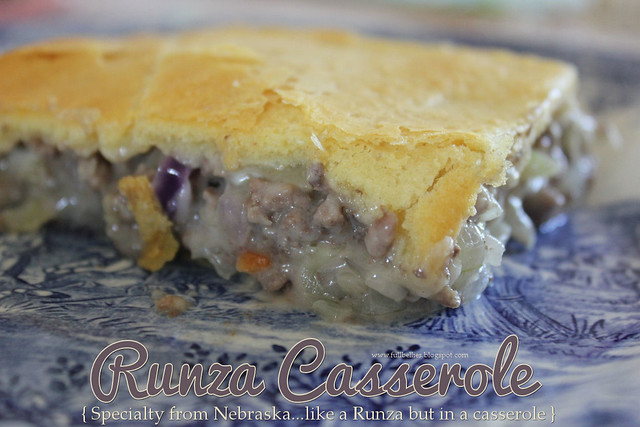
Runza Casserole

A specialty from Nebraska, the Runza is quite popular in the State.  But if you're not from Nebraska, chances are you've never heard of it and didn't even know it existed.

Runza Casserole

I'm one of those people, I had no clue it existed until a friend of mine mentioned them.  So I went online, did a little search here and there and found the Runza's, which are originally a bread dough filled with a delicious meat filling featuring cabbage.

I LOVE cabbage.  Just wanted to get that out of the way.

After doing a little more searching I started seeing the Runza Casserole pop up all over the place and I just knew that I had to try it.

Let me tell you that my kids loved it and never even noticed the cabbage in there.  Definitely going on my Casserole List.


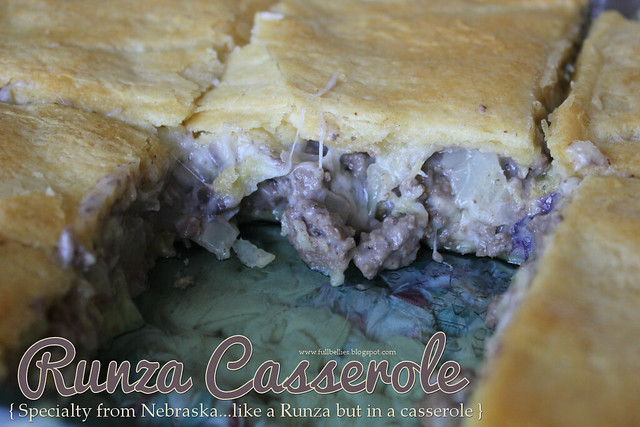
Runza Casserole
Runza Casserole
Adapted from:  Busy Bee


2 cans of crescent rolls
1 Pounds of Ground beef
2 Cups of Cabbage (I used shredded cabbage in a bag)
1/2 Cup of Onion
1 Can of Cream of Mushroom Soup
Garlic powder
Salt to taste
Shredded Mozzarella or Swiss Cheese


Preheat oven to 350 degrees.

Brown meat in large skillet, drain and return to skillet. Add cabbage, onion, garlic powder and salt, let it cook for a minute or two until cabbage is soft. Add the mushroom soup, stir well.

Grease baking dish, unroll one of the cans of crescent rolls and press into the bottom of the dish. Top with the ground beef and cabbage mixture. Sprinkle with shredded cheese.

Unroll second can of crescent roll, place over the beef mixture. Bake for 25 minutes or until golden brown.

Runza Casserole

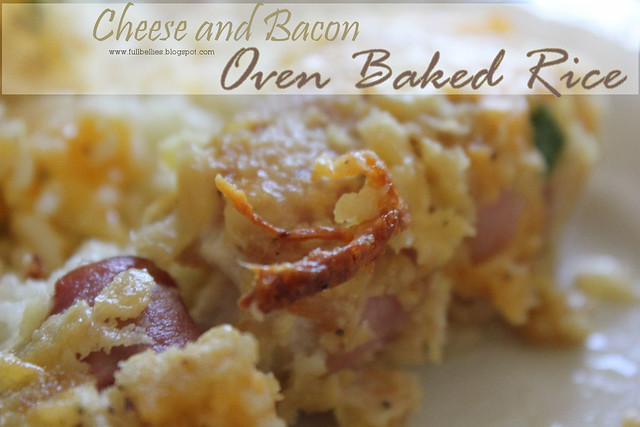
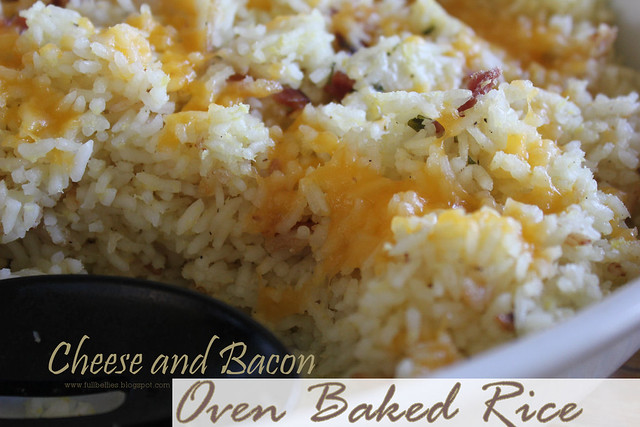
Cheese and Bacon Oven Baked Rice

Cheese and Bacon Oven Baked Rice

This is a really good way of using up leftover rice, which seems to be quite a usual occurrence in my household.

I either make this oven rice as a side dish for another meal, or I make rice pudding.  One thing is for sure, rice never goes to waste in this house :)

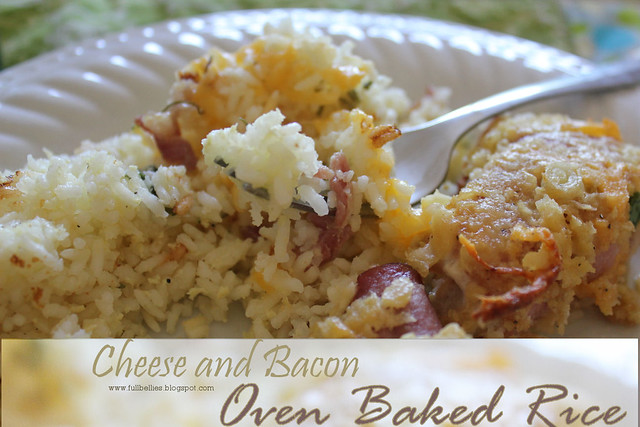
Cheese and Bacon Oven Baked Rice

4 cups of cooked rice
4 slices of bacon, diced
parsley
3 tablespoons of parmesan cheese
1 cup shredded cheddar or any other cheese you have on hand
salt and pepper
2 eggs
1 cup of milk


In a bowl, mix the rice, bacon and parsley.  Transfer to a baking dish greased with butter.

In a separate bowl, mix the eggs, milk, cheeses and salt and pepper.  Pour over the rice.

Bake at 400 degrees for about 20 minutes or until bubbly and golden brown.

Cheese and Bacon Oven Baked Rice

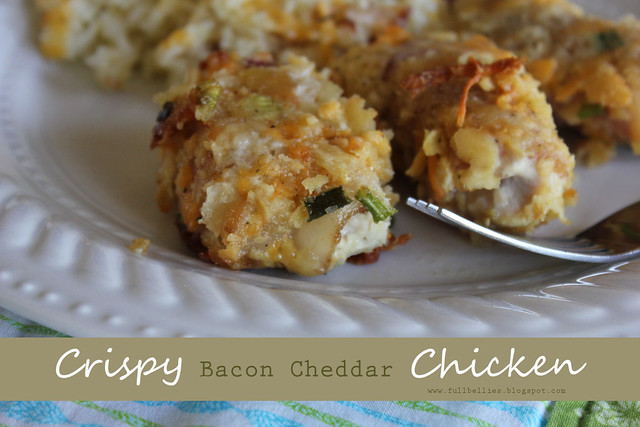
Crispy Bacon Cheddar Chicken

Crispy Bacon Cheddar Chicken

Bacon....cheddar cheese.....need I say more?

If there are two ingredients that are always in my refrigerator, it's bacon and cheese, and if don't see them in there it makes me sad.  Really!

This recipe came about when I decided to combine two chicken favorites around here.  The Crispy Cheddar Chicken and the Bacon Wrapped Chicken tenders we so enjoy.

Crispy Bacon Cheddar Chicken

1 pound chicken tenders
1 sleeve saltine crackers, crushed
salt and pepper
garlic powder
1 green onion, thinly sliced
Bacon
2 eggs
shredded cheddar cheese
Little bit of butter to dot the chicken with

Preheat oven to 375 degrees.

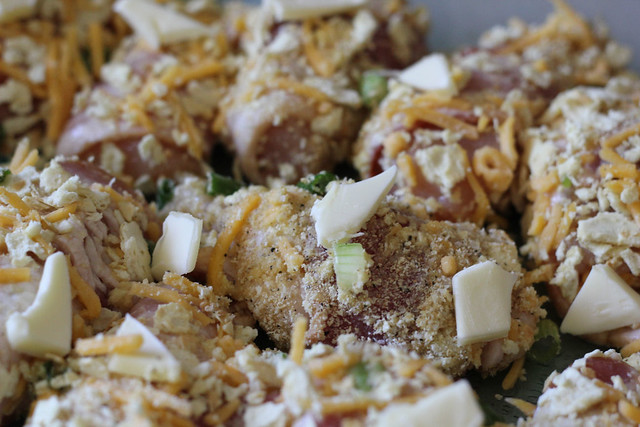
Cut the chicken tenders in half.   In a bowl add the eggs, beat with a fork and set aside.  In another bowl, add the saltine crackers, salt and pepper, cheddar cheese, garlic powder to taste and the green onion.

Crispy Bacon Cheddar Chicken

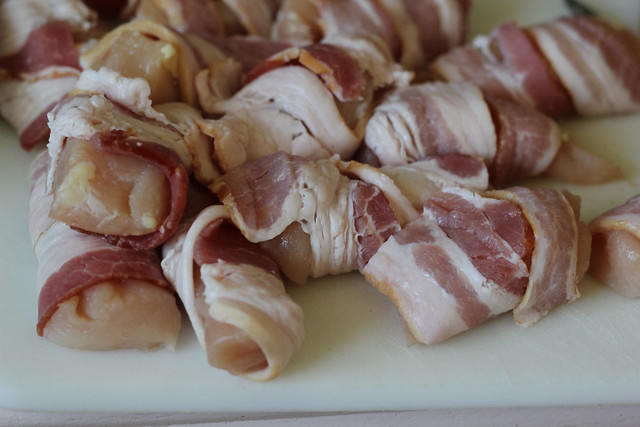
Take a slice of bacon and wrap it around each piece of chicken.  Dip the chicken into the beaten egg and then into the cracker mixture, push firmly so the mixture adheres to the chicken.  Repeat with remaining chicken.

Spray a baking dish with nonstick spray and add the chicken.   I added little dots of butter to the top of the chicken and then baked it at 375 until golden brown and the chicken was cooked through.

Crispy Bacon Cheddar Chicken

Once the chicken was cooked through and crispy golden brown on one side, I turned it over to brown on the other :)

Wednesday, July 17, 2013

Stay cool with summer sweets from Lucky Leaf


Yummy treats and Mason Jars, I mean, is there anything better than that combo???


Lucky Leaf has easy summer treats that are guaranteed to make a splash.

So summer is upon us and that means being outside, enjoying the fresh air and staying away from hot kitchens. With that in mind, Lucky Leaf has compiled a few recipes to make your summer cooler.

Let me tell you that I love Lucky Leaf Pie Fillings, but I'm sure you know that because I'm always talking about them and use them quite a lot in my desserts....but when I got the package in the mail and looked through the recipes included, my eyes immediately stopped on the one I'm sharing with you today.

Not only does it look adorable in the mason jars, but it features one of my husbands favorite flavors, Lemon.

I had NO clue that it was going to be so good, and I mean delicious make you sigh and groan in happiness good. It's like a lemon pie in a jar but with blueberries floating around. Oh goodness.


No Bake Blueberry Lemon Cheesecake Trifles
Source: Lucky Leaf

1 frozen pound cake (10.75 ounce), thawed slightly and cut into 1/2 inch cubes
18 ounces fresh blueberries
1 recipe graham cracker streusel (see below)
1 recipe no-bake lemon cheesecake (see below)

Graham cracker streusel:

9 cinnamon graham crackers, crushed to crumbs in a food processor
1/2 cup light brown sugar, packed
1/2 cup finely chopped almonds
Generous pinch of salt
1/2 cup unsalted butter, melted

No-bake lemon cheesecake filling:

24 ounces cream cheese, softened
3/4 cup granulated sugar
1 1/2 cup frozen whipped topping, thawed
1 1/2 cup Lucky Leaf Premium Lemon Pie Filling

To make the graham cracker streusel, toss all ingredients in a medium bowl until the butter is evenly distributed.

To make the cheesecake mixture, beat together cream cheese and sugar until light and fluffy. Gently fold in the frozen whipped topping and pie filling until evenly combined.

Layer the graham cracker streusel, blueberries, lemon cheesecake mixture, and pound cake cubes in a medium mason jar until filled. Repeat with remaining jars.


You have to try this dessert, and whether you're using it in mason jars, or making a big trifle, either one will be the hit of the party, especially if you have lemon loving friends and family.

Thank you Lucky Leaf for providing me with the mason jars, the recipes and the delicious pie filling.

Sunday, July 14, 2013

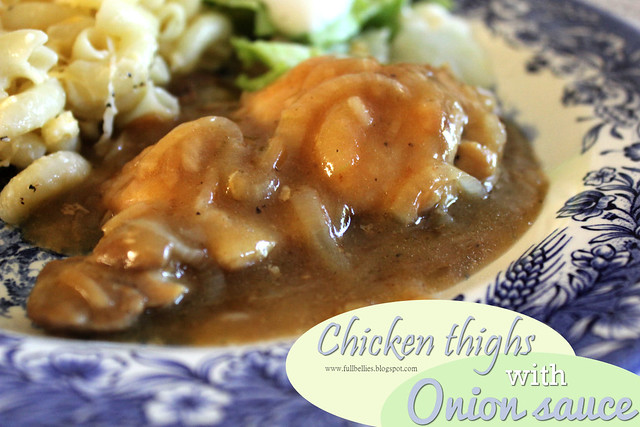
Chicken Thighs with Onion sauce

The past few weeks while I've been moving, my cooking has been very basic and I haven't followed any recipes, it's been more of a "see what is in the fridge" and make something with it.

Let me tell you that it bothers me immensely.  LOL  Really!!

I am a menu plan kinda gal and cooking out of thin air is NOT for me, but during the move and the transition I've had to adapt and make do with no cooking utensils, or no fridge, or just buying a few meats/poultry to keep in the freezer and then figuring out what to make with it when dinner rolls around......which is usually when I'm in the middle of unpacking boxes or setting up a house.

Thankfully, today is the last day of cooking this way and it couldn't come any sooner, I'm ready to get back to my menu planning and my routine.

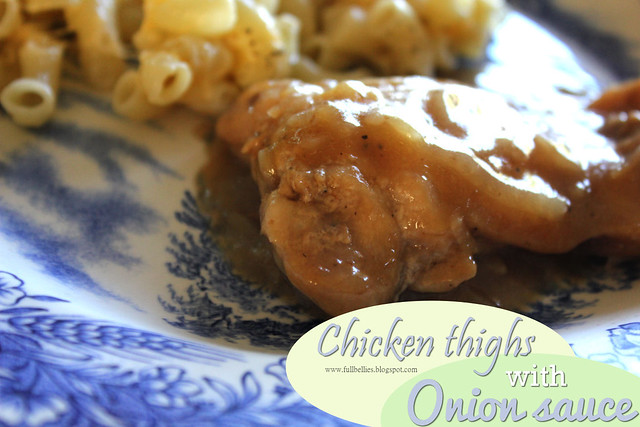
This chicken dish is another one of those that I just threw together and the family really enjoyed it.

Chicken thighs with onion sauce

Chicken Thighs with Onion Sauce

1 pound chicken thighs
1 small onion, thinly sliced
olive oil
salt and pepper
garlic powder

1 packet onion soup
water

In a large skillet, add about two tablespoons of olive oil and the chicken thighs. Season with salt and pepper and garlic powder and fry until brown.

Add the onion slices, packet of onion soup and about half a cup of water and simmer on medium heat until onion is tender.  Keep checking and stirring and if need be add a little bit more water.

When onion is cooked through, if you find the sauce is too watery, just thicken it.  I usually thicken with cornstarch, I take a spoon and scoop out some of the gravy from the skillet into a bowl, add a tablespoon or a little more if needed of cornstarch and stir well, then pour it back into the skillet while stirring constantly until thickened.

Chicken thighs with onion sauce

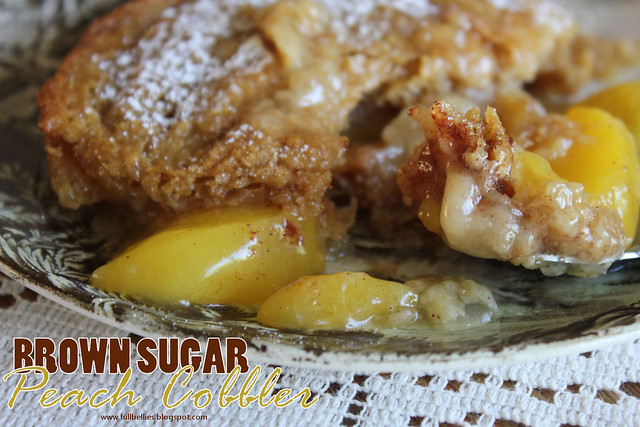
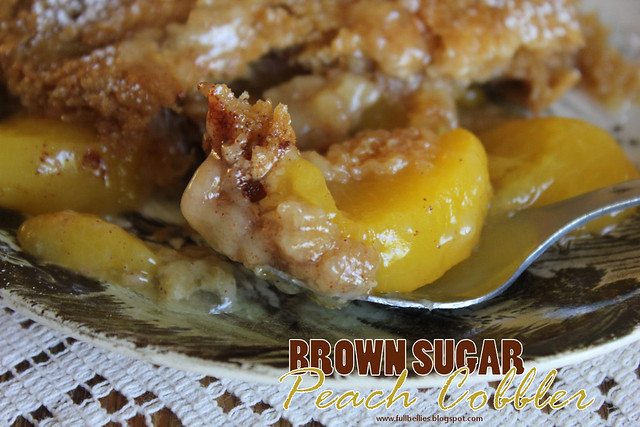
Brown Sugar Peach Cobbler

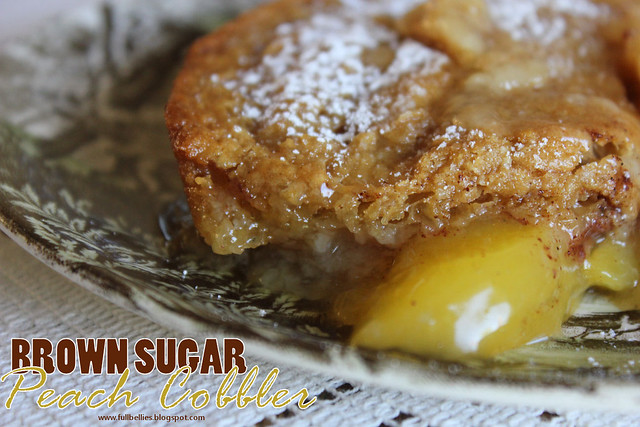
Brown Sugar Peach Cobbler

I love a good cobbler and usually I make the Blueberry which is my daughter's favorite, but sometimes I just want a good Peach Cobbler.  Yum!

This recipe is based on the Blueberry Cobbler recipe that you can find here on the blog, but it's been adapted slightly, the reason being that I was wanting to make cobbler one afternoon and didn't have the exact ingredients on hand, so I switched it up a little and the result was another delicious dessert.

Brown Sugar Peach Cobbler

Brown Sugar Peach Cobbler

1/2 cup butter
1 c all purpose flour
3/4 c brown sugar
1 tbsp baking powder
pinch of salt
1 c milk
1 can of Lucky Leaf Peach Pie Filling
Cinnamon


Preheat the oven to 375 degrees.

Place the butter in a 13" X 9" pan, you can cut it into pieces to melt faster if you wish. Place the pan into the oven and let the butter melt, it won't take very long at all.

In a medium bowl, mix the flour, 3/4 cups of the sugar, milk, baking powder and salt.

When the butter is melted, take the pan out of the oven, pour the batter in but do not stir it into the butter. Pour the pie filling over the batter, again DO NOT stir.

Bake for 40-45 mins or until golden brown. Eat warm or let it cool.

Brown Sugar Peach Cobbler

Wednesday, July 10, 2013

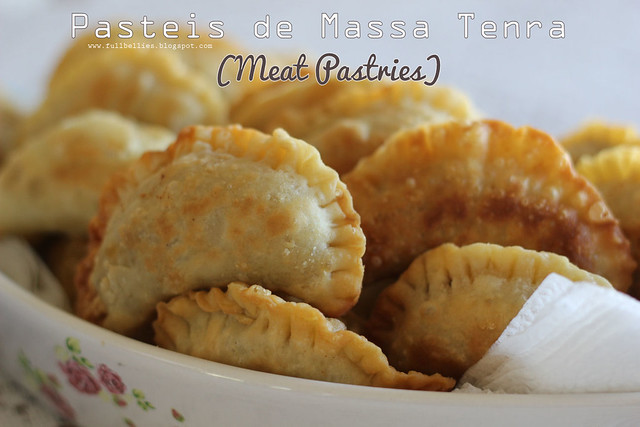
Pasteis de Massa Tenra - Meat Pastries

I think there are certain meals that will always take you back to a place in time in your life.

These transport me to my childhood kitchen where I would watch my grandmother making them at the kitchen table, rolling the dough out, cutting it, adding the filling, using the fork to seal them and then popping them into a skillet of hot oil and watching them sizzling.

It brings back so many good memories.  It was one of her favorite things to make, and it was one of my favorite things to eat.

As I sit here in my new house after moving across country, leaving the military life behind and beginning a new chapter, I was feeling quite nostalgic and homesick.  I wanted something for dinner that would comfort my soul and my tummy, and these immediately came to mind.

My kids love them, my husband loves them so much that he starts eating them as I pull them out of the skillet....and even the pugs enjoy one as a treat.

The recipe I use is the one I got from my grandmother, so I make it the way she used to, and therefore, all the ingredients are in grams...but I'll give you the equivalents too.

Pasteis de Massa Tenra
Pasteis de Massa Tenra - Meat Pastries

250 grams of flour (about 1 cups)
225 ml of water (little less than a cup), lukewarm
35 grams of butter (3 and half tablespoons), melted
3 tablespoons olive oil
1/2 teaspoon salt

Sift the flour into a bowl, add the salt and the melted butter, the olive oil and the lukewarm water.  Beat the mixture rapidly and well.

Dump the dough onto a floured bowl, then cover the bowl with a warm bowl (just take a bowl bigger than the one you're using for the dough, run it under boiling water, quickly wipe down and place it over the dough as quickly as possible).

Let the dough rest for an hour and a half.

Pasteis de Massa Tenra

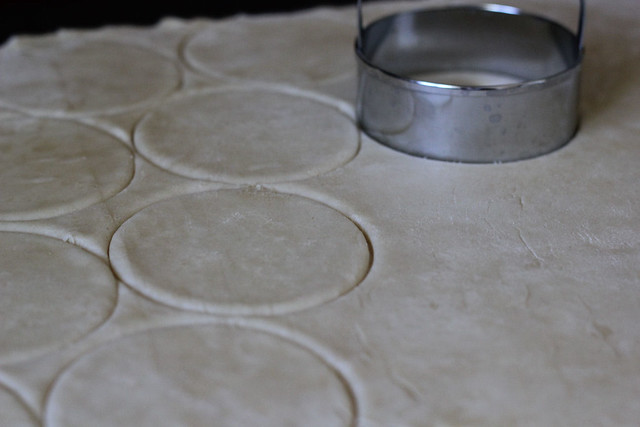
Roll out the dough on a floured surface, cut with a biscuit cutter or a glass into circles. 

Pasteis de Massa Tenra

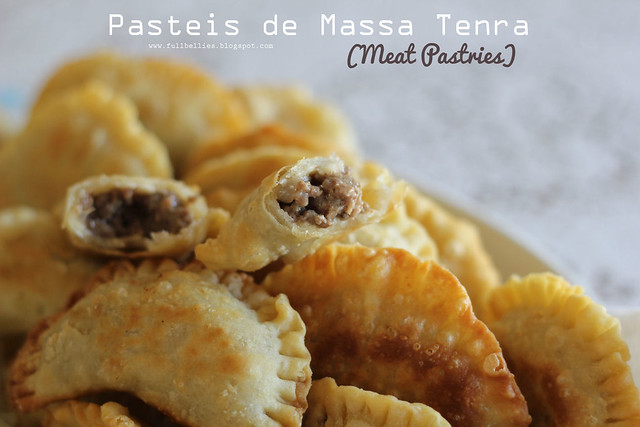
Add the meat filling (little more than a teaspoon), fold the dough over and seal the edges using a fork.  Place the pastries on a floured surface.

Fry in hot oil until golden brown and then transfer onto paper towels to absorb oil.  Serve immediately.

Pasteis de Massa Tenra

Pasteis de Massa Tenra

For the meat filling, I make a very basic one.

Meat Filling

1 lb ground beef
1 small onion finely diced
1 garlic clove, finely diced
salt and pepper
2 tablespoons butter
bay leaf
paprika
nutmeg
white sauce (bechamel)
parsley

In a skillet, add the butter, the onion and the garlic.  Cook over medium heat until onion is transparent, don't let the garlic burn.

Add the ground beef and continue cooking until browned.  Season with salt and pepper, bay leaf, paprika and a dash of nutmeg.  Stir well and simmer for a minute or two.

For the white sauce, I just make a simple bechamel, this recipe makes about a cup.


White Sauce (Bechamel)

2 tablespoons butter
2 tablespoons flour
1 1/4 cups milk, heated
Salt and pepper


Melt the butter in a saucepan. Stir in the flour and cook, stirring constantly, don't let it brown — about 2 minutes. Add the milk, continuing to stir as the sauce thickens. Bring it to a boil. Add salt and pepper to taste, usually I add nutmeg, but since I've already added some in the meat filling I'm omitting it from here.

Cook for a minute more, then remove from heat.