Wednesday, August 15, 2018

Lemon Chicken

My 15 year old gets easily bored with food, and for some reason he has an issue with chicken.  It's not that he doesn't like chicken, it's just that he finds it boring at times, so I'm always looking for new ways to prepare it.

This is a super easy and simple way to make chicken in your cast iron skillet.

It is chock full of flavor, and perfect with a salad, rice, mash or buttery garlic noodles which is what I served with it last night.

If you're interested in how I make the noodles, I just cook them al dente, and feel free to use whatever noodles your family prefers, I use the same method whether I'm making spaghetti, fettucine, rigatoni or penne.

Once the noodles are cooked, drain them and then add a tablespoon or two of butter, little drizzle of olive oil, chopped garlic (you can use powder if you don't have fresh on hand) and a sprinkle of parsley.  That's it!!!

Now onto the chicken....


Lemon Chicken

1 pound chicken breasts
1/4 cup lemon juice
2 tablespoons olive oil
1 teaspoon black pepper

1 teaspoon dried oregano
1/2 teaspoon salt
1/4 teaspoon chopped garlic

Place the chicken breasts in a ziploc bag, add the remaining ingredients and shake well.  Let rest in the fridge for an hour or overnight.

Heat a cast iron skillet and when it starts smoking a little, add the chicken breasts.  Discard the marinade.

Cook for about 5 minutes on each side until nice and brown.  Transfer to the oven, and bake at 400 for about 20 minutes or until chicken is done.

To serve, sprinkle with fresh parsley and some sliced lemon.

Serve with rice, mashed potatoes or pasta. 

Thursday, May 24, 2018

Homemade Teriyaki Sauce

A few weeks ago, I had placed down on my meal plan - Beef Teriyaki.

It used to be one of our favorite meals but it had also been quite a long time since I had made it.  Stupidly, I should have checked my pantry beforehand, but I was convinced I had Teriyaki sauce on hand.

Well, no, I didn't and honestly didn't even realize it until I had sliced up the beef and was ready to start making dinner.

One thing I'm always talking about on my main blog, is my belief that you don't need to always buy everything you run out of, because most of what you buy at the store can be easily  made at home and much healthier too.

I quickly went on the hunt for a good homemade teriyaki sauce, and found one over on Taste and Tell. It came out so good and it was easy to make.

Give it a try and let me know what you think.


Homemade Teriyaki Sauce

1 cup water
5 tablespoons packed brown sugar
1/4 cup soy sauce
1-2 tablespoons honey
1 large clove of garlic, finely minced
1/2 teaspoon ground ginger
2 tablespoons cornstarch
1/4 cup cold water


Combine the 1 cup water, brown sugar, soy sauce, honey, garlic and ginger in a medium saucepan and set over medium heat.

In a small bowl, combine the cornstarch with the 1/4 cup water and whisk until dissolved. Add the cornstarch mixture to the saucepan.

Heat the sauce until it thickens to your desired thickness. If the sauce becomes too thick, add more water to thin it out.


**I omitted the first two steps because I was in a hurry, so I basically sprinkled the cornstarch over the meat and stirred well to make sure it was well incorporated.  Dumped the meat, and sliced onion into the skillet, then added all the other ingredients and mixed well.

Then cooked the steak as I normally would.  It turned out really well and was delicious.  

Amish Friendship Bread


I had been meaning to make this bread, for a very long time.  I have quite a few Amish cookbooks in my collection and I think every single one of them has a recipe for this amazing cinnamon cake or bread.

The variations are numerous, but the concept is pretty much the same.

I read through the books, also researched a bit online and decided to try the easiest one I could find, mainly because every other one I wanted to make, I seemed to be missing an ingredient.

For those that don't know, Amish Friendship Bread is made from sourdough starter, where after keeping a cup for yourself to bake your bread, you are supposed to share the other remaining cups with friends and family.

I ended up with 4 cups of starter and used one right away, placed the remaining in ziploc bags and froze the rest.  When I want to make a fresh batch, I pull one of the baggies out of the freezer and let it thaw on the counter.

Hope you enjoy this one :)


Amish Friendship Bread Starter

1 cup milk
1 cup brown sugar
1 cup flour

Day 1 - In a large glass, ceramic, or plastic container, mix 1 cup milk, 1 cup brown sugar and 1 cup flour.  Cover with a cloth or some plastic wrap and keep at room temperature, away from drafts.  (I keep mine on the kitchen counter, in the corner away from the window or door).
Day 2 and 3 - Stir well and cover back up.
Day 4 - Add another cup of milk, brown sugar and flour, mix well and cover again.
Day 5 and 6 - Stir well and cover back up.
Day 7 - Add another cup of milk, brown sugar and flour, mix well and cover again.
Day 8 and 9 - Stir well and cover back up.
Day 10 - Add another cup of milk, brown sugar and flour, mix well.  Take one cup of the sourdough starter to bake with.   At this point you can take another cup of starter and place it into a fresh container to start another sourdough starter, or you can take the remaining 3 cups of starter, place each in a ziploc bag and freeze for when you want to use it up.  

If you decide to start another batch, take one cup of your already done starter and treat is as day 1.  Follow the directions for the remaining days.

For the actual friendship bread, I looked up a few recipes and was very curious about one I found on youtube, which uses pudding mix in the batter.  I HAD to try it and it turned out so delicious, it is going to become my go to friendship bread.
 
Amish Friendship Bread
Youtube:  CM Coleman

1 cup Amish Friendship bread starter
3 eggs, lightly beaten
1 cup oil
1 cup sugar
1/2 cup milk
1 box (3 oz) vanilla pudding mix
2 cups flour
1 1/2 teaspoon baking powder
1/2 teaspoon baking soda
1 tablespoon cinnamon
1 teaspoon vanilla extract

 Mix all ingredients together in a standing mixer, or in a bowl, by hand.

Preheat oven to 350 F. 

Pour into 2 greased cake tins, I used my 8 inch ones.  Sprinkle with sugar and bake for about 50 minutes, or until a toothpick inserted in the center, comes out clean.

This cake is delicious, fluffy and super soft.  It's wonderful with a cup of coffee or tea.

Enjoy!!!

Monday, March 26, 2018

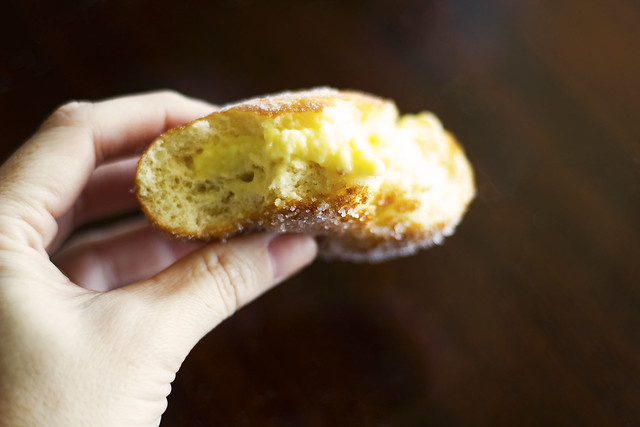
Bolas de Berlim - Custard Filled donuts


When I was growing up in Portugal, one of my earliest and most fondest memories, are of the times we would go to the local bakery for a coffee and a cake.  Usually, it would be on Saturday afternoons, and it was called "Lanche", which is not lunch or dinner, but more of a snack in between the two big meals.

The adults would have a coffee and I would eagerly await my glass of chilled coca cola with a slice of lemon and tons of ice, and along with it, one of these Bolas.

_MG_0734

Sometimes, we would have them while at the beach, the vendor would come around yelling out "Bolasssss de Berlim", and we would buy one and enjoy it right there on the beach towel, our fingers full of beach sand and our mouths covered in sugar.

There are memories that stay with you forever, and these are certainly some of those.

I had not made these before because I always felt that they would probably take up too much time, or maybe I thought they would be difficult to make.

But recently, I got a huge craving for these and decided that it was now or never, and goodness, am I glad I gave in.

Not only are they easy to make, but even the egg custard creme inside was a pinch to make as well.  If you're wondering what it is, that is good ol Creme Pasteleiro, or Creme Patisserie.

I do hope you give these a try, they are amazingly delicious and your family will love them for sure.

_MG_0733
Bolas de Berlim

325 grams all purpose flour
25 grams butter
25 grams sugar
Pinch of salt
100 ml water
2 eggs
1 packet dry yeast

Sugar for rolling

In a stand mixer, add all the ingredients, and beat well for 8 minutes.  Check the dough, if it is too dry add a little bit of water a time until you achieve a smooth elastic dough.  If it's too wet, add a little bit of flour at a time.

Pull the dough out and then measure out 50 gram dough balls.  I have a kitchen scale that works with both grams and ounces.

You should get about 12 or so pieces of dough.

Roll each into a ball and place on a lightly greased baking sheet.  Cover with a clean towel and let rise until triple in size.

Fry at a temperature of around 300 F, until gold brown, flipping over to ensure that both sides are nice and golden.

Transfer to a paper lined dish to remove excess oil.  Quickly roll in sugar to coat and set aside.

You can fill these with either jam, vanilla cream or creme patisserie.

To fill, make a 45 degree cut just above the middle of each donut ball,making sure not to slice all the way through, and fill.  You can also cut them straight down the middle as well, again making sure not to cut all the way through.

Enjoy :)

Tuesday, February 27, 2018

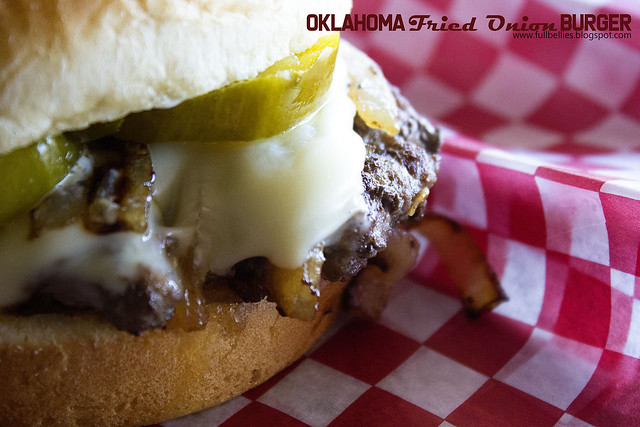
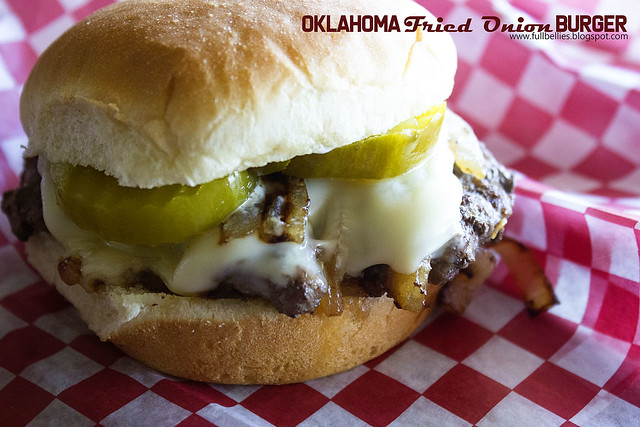
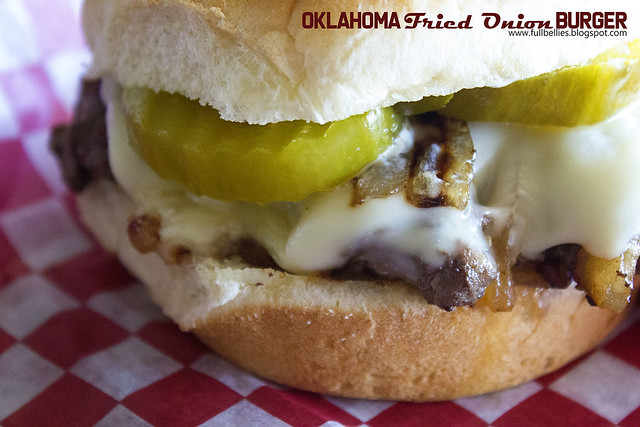
Oklahoma Fried Onion Burgers

Oklahoma Fried Onion Burgers

One of the very first times I had my mother in law prepare something for me to eat, it was at their home in Oklahoma, and she presented us with Onion Burgers.

I loved hamburgers, I loved onion and quite frankly, there was nothing about that combination that wouldn't have made me a very happy girl.

I loved the burgers so much that I asked her to show me how to make them.  Surprisingly, so easy but oh so delicious.

I've made them over the last 20 years, but it had been a while now since we enjoyed these, I don't think I had yet made them since moving to Texas.

As I was preparing my menu plan last week, I came across a picture of a fried onion burger and immediately jotted down the Onion burgers on the meal plan.

Then I realized that I hadn't yet shared it here on the blog, and that of course had to be remedied too.

My mother in law cooks all the onion on one side of the griddle, and the burgers on the other.  I do that sometimes too, but the past few times I've been doing it slightly different, and I'll explain that in the recipe below.

By the way, as I'm sure you've noticed, I'm back to cooking and sharing recipes, and I really do hope you're enjoying my return.  If you are, let me know down below and also let me know how long you've followed Full Bellies :)

Right, now onto the delicious Oklahoma Fried Onion Burger.

Oklahoma Fried Onion Burgers

Oklahoma Fried Onion Burgers

1 large onion, halved and thinly sliced
1 pound ground beef
Salt and pepper to season burgers
Butter

Swiss or American cheese (truly your choice of cheese, really)
Hamburger Buns
Mayo, Mustard or Ketchup
Pickles

If you want a thick huge burger, then divide the ground beef into 4 patties.  I usually get 8 burgers out of mine because I don't make them as thick, and also flatten them out quite a bit.


In a griddle, place a few pats of butter.  Take the onion slices and make a mound for each burger patty, on the griddle.  So if you're having 8 burgers, divide the onion slices into eight equal parts and place them down on the griddle.

Take the burger patties and place them on each of the onion mounds, then press down so that the onions stick to the burger.

 
Cook until the onions turn a nice gold brown, about 8 minutes or so.  Flip them over, and cook on the other side until the patty is brown and cooked all the way through.
 

Place a slice of cheese on each patty and let it melt, then transfer to the hamburger buns.  Add desired condiments and toppings and serve.

We like ours just plain with either some mayo or ketchup, and a few slices of pickle, nothing more.  Truly they don't need anything else on, they are divine just like this.

Oklahoma Fried Onion Burgers