It's one of those things that is often used in Portuguese cooking, or at least for me. I find that it's the best marinade for not only pork but beef, chicken and even fish.
You can find it at the store but I've always made it at home, it's simple and it's really good too and I'm a huge believer in that if I can make it at home and see what I'm actually putting into it, I would rather do that :)
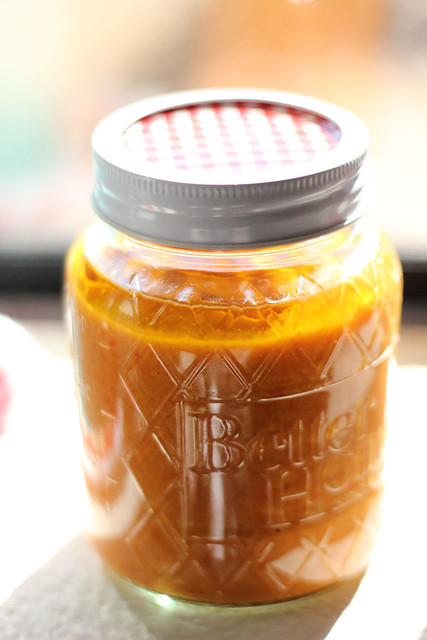
Massa de Pimentao - Roasted Red Pepper Paste
4 large red peppers
100 ml olive oil (that's about 1/2 cup)
10 garlic cloves
1 teaspoon salt (you can add more or less according to your taste)
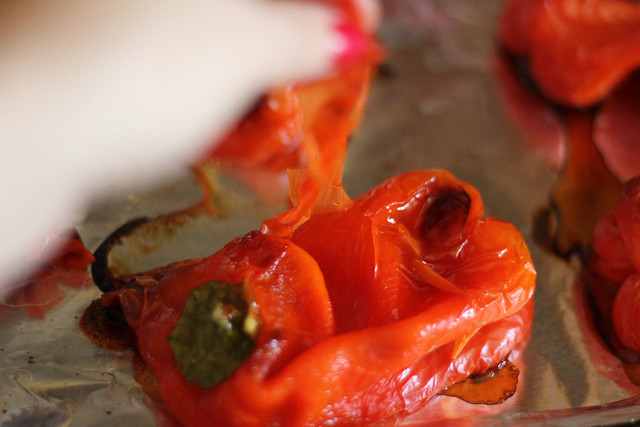
First I start by roasting the red peppers, all I do is line a baking pan with foil, wash the red peppers well, then lay them on their side.
I turn the oven to 400 degrees, set the timer for 15 minutes and start roasting. After 15 minutes, I take my tongs and turn the pepper about 1/4 turn.
Pop back in for another 15 minutes and I keep doing that until it's nice and soft with black charred skin.
I remove them from the oven and let them cool down on the baking sheet. Once cool, remove all the skin, open them up and remove the seeds too. Set aside.
Pat them dry with a paper towel to remove any excess liquid.
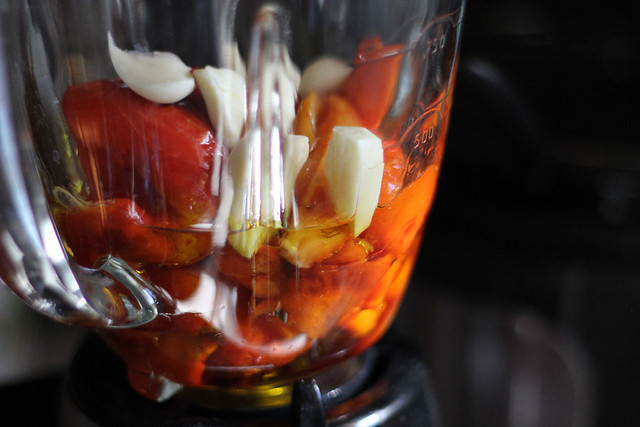
Then pop them into a blender, add the olive oil, garlic cloves and salt and blend until smooth.
Pour into a mason jar and add a bit of olive oil on top to cover, it will help keep it from going moldy and will also preserve it longer :)
That's all there is to it.
Saturday, December 31, 2011
Creamy Chocolate Mousse
It's one of those desserts that you always find at Portuguese homes and at Portuguese restaurants, matter of fact it's the one dessert, other than Molotoff that I would always request when the family went out to eat.
It's super easy to make, it's delicious and fluffy and airy and just heaven in your mouth.
Here's how I make mine, been doing it for so many years. Thought it would be a nice dessert for our meal tonight to ring in the New Year.
Creamy Chocolate Mousse
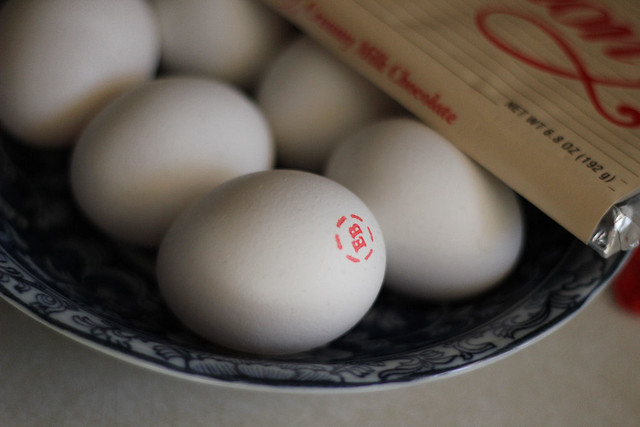
6 eggs
1 can condensed milk
1 bar of milk chocolate (I like using the Hershey's Giant bars)
1 tablespoon of butter
Separate the egg whites from the yolks.
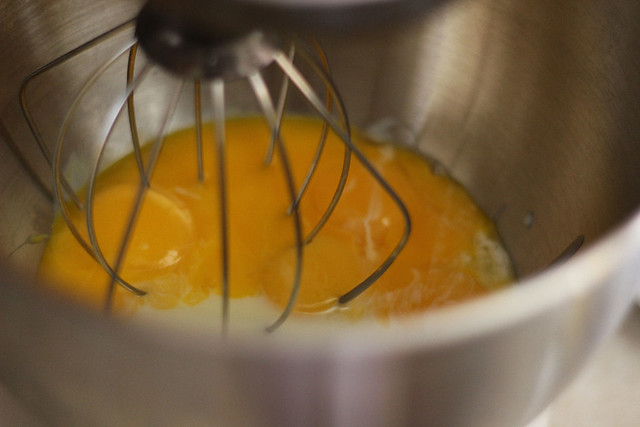
Add the yolks to a mixing bowl and pour in the can of condensed milk. Beat until creamy.
In a separate bowl, beat the egg whites until stiff.
Break the chocolate into small pieces, add to a microwave safe bowl, add in the tablespoon of butter and microwave for a minute. Remove and stir well until chocolate is completely melted.
Add the chocolate mixture to the egg yolk and condensed milk mixture, stir well to incorporate.
Fold in the egg whites, a little at a time until well combined.
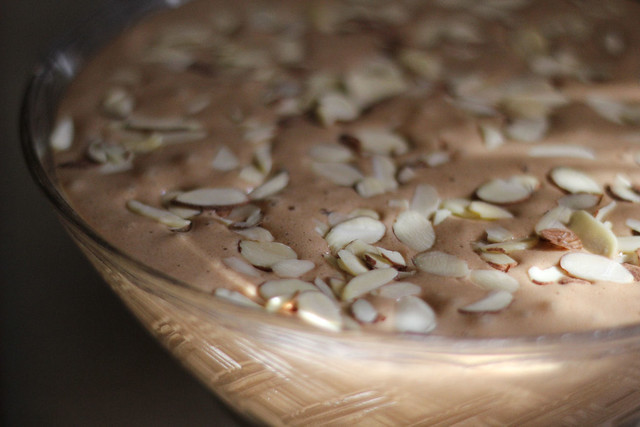
Pour into a serving dish and top with some slivered almonds. (you can omit those if you don't like them, but I love them on the mousse)
Cover with plastic wrap and refrigerate for at least an hour before serving.
That's it, nothing to it. Enjoy :)
Saturday, December 17, 2011
Peppermint Patties
Oh wow, one of my favorite sweets to have and now I can make them at home.
So I had seen these a while ago in one of my Taste of Home cookbooks and then a few days ago, my sweet friend Jen had tried them and said they were really good. That was all I needed to decide that I had to make them today.
I'm going to give you the recipe from Taste of Home, though my friend Jen tweaked it a little, she made a big slab of the patties instead of the actual round little ones. I thought I would go ahead and try the actual round patties but let me tell you, it was a little time consuming and not as easy as it seems, so next time, I'm just going to follow what Jen did and make it a big slab and just cut them into squares instead :)
It seemed to all go downhill for a minute, hubby and I were just struggling to pull it together LOL Moral of the story, stick to the original recipe or Jen's, don't try to take shortcuts. By the way, my notes are in red.
Perfect Peppermint Patties
Ingredients
3-3/4 cups confectioners' sugar
3 tablespoons butter, softened
2 to 3 teaspoons peppermint extract (I used only 2 and it was more than enough)
1/2 teaspoon Spice Islands® pure vanilla extract
1/4 cup evaporated milk
2 cups (12 ounces) semisweet chocolate chips
2 tablespoons shortening
Directions
In a large bowl, combine the first four ingredients. Add milk and mix well. Roll into 1-in. balls and place on a waxed paper-lined baking sheet. Flatten with a glass to 1/4-in. Cover and freeze for 30 minutes.
(I spread mine into a pan like Jen did)
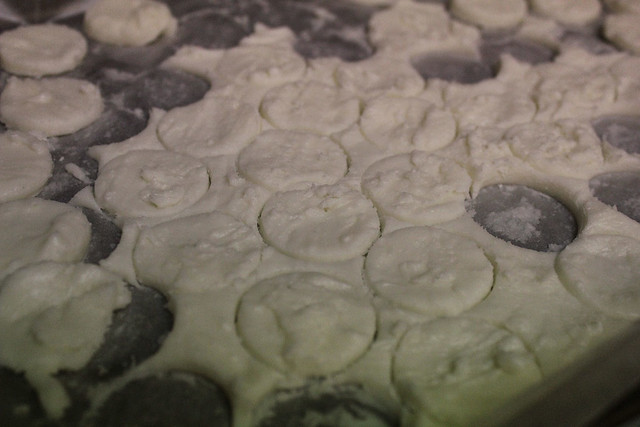
(Then I cut out little circles, next time I'll either keep it in a slab or follow the recipe lol)
(Hot chocolate meets cold filling and proceeds to melt cold filling which makes it really hard to dip into the said melted chocolate, which then becomes a big mess trying to pour onto the filling. Lesson learned, just do what recipe says LOL)
In a heavy saucepan or microwave, melt chocolate chips and shortening; stir until smooth. Dip patties, allowing excess to drip off. Place on waxed paper; let stand until set. Yield: 5 dozen.
Nutrition Facts: 1 serving (1 each) equals 67 calories, 3 g fat (1 g saturated fat), 2 mg cholesterol, 7 mg sodium, 11 g carbohydrate, trace fiber, trace protein.
Pepperoni Bread
We love all kinds of breads and especially if they have meats inside.
My kids love pepperoni so I'm always looking for a quick and easy yummy recipe to try.
On my facebook page a few weeks back, Stacey mentioned a Pepperoni Bread that she makes and I asked her to email me the recipe.
Here's Stacey's recipe, I followed it but then deviated a bit because I didn't realize that I had an appointment I had to go to, so I popped them into the crockpot instead of the oven and the result was different than what they're supposed to look like....the filling tended to stay all in the bottom LOL
BUT, it was delicious nonetheless, next time though I'm sticking to Stacey's recipe and following it to a tee. :)
1/4 - 1/2 lb sliced pepperoni cut in quarters
2 eggs
palmful of oregano
palmfull of garlic powder or garlic salt (your choice, I use garlic powder)
2 ½ cups shredded mozz cheese
2 cans of pillsbury FRENCH LOAF (in the cold section of grocery store)
Cookie Sheet
Pam Spray (cooking spray)
Instructions
-Preheat oven to 350
-spray cookie sheet lightly with pam
-Mix together everything in a mixing bowl using a spoon until well mixed.
-Open one can of the french loaf and gently pull along the slit they have in it ….
-pour half of your mix onto the loaf and spread close to the edges but not touching them
-now roll the loaf towards you, like you were making a wrap or pumpkin roll
-once rolled together, tuck in the ends and kneed with your fingers
-flip roll over, place roll seem side down on cookie sheet
-make 3 slits lightly on the top (side, middle, side) to vent
-follow steps to make the next one
Once done and have both rolls on the cookie sheet, place in the preheated oven for 20-25 minutes or until golden brown like cookies.
Cool for about 10 minutes, cut into slices and enjoy.
Can use this as a dinner and with a side dish or just as a snack or party tray!
You can use pizza sauce or sour cream for dipping :)
Enjoy!
Homemade Powdered Sugar
Did you know that you can make Powdered Sugar at home?
Did you know that it is extremely easy?
Did you know that next time you're in the kitchen baking and you realize you are out of powdered sugar, you do NOT have to run to the store or put the recipe away for another day?
Well I will be honest and tell you that I didn't know, any of those things, until I ran out of Powdered Sugar one day and was determined to make the recipe if it killed me. So I went looking for a recipe, because, you know, you can pretty much make everything at home so why not powdered sugar? I was completely ready to not find one and then I did, over at Whole New Mom. I LOVE that site, you have got to go over and check it out, she has some of the best recipes and homemade mixes you can find.
For more hints, tips, and info on Powdered sugar and sugar substitutes check out her original post.
Here we go, you'll totally kick yourself when you realize how easy it is.....
Powdered Sugar
Ingredients
1 1/2 cups granulated sweetener of choice (I used white sugar)
1 Tbsp cornstarch or arrowroot (I used cornstarch)
Method
1. Place the sweetener and either cornstarch or arrowroot into your blender.
2. Blend on high continuously until the mixture is of uniform powdered consistency.
3. Keep the lid on the blender until the powder settles.
That is it! That is IT folks, did I not tell you this was super easy? No more crying when you run out, you can totally make it yourself and trust me, it works just as well as the stuff you buy at the store, matter of fact, I'm using some homemade powdered sugar right now for the Peppermint Patties I'm making.
Would you like the recipe to those as well?
Friday, December 16, 2011
Bake your Heart Out Winners
Wednesday, December 14, 2011
Chef Cat Cora's New Mediterranean Recipes and Product Line
I think we all know who Chef Cat Cora is right?
Well I was contacted a few weeks back and asked if I would be willing to try some of her new products. Yum!
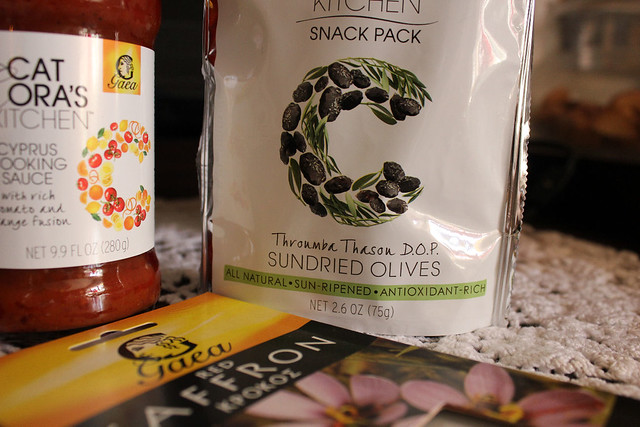
So, here is what I got in the mail and funny story, the day I received this package I was making Seafood Paella and had run out of Saffron, and low and behold, some in the package :)
Starting with the Smoked Eggplant Tapenade. Oh my, that was really really good.
I love eggplant but I wasn't quite sure if an Eggplant Tapenade would be tasty, I was pleasantly surprised.
The Cyprus Cooking Sauce is infused with Orange. If you like citrus based sauces, you'll really enjoy this one.
Ok, now I will say that these were just ok for me. The dried olives snack pack wasn't what I was expecting. It definitely is infused with strong good olive oil because that is the major flavor going on there.
And then there's the saffron, I think one of my favorite spices but one that I don't get to use very often.
I was preparing Seafood Paella that day and was so glad to see it arrive in the package. If you've never tried saffron, you really don't know what you're missing.
So all in all, I enjoyed the products and I think that if you are looking for the perfect gift for you food loving or cooking lover friend or family member, you can't go wrong with some Cat Cora Mediterranean products.
Cat Cora’s Kitchen by Gaea is now available for the first time nationwide at specialty food stores and major retailers including Kroger, Target and Whole Foods. Products range from $3.18 - $24.55. Higher end products in the line such as the XXX oil and the Oxymelo Vinegar (think of it as the Greek Balsamic) are also great for stocking stuffers.
Just head on over to Cat Cora's Kitchen and check out the great products available.
Well I was contacted a few weeks back and asked if I would be willing to try some of her new products. Yum!
There are an abundance of studies indicating the significant benefits of the Mediterranean diet, and even last week The Los Angeles Times featured the healthful style of eating citing support from Harvard University’s, Dr. Dimitrios Trichopoulos who called the Mediterranean diet “possibly the best ever!”
Not sure how to eat the Mediterranean way? Simple! Just head over to your local grocery store and pick up Cat Cora’s Kitchen by Gaea products.
The Greek-American celebrity chef has teamed up with Gaea, an award-winning Greek specialty foods manufacturer to create her new line of gourmet olives, olive oils, vinegars, cooking sauces, tapenades and other authentic Greek specialties. All of the products are made from the finest ingredients and are 100 percent natural, free from artificial colors, flavors and preservatives.
Looking for an alternative to the heavy holiday dips? Try Cat Cora’s Kitchen by Gaea’s tapenades with bread and crackers! Instead of a traditional chocolate cake for your holiday party, try a lighter yet surprisingly decadent-tasting alternative like Cat’s Lathi Torte, an olive oil cake rich in healthy fats and antioxidants. This is just one of Cat’s specially created recipes that will surely have your friends and family wanting to try the Mediterranean lifestyle, too!
So, here is what I got in the mail and funny story, the day I received this package I was making Seafood Paella and had run out of Saffron, and low and behold, some in the package :)
Starting with the Smoked Eggplant Tapenade. Oh my, that was really really good.
I love eggplant but I wasn't quite sure if an Eggplant Tapenade would be tasty, I was pleasantly surprised.
The Cyprus Cooking Sauce is infused with Orange. If you like citrus based sauces, you'll really enjoy this one.
Ok, now I will say that these were just ok for me. The dried olives snack pack wasn't what I was expecting. It definitely is infused with strong good olive oil because that is the major flavor going on there.
And then there's the saffron, I think one of my favorite spices but one that I don't get to use very often.
I was preparing Seafood Paella that day and was so glad to see it arrive in the package. If you've never tried saffron, you really don't know what you're missing.
So all in all, I enjoyed the products and I think that if you are looking for the perfect gift for you food loving or cooking lover friend or family member, you can't go wrong with some Cat Cora Mediterranean products.
Cat Cora’s Kitchen by Gaea is now available for the first time nationwide at specialty food stores and major retailers including Kroger, Target and Whole Foods. Products range from $3.18 - $24.55. Higher end products in the line such as the XXX oil and the Oxymelo Vinegar (think of it as the Greek Balsamic) are also great for stocking stuffers.
Just head on over to Cat Cora's Kitchen and check out the great products available.
Thank you to Tara from Fifteen Minutes Public Relations for the samples. All opinions are mine alone.
Monday, December 12, 2011
Bake Your Heart Out Recipe Book - Review and Giveaway
I love cookbooks, you've all heard me say it many many times on my blogs. I have a huge collection and for some reason I just can't seem to stop collecting more, so when I was contacted by Lucky Leaf regarding their new Bake your Heart Out Recipe Book, I obviously said yes.
Best part is that I got to review a really good dessert cookbook, try some awesome yummies and I get to giveaway 2 cookbooks to 2 lucky readers on my blog. How cool is that?
So first, let me tell you all about the new cookbook and by the way, if you don't want to wait to see if you win one, or if you just want to go ahead and get a few more copies, you can do so by going here.
Cherry-Chocolate Macaroon Pie, Simple and Sweetie Blueberry Cobbler and Cherry Bliss Brownies are great for holiday parties and sharing with friends. How about making an ordinary winter morning special for your family with Sweet Apple-Cinnamon Baked Oatmeal? Yum!
Oh yeah, there are 20 delicious recipes in there including colorful photos :)
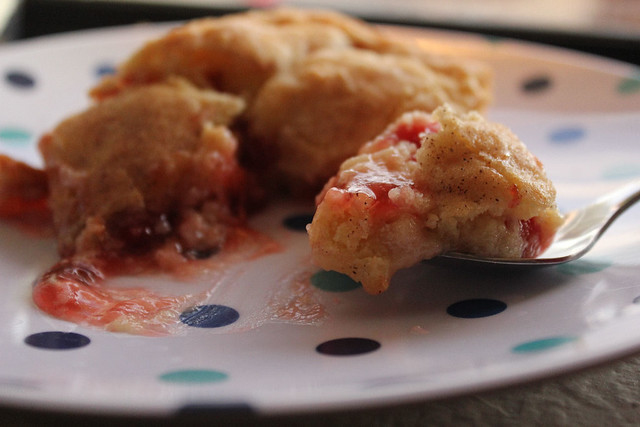
So the first thing I tried, was actually for my daughter Jasmine, who loves cherries. I will tell you right now that I am not a big fan of cherries or cherry anything, if it's not the actual fresh fruit, I don't like it, so I made this with the intent of surprising her and not having a bite at all LOL
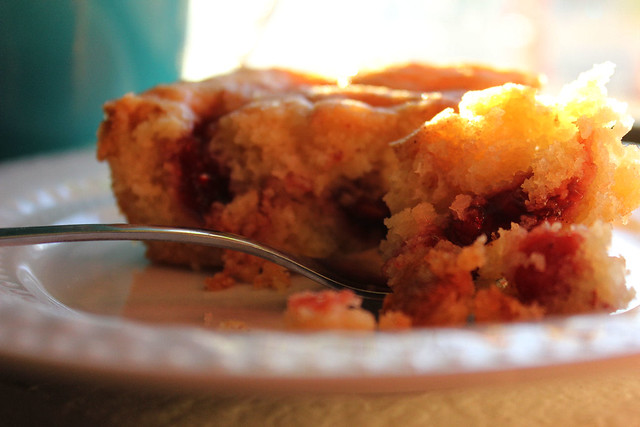
But.......I did. And I loved it, it was really good and I tell you that as a cherry hater.
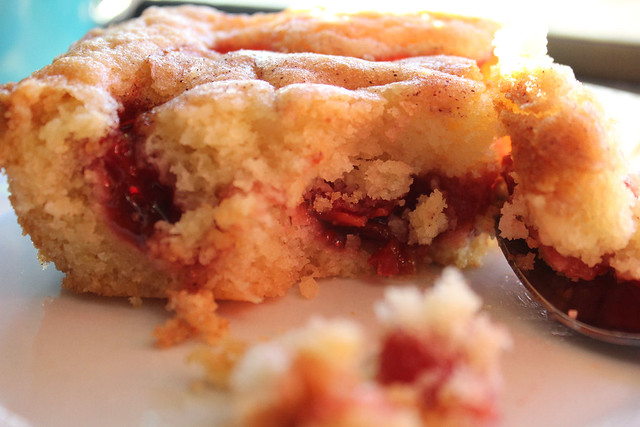
Sweet Vanilla Cherry Cake
3 eggs, beaten
1 cup sugar
¾ cup cooking oil
1¾ cups all-purpose flour
3 teaspoons baking powder
½ teaspoon vanilla
Dash of salt
1 21-ounce can LUCKY LEAF ® Regular or Premium Cherry Pie Filling
1 Tablespoon sugar
½ teaspoon ground cinnamon
Preparation
Preheat oven to 350°F.
Beat together eggs, sugar, oil, flour, baking powder, vanilla and salt.
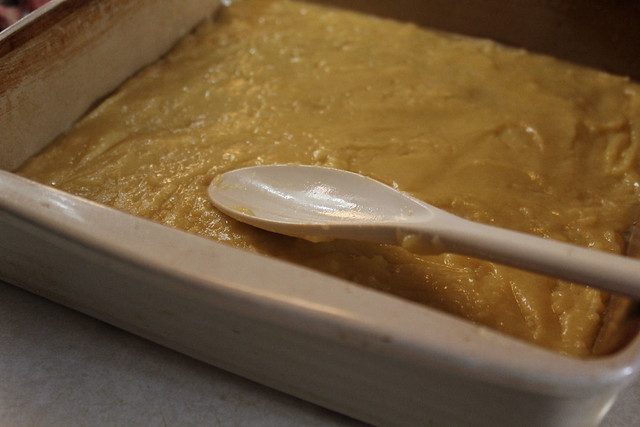
Spread 2/3 of the batter into a greased 13”x9” baking pan.
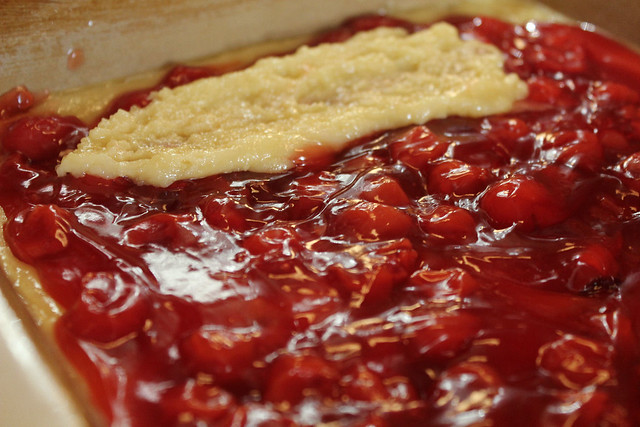
Spread LUCKY LEAF Cherry Pie Filling on top of batter.
Drop the remaining batter by spoonfuls on top of the pie filling layer.
Stir together the sugar and the cinnamon. Sprinkle over top of cake.
Bake for 40 minutes or until a toothpick inserted near the center comes out clean.
Serve warm or cooled.
Servings: 12
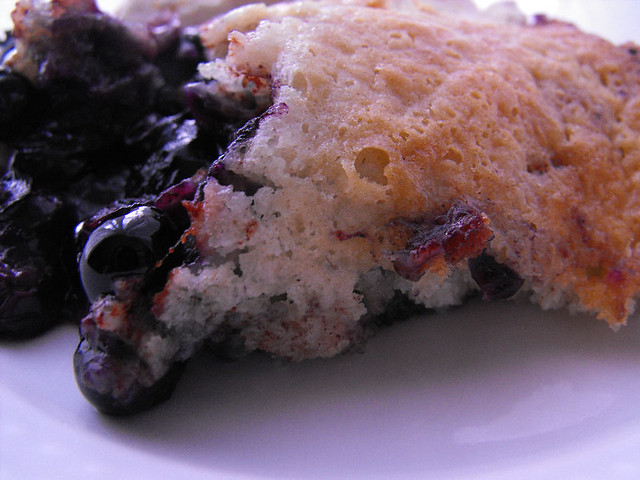
Another recipe that is included in the cookbook which I've actually been making for a while, is the Blueberry Cobbler. YUM!
There are quite a few others in there that I plan on trying but I'm waiting for my in laws to arrive next week :)
Now for the giveaway, like I said above, Lucky Leaf is giving two readers a cookbook each. Here are the rules:
- Leave a comment including your email address
- Go on over and LIKE the Lucky Leaf page on Facebook
I am running the contest until the end of the week so that we can try and get those books out to the winners before Christmas. I said try, because they will be coming directly from Lucky Leaf, so don't hold me to it especially with the holiday mail rush. :)
Good Luck!
Friday, December 09, 2011
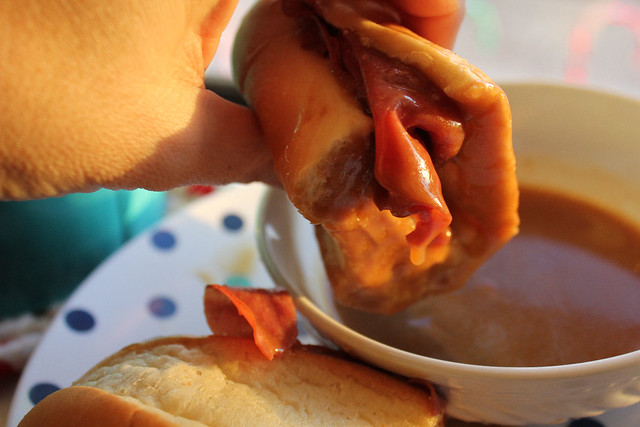
Quick French Dip Sandwiches
Without a doubt, French Dip sandwiches rank very high on my extensive list of favorite things to eat.
I think it's the combination of the meat soaked in all that yummy gravy and then dipping it in more gravy after each bite. I don't know, it's like an experience all itself.
But truthfully to make a really good French Dip you need to have time, or at least that is what I always thought, I thought that I had to have the meat cooking in a slow cooker for hours and get it just right.
Then one day, I was running late and when it came time to put something on the table, the family requested French Dip Sandwiches and at first I froze, how on earth was I supposed to do that in just a few minutes?
So I threw somethings together and this is the result and let me tell you, it tastes really good and the family love it.
Quick French Dip Sandwiches
4 tablespoons butter
1 small onion, finely diced
2 packets brown onion gravy
2 cups of cold water
thinly sliced beef
hoagie buns
In a large skillet, add the butter and the onions. Cook for a few minutes over medium heat until onions are transparent, add the sliced beef and continue cooking for about 2 to 3 minutes.
Fill the hoagie buns with the beef, spoon some of the gravy onto a separate dish for dipping. Enjoy!
Honestly, the messier, the better.
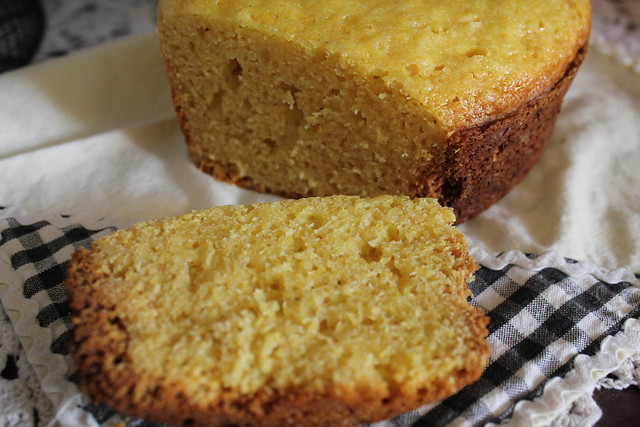
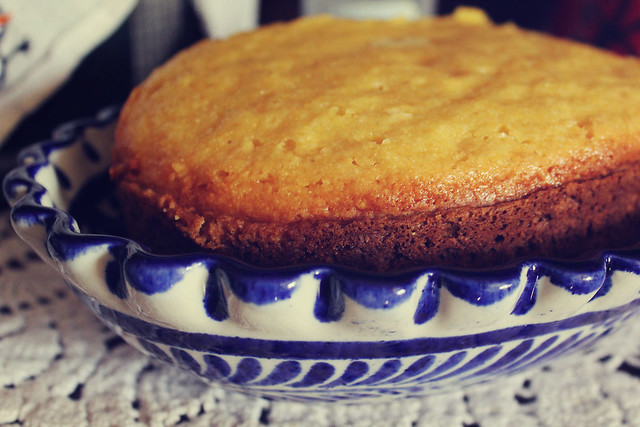
Slow Cooker Cornbread
If I told you this was really easy would you think me crazy?
I will admit that there are certain things, that I never imagine trying in the slow cooker, until I actually do and then I'm shocked at how it took me so long to try.
Let me just show you how super easy this is to make....you can use a homemade cornbread recipe or you can use the boxed mix from Jiffy. I've tried it both ways and it always turns out great :)
Just one thing, the timing is a little iffy in the sense that some will tell you to cook it on high for 3 hours, others will say for 1 hour. What I do is check it after one hour and usually it's done for me, but just keep an eye on it and when a toothpick inserted into the middle comes out clean, you know it's ready.
1 box Jiffy cornbread mix (or homemade)
Spray the inside of a 2 and a half quart slow cooker pan.
Mix the ingredients according to package directions. Pour into the pan and cook on HIGH for an hour or until toothpick inserted in the middle comes out clean.
That's IT!
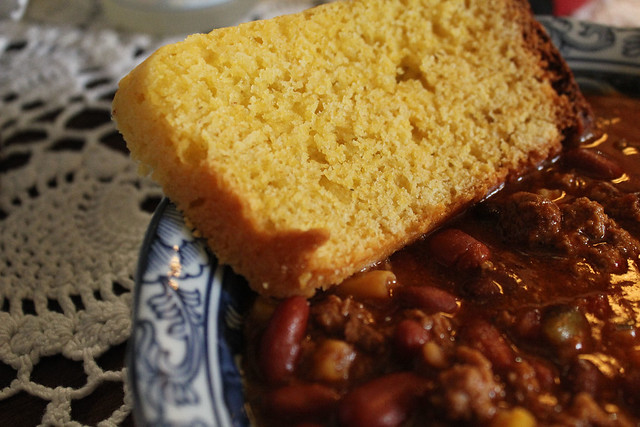
Just perfect for some chili :)
I will admit that there are certain things, that I never imagine trying in the slow cooker, until I actually do and then I'm shocked at how it took me so long to try.
Let me just show you how super easy this is to make....you can use a homemade cornbread recipe or you can use the boxed mix from Jiffy. I've tried it both ways and it always turns out great :)
Just one thing, the timing is a little iffy in the sense that some will tell you to cook it on high for 3 hours, others will say for 1 hour. What I do is check it after one hour and usually it's done for me, but just keep an eye on it and when a toothpick inserted into the middle comes out clean, you know it's ready.
Slow Cooker Cornbread
1 box Jiffy cornbread mix (or homemade)
Spray the inside of a 2 and a half quart slow cooker pan.
Mix the ingredients according to package directions. Pour into the pan and cook on HIGH for an hour or until toothpick inserted in the middle comes out clean.
That's IT!
Just perfect for some chili :)
Thursday, December 08, 2011
Thin Crust Pizza dough
I love a good thick crust but there are times that nothing but a flaky thin crust will do, especially if I'm having veggie pizza.
I had a bit of a hard time finding a recipe I liked but once I did, I always go back to it. I don't have a recipe of my own, I just tried a few things until I found one I liked, but I am going to give you the recipe to the Thin Crust from The Kitchn because it's the most similar to mine, matter of fact it's pretty much how I make mine :)
3/4 cups (6 ounces) of water
1/2 teaspoon of active-dry yeast (if using instant yeast, you don't need to dissolve it during the first step)
2 cups (10 ounces) unbleached all-purpose flour
1/2 tsp salt
About 30 minutes to 1 hour before baking, pre-heat your oven to 500 degrees. If you have a baking stone, put it on a rack in the lower-middle part of the oven.
In a small bowl or liquid measuring cup, heat the water until it feels barely lukewarm when you test it with your finger (if the water is so hot that you can't leave your finger in it, wait for it to cool down). Add the yeast to the water and use a fork or whisk to stir it into the water. Set this aside for a few minutes and allow the yeast to dissolve. It's ok if the yeast doesn't bubble, but it should be entirely dissolved and the mixture should look like thin miso soup.
Measure out the flour into a large mixing bowl. Add the salt and use your hand or a whisk to combine.
Make a well in the center of the flour and pour in the water-yeast mixture. Use your fingers or a wooden spoon to combine everything together.
When it comes together into a cohesive ball, turn it out onto the counter along with any extra flour in the bowl that hasn't yet gotten worked in.
Knead the dough until all the flour is incorporated and the dough is smooth and elastic to the touch--about five minutes.The dough should still feel moist and slightly tacky. If it's sticking to your hands and counter-top like bubble gum, work in more flour one tablespoon at a time until it's smooth and silky.
Use a bench scraper to divide the dough in two.
Shaping the Dough:
Tear off two pieces of parchment paper roughly 12-inches wide. Work one piece of the dough in your hands and form it into a large disk. Lay the disk of dough on the parchment paper.
Working from the middle of the dough outwards, use the heel of your hand to gently press the dough outward until it's about 1/4 of an inch thick or less. You can also use a rolling pin for this part. We like to make free form pies, but if you'd like a circular pie, you can trace a large circle on the back of the parchment to use as a guide.
Repeat with the second piece of dough.
Note: The dough will stick to the parchment paper, making it easier for you to roll out. You'll bake the pizza right on the parchment paper. As it cooks, the dough will release from the parchment, and you can slide the paper out before serving.
Topping and Baking the Dough:
Spoon a few tablespoons of sauce into the center of each pizza and use the back of a spoon to spread it out to the edges. Pile on all of your toppings except the cheese.
Using a bread peel or the backside of a baking sheet, slide your pizza (still on the parchment) onto the baking stone in the oven. If you don't have a baking stone, just bake it right on the baking sheet.
Bake for about 5 minutes and then rotate the pizza 180-degrees (most ovens have 'hot spots' your pizza will bake unevenly if it's not rotated). Bake for another 3 minutes and then sprinkle the cheese over the top. Bake for another 2-3 minutes until the edges are golden brown and crispy.
Remove your pizza from oven and let it cool on a wire rack. At this point, you can slide the parchment paper out from under the pizza. Repeat with second pizza.
Let both pizzas cool for about five minutes (we know--it's hard to wait!) and serve.
I had a bit of a hard time finding a recipe I liked but once I did, I always go back to it. I don't have a recipe of my own, I just tried a few things until I found one I liked, but I am going to give you the recipe to the Thin Crust from The Kitchn because it's the most similar to mine, matter of fact it's pretty much how I make mine :)
Home-made Thin Crust Pizza
Makes 2 pizzas
3/4 cups (6 ounces) of water
1/2 teaspoon of active-dry yeast (if using instant yeast, you don't need to dissolve it during the first step)
2 cups (10 ounces) unbleached all-purpose flour
1/2 tsp salt
About 30 minutes to 1 hour before baking, pre-heat your oven to 500 degrees. If you have a baking stone, put it on a rack in the lower-middle part of the oven.
In a small bowl or liquid measuring cup, heat the water until it feels barely lukewarm when you test it with your finger (if the water is so hot that you can't leave your finger in it, wait for it to cool down). Add the yeast to the water and use a fork or whisk to stir it into the water. Set this aside for a few minutes and allow the yeast to dissolve. It's ok if the yeast doesn't bubble, but it should be entirely dissolved and the mixture should look like thin miso soup.
Measure out the flour into a large mixing bowl. Add the salt and use your hand or a whisk to combine.
Make a well in the center of the flour and pour in the water-yeast mixture. Use your fingers or a wooden spoon to combine everything together.
When it comes together into a cohesive ball, turn it out onto the counter along with any extra flour in the bowl that hasn't yet gotten worked in.
Knead the dough until all the flour is incorporated and the dough is smooth and elastic to the touch--about five minutes.The dough should still feel moist and slightly tacky. If it's sticking to your hands and counter-top like bubble gum, work in more flour one tablespoon at a time until it's smooth and silky.
Use a bench scraper to divide the dough in two.
Shaping the Dough:
Tear off two pieces of parchment paper roughly 12-inches wide. Work one piece of the dough in your hands and form it into a large disk. Lay the disk of dough on the parchment paper.
Working from the middle of the dough outwards, use the heel of your hand to gently press the dough outward until it's about 1/4 of an inch thick or less. You can also use a rolling pin for this part. We like to make free form pies, but if you'd like a circular pie, you can trace a large circle on the back of the parchment to use as a guide.
Repeat with the second piece of dough.
Note: The dough will stick to the parchment paper, making it easier for you to roll out. You'll bake the pizza right on the parchment paper. As it cooks, the dough will release from the parchment, and you can slide the paper out before serving.
Topping and Baking the Dough:
Spoon a few tablespoons of sauce into the center of each pizza and use the back of a spoon to spread it out to the edges. Pile on all of your toppings except the cheese.
Using a bread peel or the backside of a baking sheet, slide your pizza (still on the parchment) onto the baking stone in the oven. If you don't have a baking stone, just bake it right on the baking sheet.
Bake for about 5 minutes and then rotate the pizza 180-degrees (most ovens have 'hot spots' your pizza will bake unevenly if it's not rotated). Bake for another 3 minutes and then sprinkle the cheese over the top. Bake for another 2-3 minutes until the edges are golden brown and crispy.
Remove your pizza from oven and let it cool on a wire rack. At this point, you can slide the parchment paper out from under the pizza. Repeat with second pizza.
Let both pizzas cool for about five minutes (we know--it's hard to wait!) and serve.

Wednesday, December 07, 2011
Slow Cooker Potatoes Dijonnaise
Great side dish, it's almost like a mustard hot potato salad.
Another one from Gooseberry Patch. The only thing that went wrong for me is that I put everything in the crockpot and then totally forgot to turn it on, went back 3 hours later and nothing. I could have kicked myself, so I ended up having to pop the dish into the oven. *sigh*
1/3 cup Dijon mustard
1/2 c. olive oil
1/3 c. red wine vinegar
salt and pepper to taste
6 potatoes, cubed
1 onion, chopped
Blend mustard, oil and vinegar in a medium bowl; add salt and pepper to taste. Add potatoes and onion, stirring to coat.
Transfer to a slow cooker; cover and cook on low setting for 8 to 10 hours, or until potatoes are tender. Makes 4 to 5 servings.
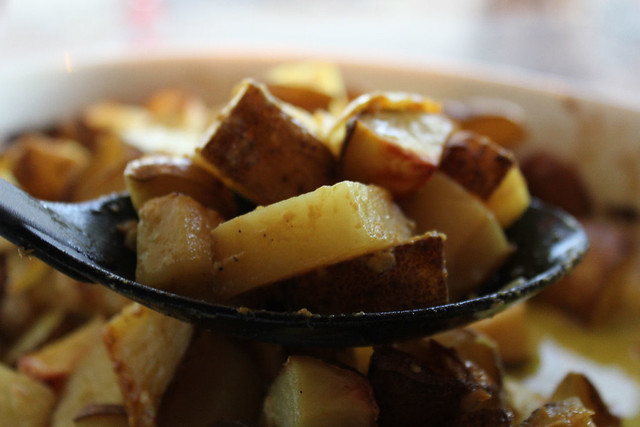
Another one from Gooseberry Patch. The only thing that went wrong for me is that I put everything in the crockpot and then totally forgot to turn it on, went back 3 hours later and nothing. I could have kicked myself, so I ended up having to pop the dish into the oven. *sigh*
Potatoes Dijonnaise
1/3 cup Dijon mustard
1/2 c. olive oil
1/3 c. red wine vinegar
salt and pepper to taste
6 potatoes, cubed
1 onion, chopped
Blend mustard, oil and vinegar in a medium bowl; add salt and pepper to taste. Add potatoes and onion, stirring to coat.
Transfer to a slow cooker; cover and cook on low setting for 8 to 10 hours, or until potatoes are tender. Makes 4 to 5 servings.
Slow Cooker Italian Sausage and Penne - Revisited
I actually tried this one back in 2007, but if you didn't come across it before, here is a reminder :)
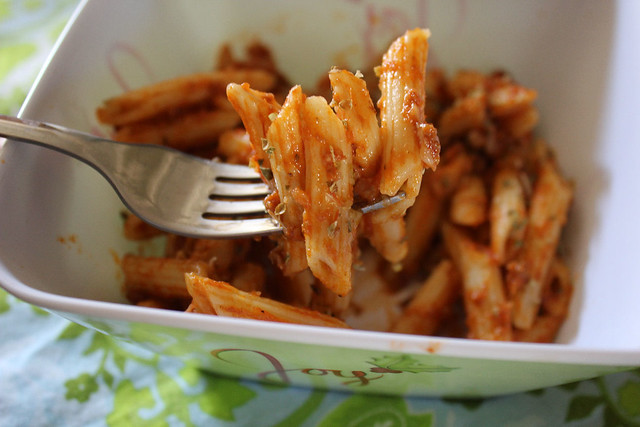
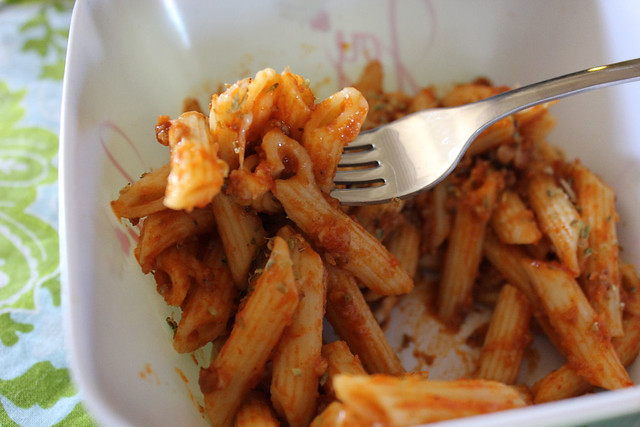
My kids LOVE this dish and will often have leftovers for a day or so. :)
Slow Cooker Italian Sausage and Penne
My kids LOVE this dish and will often have leftovers for a day or so. :)
Subscribe to:
Posts (Atom)