Thursday, December 20, 2018

Beef S.O.S

My husband loves everything that I make, but one of his favorite meals is also one of the easiest and cheapest meals to have.  If it were up to him, he would eat S.O.S every single day and be just fine with that.

If you are military or have military background or even been around military people in general, then you will no doubt have heard about the good ol' S.O.S.  Technically it's called S*** on a Shingle, and I don't think I need to tell you what the S word stands for LOL

It's something that military folk of all branches are quite familiar with.  The dish seems to go all the way back to World War I and an Army field kitchen, although the recipe itself first appears in a Manual of Army Cooks from 1910.  So, as you can see it has definitely been around for a very long time. 

This is definitely one of those meals that not only go far, but are perfect for when you need to cut back on your food budget.  There seems to be a love/hate relationship for people with this meal, but we think it is absolutely fantastic, and filling.

There are SO many ways to make this recipe, so I'm giving you my way of making it, I'm sure you can find a ton of different versions online.


Beef S.O.S


1 lb ground beef
2 cups milk

3 tbsp all-purpose flour
Salt and pepper to taste
Garlic (optional but I like to add some in)
Sliced Bread


In a medium sauce pan over medium high heat, brown the ground beef, then season with salt and pepper.  I sometimes add a little garlic too. Drain grease. Sprinkle the flour over the meat and stir to combine, then slowly start pouring in the milk all the while mixing well so as not to allow the flour to become lumpy.

Serve over sliced bread.  (you can toast the bread if you wish, we either toast it or just have it as is)

One Pan Portuguese Roast Chicken

I think everyone knows how to prepare roast chicken, and there are so many variations out there and family recipes passed down from generation to generation.

Much as I love cookbooks and trying out new recipes, some days I prefer to stick to the way I have grown up cooking, the meals that I remember from my childhood.

This is a very simple way to make roast chicken, it may seem a little different to what you're used to making but it's equally delicious.  It is also a one pan meal, and that is always great as it saves on having a pile of dishes to clean up.

I do hope you'll give it a try :)


One Pan Portuguese Roast Chicken


1 pound chicken (I used thighs, but you can use a whole cut up chicken, or legs, or breasts, whatever you prefer)
Vinegar
Minced Garlic
Mustard
Mayonnaise
Paprika
Salt and Pepper
2 large potatoes
Small red onion


Now here's the deal, if I'm not following a specific recipe, I always cook from the heart, which means I eyeballs the ingredients.  It's hard for me to give specific measurements, but I'll try to give you an idea of how much I used.

First thing, wash and clean your chicken well.  Place the chicken in a big ziploc bag, then squirt in some vinegar, add about 1/2 cup of mayo and 1/4 cup mustard, some minced garlic cloves (I used about 4 that I mashed in my mortar and pestle), salt and pepper to taste and some paprika.


Close the ziploc tightly and give it all a good mix, then pop in the fridge for a few hours.  It's even better overnight, but usually I'll do it either in the morning, or around noon to cook for dinner.


When you're ready to cook.  Dump the whole contents of the chicken into a casserole dish, or a baking dish covered with foil.

Add a layer of sliced onion on top, and then top with thick sliced potatoes.  Cover with foil and bake at 375 degrees for about an hour or until chicken and potatoes are completely cooked through.

When done, you can serve right away, or if you wish, you can remove the foil and place back in the oven to broil a bit.

Sheet Pan Chicken Fajita Crunchwrap


Oh my goodness!!!

Just oh my goody, gosh, this is delicious.  I've shared a recipe before for an actual Crunchwrap like the ones from Taco Bell, and then I also shared one for a Sheet Pan Crunchwrap which is phenomenal as well.

Today, I'm bringing you a Sheet Pan Chicken Fajita Crunchwrap just is just as delicious.

What I love the most about these Sheet Pan meals, is that they are perfect for get togethers, family dinners and so on.  I love meals that I can stretch for a big crowd and this is one of those, for sure.

Give it a try.


Sheet Pan Chicken Fajita Crunchwrap
Source: Tasty


4 chicken breasts, sliced
3 onions, sliced
5 peppers, sliced
2 tbsp fajita seasoning
3 tbsp olive oil
9 large flour tortillas
1 tsp melted butter
2 cups cheddar, grated
2 cups spicy tortilla chips

For the dip:

1 cup sour cream
2/3 cup mayonnaise
1 tbsp fajita seasoning
1/2 cup pickled jalapenos
1 tbsp honey
juice 1 lime
salt, to taste


Pop the chicken, peppers and onions on a large roasting tray with the 2 tbsp fajita seasoning and oil. Roast for 25 minutes at 200°C, stirring occasionally.


Meanwhile, mix everything together for your dip and set aside.

Brush your butter across the base of a sheet pan. Lay 7 tortillas down on the bottom of the pan.  Put in half your cheese, half your chicken, all of your chips, then the rest of the chicken and cheese.


Fold over the tortillas, then lay over a sheet of wax paper, and weigh down with a heavy tray.

Bake for 30 minutes at 180°C.


Panda Express Chow Mein - Cheap Meals


A few months ago I was on the hunt for some cheap, inexpensive, easy meals to make.  Once in a while I like to try and cut my food budget down by making meals that are not only cheap but that the family will surely enjoy.  That is not always as easy as it may seem.

I came across a channel on Youtube that provided just that, she called it Dirt Cheap Budget Meals but they looked SO incredibly yummy, which peaked my interest.

We as a family, love Panda Express and especially their chow mein, so when I saw that she had a recipe for a knock off Panda Express Chow Mein using none other than Ramen Noodles, I KNEW that was definitely going to be on the menu.

The verdict:  We absolutely LOVED it, and is actually on the meal plan for the next two weeks, again.


Panda Express Chow Mein
Source:  Queenn Callier


3 tablespoons butter
3 tablespoons oil
4 packs Ramen Noodles (I used Beef Flavored)
2 packets of Ramen noodles seasoning
1/4 cup Soy Sauce
1 tsp Shredded ginger root
1 Tbsp Honey (Can substitute with sugar)
2 tsp Garlic powder
1/4 tsp pepper
2 cups Shredded Cabbage
1/2 cup shredded carrots
1 cup sliced celery
Optional:  I added in some cooked chicken breast that I chopped into bite size chunks


Cook the ramen noodles with the two packets of seasoning, as you normally would.  Set aside.


In a small bowl combine the soy sauce, ginger, honey, garlic powder and pepper.  Set aside. 

In a skillet, or a wok, add the butter and the cabbage, cook for 15 minutes.  Add in the celery and the carrots and cook for 15 minutes more.

Add in the oil, then the cooked ramen noodles and finally the soy sauce, mix well and let fry for a few minutes.  Serve immediately.

If you're adding in chicken or any other meat, do so when you add the ramen noodles to the skillet.

Enjoy!!!

Chicken Sopa - Church Cookbook

When my husband and I were newlyweds, we traveled to Oklahoma to visit his family.  We had our daughter at the time, she was just about a year old and at my husband and his family's request, we had her baptized in their local family church.

As we arrived at the church, there were a stack of cookbooks, you know the church cookbooks that used to be so common?  My mother in law asked me if I would like one, she knew I loved cooking, and wanted to gift me one because there were recipes from her, her mother and her niece featured in the book.

I was thrilled.

Over the years I've tried many of the recipes and maybe because they're simple homecooked dishes, they tend to be some of the best family meals around.

One of the recipes featured in the cookbook is from my husband's cousin Cindy.  I just made it again a few weeks ago and realized I hadn't shared it on the blog, so here it is.

A simple Mexican flavor inspired casserole that I'm sure your family will enjoy :)


Chicken Sopa


1 pound chicken, cooked and cut into bite size pieces (you can use leftover roast chicken as well)
1 (10.75 ounce) can condensed cream of chicken soup
1 (10.75 ounce) can condensed cream of mushroom soup
1 (4 ounce) can diced green chiles

1 cup chicken broth
1 cup shredded Cheddar cheese
12 (6 inch) corn tortillas


Preheat oven to 350 degrees F (175 degrees C).  Put the chicken into a mixing bowl. Add the chicken soup, mushroom soup, green chiles and broth. Mix well.

In a 9x13 inch baking dish place a layer of corn tortillas to cover the bottom, then a layer of the chicken mixture, then a layer of cheese. Continue to layer, like you would lasagna, until all of the chicken mixture is gone.

Bake in the preheated oven for 20 minutes or until the cheese is bubbly and brown. Let cool and serve.

Saturday, November 10, 2018

Best Homemade Sandwich Bread

 I've made a lot of bread in my life, but this one by far is my family favorite. I bake 3 loaves every week because my husband refuses to have store bought bread for his lunches, he loves mine THAT much LOL


White Bread
Source: Brown Eyed Baker

  • 4½ teaspoons instant yeast (two 0.25-ounce packets)
  • ¾ cup + 2⅔ cups warm water, divided
  • ¼ cup (50 grams) granulated sugar

  • 1 tablespoon salt
  • 3 (43 grams) tablespoons unsalted butter, cubed, at room temperature
  • 9 (1.3 kg) to 10 (1.4 kg) cups all-purpose flour
  • 3 tablespoons unsalted butter, melted, for brushing

Directions:

  1. In the bowl of a mixer, stir to dissolve the yeast in ¾ cup of the warm water, and let sit for 5 minutes. Add the remaining 2⅔ cups water, sugar, salt, room temperature butter, and 5 cups of the flour and stir to combine.
  2. Using a dough hook, mix on low speed and gradually add the remaining flour until the dough is soft and tacky, but not sticky (you may not need to use all of the flour). Continue to knead until a soft ball of dough forms and clears the sides of the bowl, about 7 to 10 minutes.
  3. Place the dough in a lightly greased bowl and turn it over so it is completely coated. Cover with plastic wrap and set in a draft-free place to rise until doubled in size, about 45 minutes to 1 hour.
  4. Turn the dough out onto a clean, lightly floured surface. Gently press it all over to remove any air pockets. Divide the dough in two and, working with one piece at a time, gently pat it into a 9×12-inch rectangle. Roll up the rectangle, starting on the short end, into a very tight cylinder. Pinch to seal the seams and the ends, tuck the ends of the roll until the bread, and place into greased 9-inch loaf pans. Cover the loaves loosely and place in a draft-free area until doubled in size, 30 to 45 minutes.
  5. Position an oven rack on the lowest setting and preheat the oven to 400 degrees F.
  6. Brush the loaves with some of the melted butter. Bake the loaves for 30 to 35 minutes, rotating halfway through, until golden brown (an instant-read thermometer inserted into the center should read 195 degrees F).
  7. Remove from the oven and immediately brush with more of the melted butter. Allow to cool for 10 minutes, then remove from the pans and cool completely before slicing. The bread can be stored in an airtight bread bag or wrapped tightly in plastic wrap at room temperature for up to 4 days. It can also be frozen for up to 1 month.

Wednesday, October 10, 2018

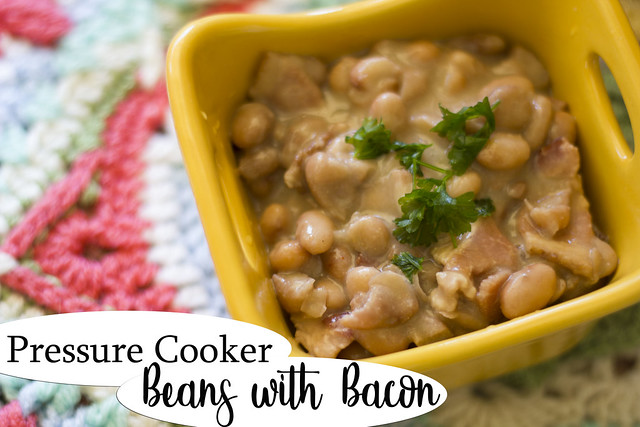
Pressure Cooker Beans with Bacon

_MG_3394

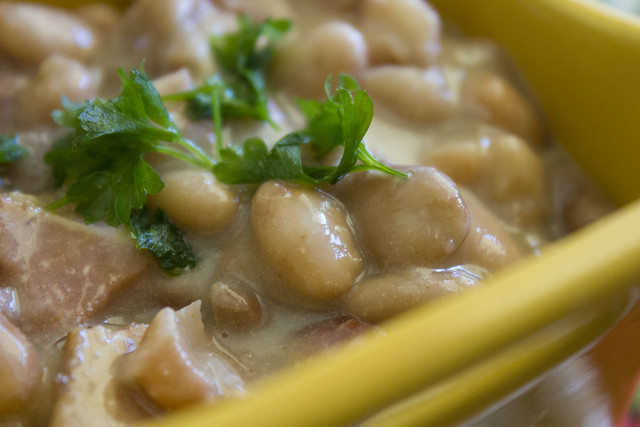
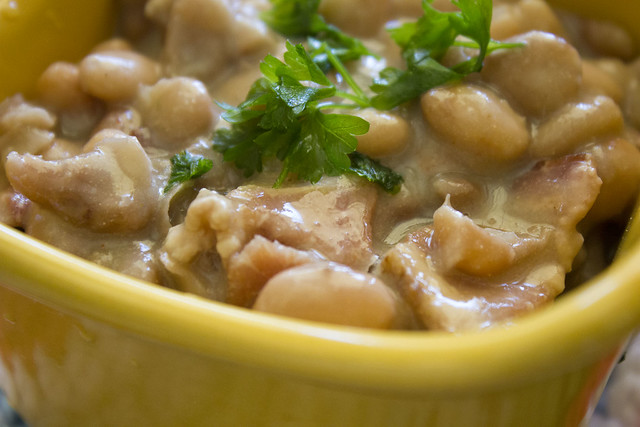
If you're looking for a quick and simple, but fantastic bean recipe, you have found it.  It is incredibly easy to put together and with the help of the pressure cooker, you will have fantastic flavorful beans, in no time at all.

_MG_3392

Pressure Cooker Beans with Bacon


1 pound of pinto beans
1 small onion, finely diced
6 slices of bacon, diced
Crushed garlic, about a tablespoon
Salt and pepper to taste
Cheiro Verde 
Olive oil
Bay leaf
Water


Wash your beans well, then soak in water overnight.  Throw out any bad beans, little stones, or any beans that float to the top.

Before cooking the beans the next day, give them a good wash until the water runs clear.

Add a little drizzle of olive oil to the pressure cooker, and set to Saute.  Stir in the garlic, salt and pepper and bacon and cook until crispy.  Click the cancel on the pressure cooker.

Next goes in the beans and the water.  You need to add water to at least 2 finger widths above the beans.  Some people add 3 cups of water for ever cup of beans, but I usually just do as I said above. 

Set the pressure cooker to Manual High and cook for 35 minutes.  When the time is up, do a quick release and check the beans.  If they are not yet cooked, add more water and return to the pressure for another 10 or so minutes.

I don't usually have a problem with the beans not cooking, especially the pinto beans.  You will notice at this point that the beans may seem kind of runny, at this point I turn the pressure cooker back to the Saute function, mix a tablespoon of cornstarch with a little bit of water, and add that back into the beans, stir and let it cook until thickened.

You can recheck the seasoning at this point, add more salt if needed.

_MG_3393

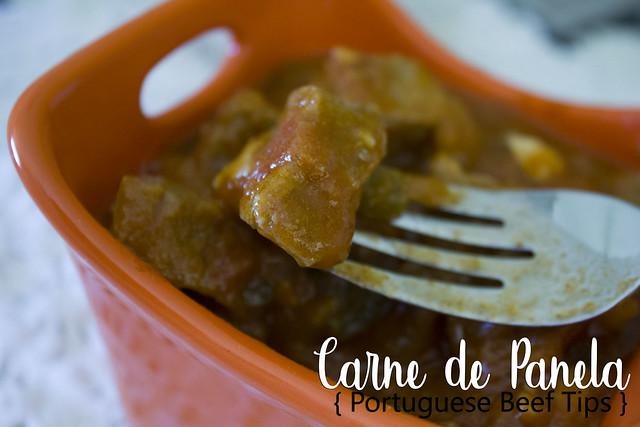
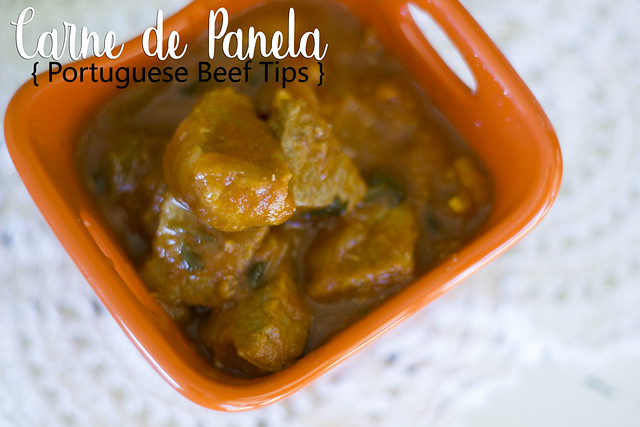
Carne de Panela - Portuguese Beef Tips

_MG_3396

I love food, always have and I think I always will, and I may sound very biased, but without a doubt, for me, one of the best foods on earth, is Portuguese.

You may say that I only think that because I'm Portuguese, but that's not necessarily true, seeing that I also think Mexican, Chinese, Indian and Italian are some of the best too.

For me though, growing up in a Portuguese home, learning to cook from a very young age and being surrounded by flavor, fresh ingredients and nothing but the simplest of homemade meals, created a love for real comfort easy dinners.

I was never one for gourmet, never one for expensive or intricate recipes or exquisite weird ingredients.  Cooking needs to come from the heart, and most importantly from your home and what you have on hand.  A little of this, a pinch of that, and a finished dinner that will stick to the ribs and leave everyone asking for more.

The recipe I'm sharing with you today is one of the simplest ways to prepare a pot of beef tips that can be served with mashed potatoes, or rice, pasta, whatever your heart desires.

I paired mine with some simple buttery white rice and some homemade pressure cooked beans with bacon.  (the recipe for those will be up shortly)

_MG_3400

Carne de Panela - Portuguese Beef Tips


1 pound of stewing beef
4 garlic cloves
Tablespoon of kosher salt
Paprika
Chili flakes to your liking
Cheiro Verde (This is a mixture of parsley and cilantro, to taste
Olive oil
1 medium onion, diced
2 medium tomatoes, diced
Half a green pepper, diced
15 oz. can of tomato sauce
2 cups of water


Using a mortar and pestle, crush the garlic cloves along with the salt, paprika and chili flakes.

In a pot, add a little bit of olive oil and the garlic mixture you just crushed.  Stir, then add the beef cubes.  Cook over medium heat until nicely browned.

Next, add in the rest of the ingredients and mix well to combine, check the seasonings and add more salt if needed.  Cover and let cook over medium heat until meat is tender and the sauce has reduced to a nice thick gravy.

Cheiro Verde - Parsley, Cilantro and Green Onion

If I were to translate the name in Portuguese to English, it would sound so ridiculous, that you would probably laugh and laugh for days.

Cheiro Verde basically means Green Smell or Green Scent.  Go ahead and laugh LOL

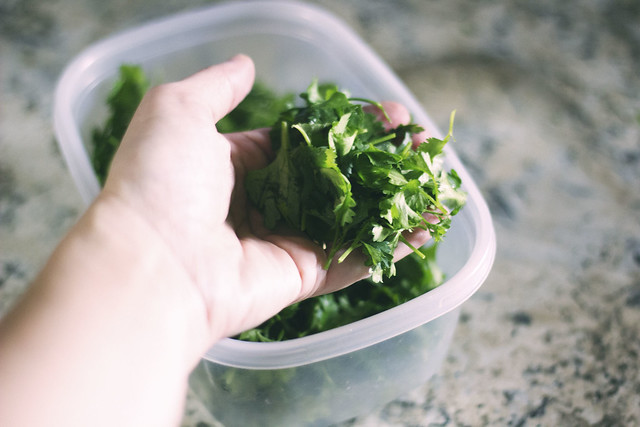
It is basically a mixture of parsley, cilantro and green onion.  I use it in a lot of my Portuguese recipes, and it really does help bring out the flavor.

The best part is that it is frozen, so I can pinch off little bits at a time, and add to my food.  It's just another way to make meal prepping quicker and easier.

_MG_3386

Cheiro Verde - Parsley, Cilantro and Green Onion


Parsley
Cilantro
Green Onion


Start by washing the parsley, cilantro and green onion, being careful to remove any wilted leaves.

Spread them out over some paper towels to dry completely.  When dry, rough chop the green onions, removing the roots which you can place in a small glass container with a little bit of water, to regrow.  I've been doing this for years and only really need to buy green onions once in a while.

Remove the stems from the parsley and cilantro.  I don't remove ALL the stems from the cilantro and parsley, but the majority, leaving just the bit closer to the leaves.  Give them a rough chop too. (you can finely dice them too if you prefer)

Mix all three in a freezer safe tupperware container, and place in the freezer.  It keeps for up to one month.

For cooking, I usually just add enough to my taste, depending on what I'm making.

Tuesday, October 09, 2018

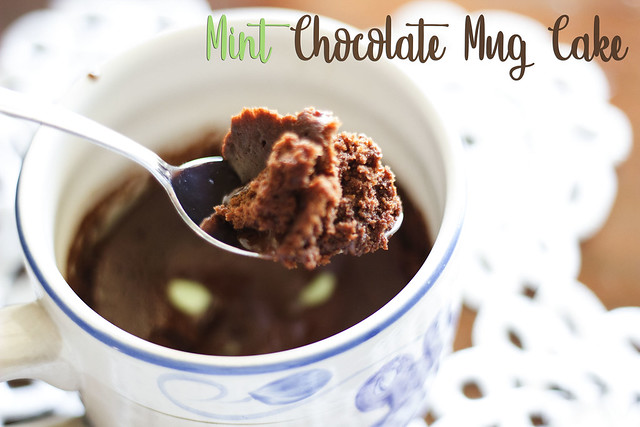
Mint Chocolate Mug Cake

Y'all......mug cakes are one of the easiest and most versatile recipes to keep on hand.

You know how sometimes you get a craving for something sweet, but you don't want to have to whip up a whole cake?  This is the perfect way to get rid of that craving, and since the possibilities are endless, you can do chocolate, vanilla, caramel, whatever you want.

This Mint Chocolate Mug Cake came about last week, when I was craving chocolate and had none on hand.  It turned out SO SO good and definitely hit the spot. 


_MG_3361

Mint Chocolate Mug Cake
Adapted from: Table for Two


1/4 cup flour
2 tablespoons unsweetened cocoa powder
1/4 teaspoon baking powder
2 tablespoons sugar
1/8 teaspoon salt
1/4 cup plus 1 tbsp. milk
2 tablespoons vegetable oil
1 tablespoon mint chocolate chips


In a big mug, add all the ingredients and give them a good whisk to make sure everything is incorporated. 

Add the mint chocolate chips to the middle of the cake batter.  Don't mix, don't stir, just drop and leave it alone.

Microwave on high for 70 seconds. Carefully remove from microwave and enjoy.

This truly is the fluffiest, softest and moistest mug cake, you will ever have.

Pressure Cooker Bangers and Mash

It's no secret that one of my favorite kitchen gadgets, has been my pressure cooker.  The versatility and the endless ways we can prepare food in it, is by far one of the best investments you could ever make for your kitchen.

I received mine two years ago for Christmas, and I've actually requested another one for this year, that's how much I love mine.

One thing I find quite a lot of fun to do, is adapting recipes from the oven or stove, to make in the pressure cooker, I just find that it cuts down cooking time dramatically and sometimes, when our days are super busy, it really helps get a good home cooked meal on the table.


_MG_3202

Pressure Cooker Bangers and Mash


6 thick sausages
olive oil
1 cups water
1 packet of onion gravy mix


Turn the pressure cooker on to Saute, and then add a drizzle of olive oil, add the sausages and cook until brown.  When done, pour in the cup of water and the packet of onion gravy mix.  Press the cancel button on the pressure cooker.

Pop on the lid, make sure the valve is set to seal, then cook on Manual High for 6 minutes.  As soon as it is ready, click cancel/keep warm, and do a quick release of the steam.  I like to pop on a kitchen towel over the valve when releasing the steam so it doesn't sputter everywhere.


If the gravy is very thin, you can turn on the saute feature again and add in about a tablespoon of cornstarch, mix it well to avoid clumps and let sauce thicken.

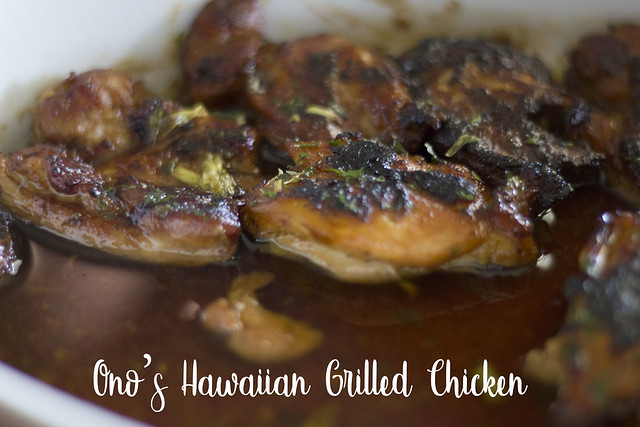
Ono's Hawaiian Grilled Chicken

While stationed in Arizona, we came to find a ton of amazing restaurants, and to this day, some of our favorites remain in Phoenix, AZ.  It is one of the reasons we are looking to visit sometime next year.

One such place was Ono Hawaiian BBQ.  Their food was so good, but so good, that we went back constantly.

I only wish there was an Ono's in Texas, but alas, there isn't.

So with that in mind, I went on the look for copycat recipes that could recreate this wonderful food, and found one for our favorite chicken, so I thought I would share it with you.  If you have an Ono's nearby, I highly recommend checking it out.

By the way, the proper way to make this chicken is by grilling it, but I adapted the recipe to use my cast iron skillet instead.


_MG_3323

Ono's Hawaiian Grilled Chicken
Adapted from: Best Recipes Ever


Boneless skinless Chicken Thighs (thin, if needed use a mallet to flatten the chicken)
1 C. packed light brown sugar
1 C. soy sauce
4-5 cloves of garlic chopped
1 1/2 T. fresh ginger root chopped
1/4-1/2 large onion sliced

For the prepared chicken:
1 stick of butter
Green onions


In a bowl, mix the brown sugar and soy sauce together. Add in the garlic, ginger and onion.  Pour the mixture into a ziploc bag, add the chicken thighs, make sure the bag is closed tightly and then give it all a good shake.  Let it marinade for a few hours, or even overnight. 

Heat up a cast iron skillet with a little bit of butter, add the chicken thighs and cook until brown and cooked through. 

In the meantime, place a 13x9 inch casserole dish in the oven, at about 250 degrees F.  Add a stick of butter and let it melt. 


As the chicken gets done, transfer to the casserole dish and keep it in the oven where it will be swimming in all that buttery goodness.

Once all the chicken is done, cut up some green onions and add to the chicken. 

Monday, September 24, 2018

{ Pork Chops in Mustard Sauce }

You guys, I have one of the tastiest pork recipes for you all.

I love pork but I get a little tired of making it the same way, over and over again.  I don't know, I just find that pork is a bit harder to find good recipes for, and that's probably just me, but anyway, in my attempt to find a different way to fix pork, I turned to my old Teleculinaria Portuguese Cooking Magazine.

The Teleculinaria magazine is a really old one but is always filled with the yummiest recipes.

Back to the pork.  No joke, this was one of the tastiest meals we've had in a while, I paired with some Pressure Cooker Twice Baked Potatoes and a salad, and everyone raved.


Pork Chops in Mustard Sauce


8 pork tenderloin chops (I use the pretty thin ones and usually make 2 for each person)
Salt and pepper to taste
Garlic
Butter to fry the chops
2 cups Heavy Cream
1 tablespoon Spicy Mustard (you don't have to use spicy, just make sure it's a good mustard, not the yellow hotdog mustard)
Parsley


Season the chops with the salt and pepper and some fresh garlic.  Set aside and let sit for about 30 minutes.

Fry the chops in some butter until nicely browned and completely cooked through.  Transfer to a baking dish to keep warm. 

In a small bowl mix the heavy cream and the mustard.

In the skilled you fried the chops in, scrape up the bits, add the heavy cream and mustard mixture, and mix well.  Let it come to a boil so that it thickens a bit, then pour over the chops.  Sprinkle on some parsley and serve immediately.

Pressure Cooker Twice Baked Potatoes

I have a lot of kitchen gadgets and appliances and enjoy trying them all out.  I can't really say that any of the appliances I have bought, have been a disappointment, but I can for sure say that some have become my favorite to use and I try to use them as much as I can, sometimes daily.

My pressure cooker is one of those.  Not just for it's convenience, but I love putting it to the test and making things in it that I would never have thought of doing.

Last week I made some delicious pork chops (recipe will be up after this one), and to go with them I wanted twice baked potatoes, but it was a super busy day and by the time I got around to dinner prepping, I realized that I wouldn't have an hour or more to wait for the potatoes to bake in the oven.

Obviously, I turned to the pressure cooker, looked through my user manual, searched a few online tips and tricks and went for it.

Guys????  They came out so good that I will never bake them in the oven again.

Let me tell you real quick how to make these delicious potatoes.


Pressure Cooker Twice Baked Potatoes


4 medium russet potatoes
2 cups water


Wash the potatoes well and then poke them a few times with a fork or knife.  In the meantime, placeyour trivet inside the pressure cooker, you don't want the potatoes to touch the bottom of the pan. 
Add 2 cups of water, close the lid, making sure the valve is set to seal.  Press the Manual Button for 25 minutes on High pressure.

When the potatoes are done cooking, place a dishtowel over the release valve.  I always do this because sometimes it sputters water everywhere.  Do a quick release of the valve and then remove the potatoes carefully.  I used tongs for this.
 

Let the potatoes cool just enough so you can handle them, then slice them in half.  Using a spoon remove the inside into a bowl.  Now for the filling, you can make your baked potatoes however you prefer.  Some people do a simple mash with milk, salt, pepper and butter.  Some people use mayonnaise or sour cream, whatever you want.

I use butter, salt and pepper, some garlic powder and a little bit of sour cream to make them nice and creamy.  I also like to add bacon bits and cheese to the mixture.

Scoop the filling back into the potatoes, sprinkle on some green onions, and you're done.

If you wish, you can also sprinkle on some shredded cheese and pop them under the broiler to melt the cheese. 

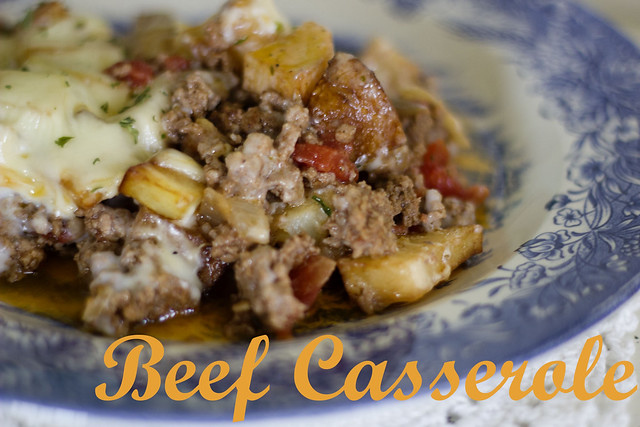
Beef Casserole


Today I'm bringing you a recipe that is sure to become a hit in your home.

Imagine if you will a Cottage Pie, but instead of mashed potatoes, you use cubed fried potatoes and a delicious white bechamel sauce that will make it all yummy and creamy.

I've been trying to get back into cooking and baking on a daily schedule, and most importantly coming up with and trying new recipes.  I always menu plan but it gets a bit tiring making the same things over and over, and it feels like the past year that is what I've done.

So out come the old cookbooks for inspiration.  I truly do hope you enjoy this one, as always if you try it, I would love for you to let me know in the comments below.


_MG_2985

Beef Casserole


1 pound ground beef
4 medium potatoes, peeled and cubed
1 medium onion, diced
2 garlic cloves (I used two teaspoons of my homemade diced garlic)
1 can diced tomatoes, undrained
Olive oil
White Bechamel Sauce (I'll tell you below how to make it, if you don't know how)
1 teaspoon oregano
Salt and pepper to taste
1 Bay Leaf
Shredded cheese of your liking (I used mozzarella)
Oil to fry


In a pot, add a bit of olive oil (I eyeball, but it's about 1 tablespoon), add the diced onion, garlic and bay leaf.  Cook over medium heat until onion is transparent.  Add the ground beef and brown.  Next, pour in the diced tomatoes with their juice, oregano and salt and pepper to taste.  Simmer until the meat is cooked through and there is hardly any sauce left.

In a separate saucepan, add 2 tablespoons of butter and cook over medium heat until melted, next add in 2 tablespoons of flour and stir vigorously and cook for just under a minute.  Pour in milk, a little at a time, stirring with a whisk to make sure there are no lumps.  I season it with a little salt, pepper and a dash of nutmeg.  ( I always add nutmeg to my white sauce).    Bring to the boil and stir constantly until the sauce thickens.

Once meat and sauce are done, set them aside.

Fry the cubed potatoes in oil until golden brown, drain on paper towels.


In a casserole dish, pour in the meat mixture, remember to remove the bay leaf.  Add the fried potatoes on top and spread them on evenly.

Pour over the potatoes the white bechamel sauce, then top with shredded cheese of your choosing.  Bake in a 375 degree oven for 20 minutes.  Sprinkle with Parsley and serve immediately!!!

Wednesday, August 15, 2018

Garlic in olive oil - For cooking

There are a couple things I do after grocery shopping.  I not only put the groceries away, but I leave out certain items to prep for the upcoming weeks, like fruit, veggies and so on.

One thing I always make, is my garlic for cooking.

I find it easier to have it readily available to add to whatever I'm cooking at the time, and I also don't like the store bought minced garlic, it has a weird taste to me.

This is so easy to throw together, takes but a few minutes and it cuts down on prep time when you are needing garlic for a specific recipe.  I'm Portuguese, so garlic is pretty much in every single dish I make.


Garlic in Olive Oil


1 head of garlic
Olive oil


First thing you're going to do, and this is merely to make it easier to peel the garlic cloves, is to place them all in a bowl of water.  Let them sit for about an hour.  I do this first thing when I get home, and then let them sit while I get the groceries put away.

_MG_2560

Peel the garlic cloves, you'll notice that the skin comes right off. 


_MG_2564

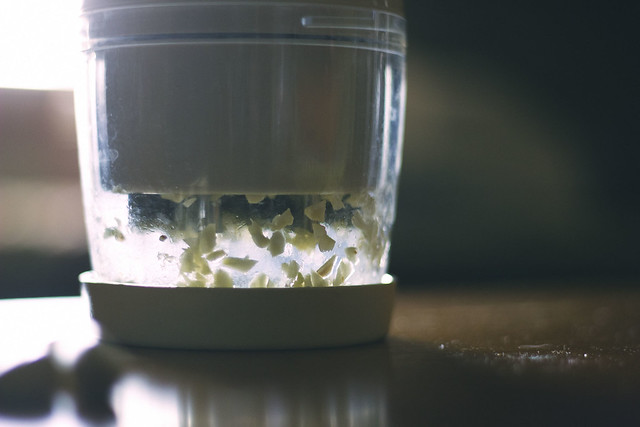
Next, chop them up finely.  You can do it by hand, or pop them in a blender, I use my handy Pampered Chef Chopper.

_MG_2565

Give them a really good chop, then transfer them to a small mason jar.  Now the size of the jar will depend on the amount of garlic you have, I find that for one head of garlic, the small 4 oz. jar works fine.

_MG_2578

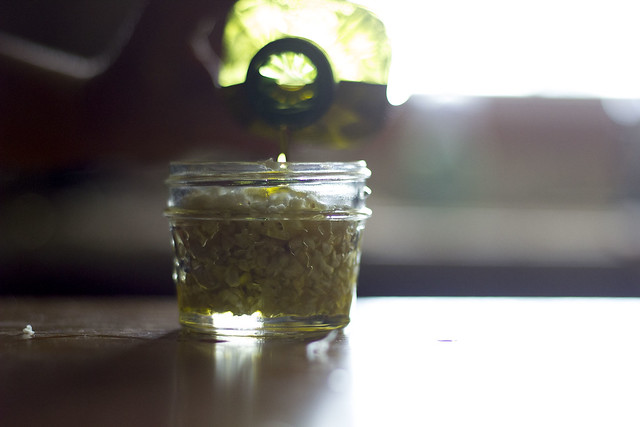
To finish off, pour in some olive oil just until it covers the garlic.  That's it!!!

Pop it in your fridge and it's ready to use. 

It really is an easy way to have your own fresh minced garlic ready to use.  If you want to make a larger amount, just use the same process, remembering to cover with olive oil to the top.

Lemon Chicken

My 15 year old gets easily bored with food, and for some reason he has an issue with chicken.  It's not that he doesn't like chicken, it's just that he finds it boring at times, so I'm always looking for new ways to prepare it.

This is a super easy and simple way to make chicken in your cast iron skillet.

It is chock full of flavor, and perfect with a salad, rice, mash or buttery garlic noodles which is what I served with it last night.

If you're interested in how I make the noodles, I just cook them al dente, and feel free to use whatever noodles your family prefers, I use the same method whether I'm making spaghetti, fettucine, rigatoni or penne.

Once the noodles are cooked, drain them and then add a tablespoon or two of butter, little drizzle of olive oil, chopped garlic (you can use powder if you don't have fresh on hand) and a sprinkle of parsley.  That's it!!!

Now onto the chicken....


Lemon Chicken

1 pound chicken breasts
1/4 cup lemon juice
2 tablespoons olive oil
1 teaspoon black pepper

1 teaspoon dried oregano
1/2 teaspoon salt
1/4 teaspoon chopped garlic

Place the chicken breasts in a ziploc bag, add the remaining ingredients and shake well.  Let rest in the fridge for an hour or overnight.

Heat a cast iron skillet and when it starts smoking a little, add the chicken breasts.  Discard the marinade.

Cook for about 5 minutes on each side until nice and brown.  Transfer to the oven, and bake at 400 for about 20 minutes or until chicken is done.

To serve, sprinkle with fresh parsley and some sliced lemon.

Serve with rice, mashed potatoes or pasta. 

Thursday, May 24, 2018

Homemade Teriyaki Sauce

A few weeks ago, I had placed down on my meal plan - Beef Teriyaki.

It used to be one of our favorite meals but it had also been quite a long time since I had made it.  Stupidly, I should have checked my pantry beforehand, but I was convinced I had Teriyaki sauce on hand.

Well, no, I didn't and honestly didn't even realize it until I had sliced up the beef and was ready to start making dinner.

One thing I'm always talking about on my main blog, is my belief that you don't need to always buy everything you run out of, because most of what you buy at the store can be easily  made at home and much healthier too.

I quickly went on the hunt for a good homemade teriyaki sauce, and found one over on Taste and Tell. It came out so good and it was easy to make.

Give it a try and let me know what you think.


Homemade Teriyaki Sauce

1 cup water
5 tablespoons packed brown sugar
1/4 cup soy sauce
1-2 tablespoons honey
1 large clove of garlic, finely minced
1/2 teaspoon ground ginger
2 tablespoons cornstarch
1/4 cup cold water


Combine the 1 cup water, brown sugar, soy sauce, honey, garlic and ginger in a medium saucepan and set over medium heat.

In a small bowl, combine the cornstarch with the 1/4 cup water and whisk until dissolved. Add the cornstarch mixture to the saucepan.

Heat the sauce until it thickens to your desired thickness. If the sauce becomes too thick, add more water to thin it out.


**I omitted the first two steps because I was in a hurry, so I basically sprinkled the cornstarch over the meat and stirred well to make sure it was well incorporated.  Dumped the meat, and sliced onion into the skillet, then added all the other ingredients and mixed well.

Then cooked the steak as I normally would.  It turned out really well and was delicious.  

Amish Friendship Bread


I had been meaning to make this bread, for a very long time.  I have quite a few Amish cookbooks in my collection and I think every single one of them has a recipe for this amazing cinnamon cake or bread.

The variations are numerous, but the concept is pretty much the same.

I read through the books, also researched a bit online and decided to try the easiest one I could find, mainly because every other one I wanted to make, I seemed to be missing an ingredient.

For those that don't know, Amish Friendship Bread is made from sourdough starter, where after keeping a cup for yourself to bake your bread, you are supposed to share the other remaining cups with friends and family.

I ended up with 4 cups of starter and used one right away, placed the remaining in ziploc bags and froze the rest.  When I want to make a fresh batch, I pull one of the baggies out of the freezer and let it thaw on the counter.

Hope you enjoy this one :)


Amish Friendship Bread Starter

1 cup milk
1 cup brown sugar
1 cup flour

Day 1 - In a large glass, ceramic, or plastic container, mix 1 cup milk, 1 cup brown sugar and 1 cup flour.  Cover with a cloth or some plastic wrap and keep at room temperature, away from drafts.  (I keep mine on the kitchen counter, in the corner away from the window or door).
Day 2 and 3 - Stir well and cover back up.
Day 4 - Add another cup of milk, brown sugar and flour, mix well and cover again.
Day 5 and 6 - Stir well and cover back up.
Day 7 - Add another cup of milk, brown sugar and flour, mix well and cover again.
Day 8 and 9 - Stir well and cover back up.
Day 10 - Add another cup of milk, brown sugar and flour, mix well.  Take one cup of the sourdough starter to bake with.   At this point you can take another cup of starter and place it into a fresh container to start another sourdough starter, or you can take the remaining 3 cups of starter, place each in a ziploc bag and freeze for when you want to use it up.  

If you decide to start another batch, take one cup of your already done starter and treat is as day 1.  Follow the directions for the remaining days.

For the actual friendship bread, I looked up a few recipes and was very curious about one I found on youtube, which uses pudding mix in the batter.  I HAD to try it and it turned out so delicious, it is going to become my go to friendship bread.
 
Amish Friendship Bread
Youtube:  CM Coleman

1 cup Amish Friendship bread starter
3 eggs, lightly beaten
1 cup oil
1 cup sugar
1/2 cup milk
1 box (3 oz) vanilla pudding mix
2 cups flour
1 1/2 teaspoon baking powder
1/2 teaspoon baking soda
1 tablespoon cinnamon
1 teaspoon vanilla extract

 Mix all ingredients together in a standing mixer, or in a bowl, by hand.

Preheat oven to 350 F. 

Pour into 2 greased cake tins, I used my 8 inch ones.  Sprinkle with sugar and bake for about 50 minutes, or until a toothpick inserted in the center, comes out clean.

This cake is delicious, fluffy and super soft.  It's wonderful with a cup of coffee or tea.

Enjoy!!!

Monday, March 26, 2018

Bolas de Berlim - Custard Filled donuts


When I was growing up in Portugal, one of my earliest and most fondest memories, are of the times we would go to the local bakery for a coffee and a cake.  Usually, it would be on Saturday afternoons, and it was called "Lanche", which is not lunch or dinner, but more of a snack in between the two big meals.

The adults would have a coffee and I would eagerly await my glass of chilled coca cola with a slice of lemon and tons of ice, and along with it, one of these Bolas.

_MG_0734

Sometimes, we would have them while at the beach, the vendor would come around yelling out "Bolasssss de Berlim", and we would buy one and enjoy it right there on the beach towel, our fingers full of beach sand and our mouths covered in sugar.

There are memories that stay with you forever, and these are certainly some of those.

I had not made these before because I always felt that they would probably take up too much time, or maybe I thought they would be difficult to make.

But recently, I got a huge craving for these and decided that it was now or never, and goodness, am I glad I gave in.

Not only are they easy to make, but even the egg custard creme inside was a pinch to make as well.  If you're wondering what it is, that is good ol Creme Pasteleiro, or Creme Patisserie.

I do hope you give these a try, they are amazingly delicious and your family will love them for sure.

_MG_0733
Bolas de Berlim

325 grams all purpose flour
25 grams butter
25 grams sugar
Pinch of salt
100 ml water
2 eggs
1 packet dry yeast

Sugar for rolling

In a stand mixer, add all the ingredients, and beat well for 8 minutes.  Check the dough, if it is too dry add a little bit of water a time until you achieve a smooth elastic dough.  If it's too wet, add a little bit of flour at a time.

Pull the dough out and then measure out 50 gram dough balls.  I have a kitchen scale that works with both grams and ounces.

You should get about 12 or so pieces of dough.

Roll each into a ball and place on a lightly greased baking sheet.  Cover with a clean towel and let rise until triple in size.

Fry at a temperature of around 300 F, until gold brown, flipping over to ensure that both sides are nice and golden.

Transfer to a paper lined dish to remove excess oil.  Quickly roll in sugar to coat and set aside.

You can fill these with either jam, vanilla cream or creme patisserie.

To fill, make a 45 degree cut just above the middle of each donut ball,making sure not to slice all the way through, and fill.  You can also cut them straight down the middle as well, again making sure not to cut all the way through.

Enjoy :)

Tuesday, February 27, 2018

Oklahoma Fried Onion Burgers

Oklahoma Fried Onion Burgers

One of the very first times I had my mother in law prepare something for me to eat, it was at their home in Oklahoma, and she presented us with Onion Burgers.

I loved hamburgers, I loved onion and quite frankly, there was nothing about that combination that wouldn't have made me a very happy girl.

I loved the burgers so much that I asked her to show me how to make them.  Surprisingly, so easy but oh so delicious.

I've made them over the last 20 years, but it had been a while now since we enjoyed these, I don't think I had yet made them since moving to Texas.

As I was preparing my menu plan last week, I came across a picture of a fried onion burger and immediately jotted down the Onion burgers on the meal plan.

Then I realized that I hadn't yet shared it here on the blog, and that of course had to be remedied too.

My mother in law cooks all the onion on one side of the griddle, and the burgers on the other.  I do that sometimes too, but the past few times I've been doing it slightly different, and I'll explain that in the recipe below.

By the way, as I'm sure you've noticed, I'm back to cooking and sharing recipes, and I really do hope you're enjoying my return.  If you are, let me know down below and also let me know how long you've followed Full Bellies :)

Right, now onto the delicious Oklahoma Fried Onion Burger.

Oklahoma Fried Onion Burgers

Oklahoma Fried Onion Burgers

1 large onion, halved and thinly sliced
1 pound ground beef
Salt and pepper to season burgers
Butter

Swiss or American cheese (truly your choice of cheese, really)
Hamburger Buns
Mayo, Mustard or Ketchup
Pickles

If you want a thick huge burger, then divide the ground beef into 4 patties.  I usually get 8 burgers out of mine because I don't make them as thick, and also flatten them out quite a bit.


In a griddle, place a few pats of butter.  Take the onion slices and make a mound for each burger patty, on the griddle.  So if you're having 8 burgers, divide the onion slices into eight equal parts and place them down on the griddle.

Take the burger patties and place them on each of the onion mounds, then press down so that the onions stick to the burger.

 
Cook until the onions turn a nice gold brown, about 8 minutes or so.  Flip them over, and cook on the other side until the patty is brown and cooked all the way through.
 

Place a slice of cheese on each patty and let it melt, then transfer to the hamburger buns.  Add desired condiments and toppings and serve.

We like ours just plain with either some mayo or ketchup, and a few slices of pickle, nothing more.  Truly they don't need anything else on, they are divine just like this.

Oklahoma Fried Onion Burgers

Monday, February 26, 2018

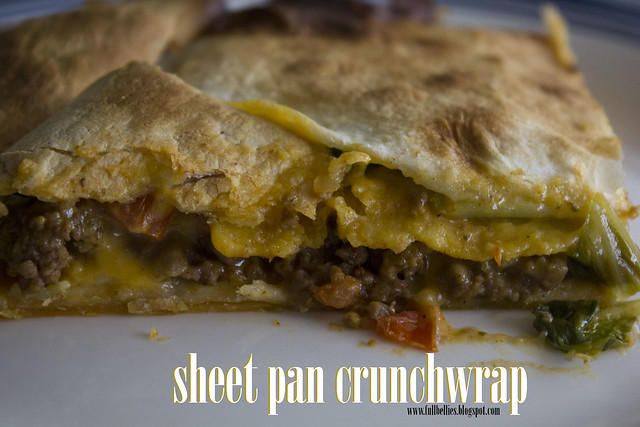
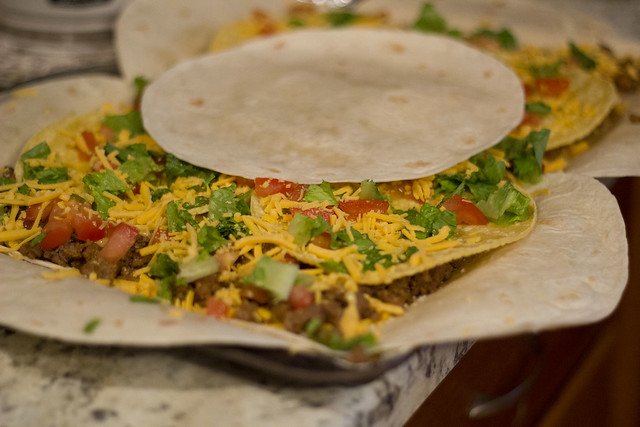
Sheet Pan Crunchwrap


A few years ago I put up a recipe for Homemade Crunchwrap, and it's been one of the most pinned and shared recipes.

If you're a fan of Taco Bell and like Crunchwraps, you may want to give it a try.

So think about a crunchwrap but in a sheet pan, where you can just cut it up into small individual pieces.  What could be better than that?  I'm actually thinking this would be a great dish to serve at get togethers and potlucks.

The recipe comes from Tasty and I adapted it to our taste.

Sheet pan crunchwrap
Sheet Pan Crunchwrap
Servings: 14

2 pounds ground beef
1 package taco seasoning
8 Large Flour tortillas
5 Corn tostadas
Shredded Cheddar Cheese (I didn't measure, just eyeballed and added as much as I liked)
Shredded Mozzarella
Nacho Cheese
Diced tomatoes and lettuce

Preheat oven to 375.

Generously spray a sheet tray with non stick spray.

Brown the ground beef over medium heat, when done, drain excess oil and add the taco seasoning packet.  I added in a tiny amount of water just so it wasn't so dry.

Place the tortillas so half of the tortilla is hanging over the edge of the pan. Place 6 tortillas around the border of the sheet tray and one tortilla in the middle, covering the exposed sheet tray.

Sprinkle half of the cheddar cheese and half of the mozzarella cheese over the tortillas.

Sheet pan crunchwrap

Spread the ground beef over the cheese, then scoop on some nacho cheese over the beef.  Place the corn tostadas on top and lastly, sprinkle on some diced tomatoes and lettuce. 

Sprinkle more cheddar and mozzarella cheese on top, place the last flour tortilla on top of the cheese, in the center of the crunchwrap, then fold over the flour tortillas so they cover the filling and touch the center tortilla.

Place another baking tray on top of the crunchwrap and then weigh it down with a cast iron skillet, or something else that is heavy.

Bake for 20 minutes, then remove the skillet and the baking tray, and bake for another 10 minutes or until the tortillas are nice and brown.

Let sit for about 5 minutes, and slice into smaller rectangles.  Enjoy :)

Monday, February 19, 2018

Biscoitos (Portuguese Cookies)

I grew up in Portugal, and always with my greatgrandmother in the house.  She was the matriarch, the one that oversaw the cooking and pretty much kept a close eye on everyone and everything that was going on.

While my parents had to work, it was my greatgrandma that watched us during the day, cooked our meals, waited for us at the door when we returned from school and then made dinner for everyone.

I learned a lot with her.

One of the fondest memories I have, are of these cookies sitting in a big glass jar.  There would be tons of these always available, and as we walked by the counter, my brothers and I would snatch a few to enjoy.

I will say that they are not very sweet at all, which to me is perfect as I much prefer simple cookies that I can have with a cup of coffee or tea. 

When I first made them, I was worried my husband and kids would not enjoy them, because they're not really the type of cookie they're used to, but they all love them just as much as I, and now I make sure to always have a batch on hand :)

I have my greatgrandma's recipe written down somewhere, just need to fish it out, but this recipe comes from Easy Portuguese Recipes.  It's pretty much the exact recipe that I have written down :)


Biscoitos

3 cups flour
1/2 cup sugar
1 pinch salt
3 teaspoons baking powder
3 eggs
8 tablespoons butter, melted
1 egg for brushing on the cookie (or you can use milk if you prefer)


Preheat the oven to 375 degrees.  Beat together the flour, sugar, salt, and baking powder.

Add the eggs and the melted butter.  Pinch off small balls of dough, about an inch in size, then roll into a log and overlap the ends, making a bow.

Place on a lightly greased baking sheet. 

 
Brush the cookies with some beaten egg, or a little bit of milk if you prefer.


Bake for about 15 minutes or until cookies are brown.  Remove from oven and let cool.

Keep either in a glass container, or in a ziploc bag.  They will keep for quite a few weeks, but they don't usually last very long in my house.