Showing posts with label brazilian. Show all posts

Friday, February 24, 2023

Smoked Sausage Stuffed Sandwich

IMG_4784
 
I wanted to bring you a recommendation for a pretty inexpensive dish, that you can definitely stretch and serve to a crowd, or make it even for just one or two people.  It's up to you.  

It uses very few ingredients, but the result is delicious and filling and just ooohhhhh.  Love it ♥

This recipe or rather this dish, is from Brasil and it's known as Buraco Quente.  It's usually made with ground beef, but you can certainly use beef, or chicken or smoked sausage which is what I used for mine.

If I have to translate exactly, word for word, to English, it means Hot Hole, and I don't know about you all, but that does not sound appealing at ALL when talking about food.  LOL

So, I just call them Stuffed Sandwiches.  Much better!
 
This is one of those sandwiches that your family will love, and will be talking about for a while.  The fact that it's so easy to make and you can change it up, using whatever meat you have on hand, is even better.  
 
 
IMG_4783
 
 
Smoked Sausage Stuffed Sandwich
Buraco Quente de Linguica


Bread Rolls (I made some of my french bread sub rolls, and cut them in half)
Drizzle of olive oil
1 package smoked sausage
1 small onion, finely diced
2 cloves of garlic
parsley and cilantro
salt and pepper to taste
oregano to taste
1 can Media Crema (table cream)
Shredded cheese


In an oven proof dish, take each roll, cut a small piece off the bottom so that it stands flat.  Place the rolls in the dish, then take a small knife and cut out the inside, creating a hole.  Don't leave the edges too thin, or it will fall apart when you fill it with the meat mixture.

In a saucepan, add a little bit of olive oil.  Dice up the smoked sausage.  I cut it into slices, then cut those slices in half then half again, creating little cubes.  Saute them in the olive oil, then add the onion and garlic and cook for a minute or two until the onion is translucent.

Season with salt and pepper and oregano, add the cilantro and parsley to taste, stir well to combine, then add the can of media crema, give it another good stir and remove off the heat.

Fill each sandwich with some of the sausage mixture, then add a sprinkle of shredded cheese of your choice.
 
Pop into the oven for a minute or so until the cheese is melted, then serve immediately.
 

IMG_4781

IMG_4782

Thursday, September 08, 2022

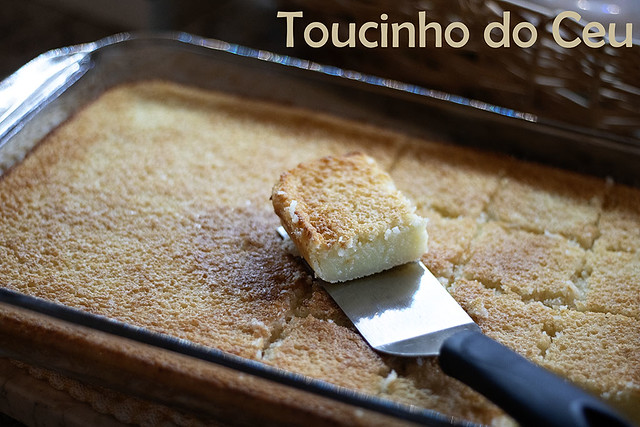
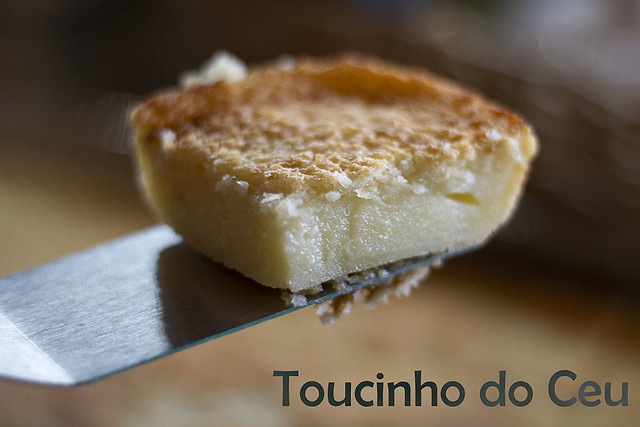
{ Toucinho do Ceu }

Today I am bringing you a Portuguese recipe, well, Brazilian, so from my paternal grandfather's side.  This is one of the easiest desserts you will put together, but it is so good, like so so soooooo good.  It tastes phenomenal.
 
So what about that name?  What does it mean?  Well if we are to directly translate from Portuguese, it means Bacon from Heaven!  
 
I don't know why that name came about, or who decided that was the perfect name for this cake, but I'm good with it, since I love bacon, and this dessert is Heavenly.  Kinda makes sense then doesn't it?

However you may feel about the name, this is the perfect dessert when you have company come over and need something to serve.  Just a few ingredients, a quick blend together and that's it.
 
I hadn't made it in a really, really long time, and when I saw one of my favorite Youtubers making it, the craving kicked in.  So thank you to Greice Brigido for the recipe, and a trip down memory lane.

 
IMG_3804

It is a cake/pudding/tart kind of dessert, all thrown together in the blender and then baked to create this creamy interior and a little coconut crunch crust.  Just trust me, make it, you will love it.

IMG_3806

Toucinho do Ceu


Ingredients
600 ml milk
4 eggs
2 cups of sugar
1 cup of flour
3 tablespoons of butter
100 gr coconut


Directions
Put all the ingredients in a blender, and mix until well combined.  Pour into a 13x9 greased baking dish, and bake at 375 for 30 minutes or until golden brown, and the center is set.

Remove, let cool and serve immediately.

You can place it in the refrigerator and it will keep for a few days, although it never EVER lasts that long in my house.

Enjoy!

IMG_3808


Monday, October 18, 2021

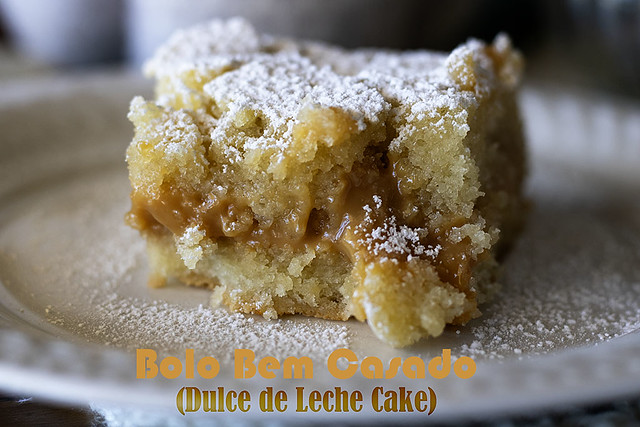
Bolo Bem Casado - Well Married Cake

Bolo Bem Casado

Think of a divine cake, vanilla, spongy, soft, with this dulce de leche filling.  I think it may be one of the easiest cakes to make, but one of the most delicious you'll ever eat.

The name is quite funny, if you translate it word for word from Portuguese to English, it will mean Well Married Cake.  Yep!!!

Which I can understand because the cake layer together with the caramel flavor of the dulce de leche, makes the perfect combination.

Bolo Bem Casado

I have been trying to make more easy, different desserts, for our weekends.  For that purpose, I've been tapping into my Portuguese and Brazilian roots, and bringing to life favorite recipes from long ago.  

The kind that were passed down from generation to generation, or even the one dessert that you remember eating as a child.  

I have many that my great grandmother used to make for us, and I wish more than anything that she was still around to help me in the kitchen, and to continue sharing with me her experience, trust and tried recipes and so on.

I may not have her, but I do have many of her recipes.  Can't wait to bring them here to the blog and share them with you all.


Bolo Bem Casado

Bolo Bem Casado 


For the cake:
4 eggs
1 and a half cups of sugar
3/4 cup oil
1 teaspoon vanilla extract
1 and a half cups of all purpose flour
1 tablespoon baking powder
3/4 cup of water

For the Dulce de Leche:
I cooked a can of condensed milk (please look online on how to do it, I used my instant pot for mine)
 
For the drizzle:
1 cup water
1 cup sugar
1 teaspoon vanilla extract


Beat the eggs with the sugar until soft and pale yellow.  Add in the oil, vanilla and beat well for another minute.  Next, add in the flour, baking powder and water, and combine until well incorporated.

Pour into a greased 13 x 9 inch pan.    Bake in a 350 degree oven for 35 to 40 minutes, until golden brown and a toothpick inserted in center, comes out dry.

Remove from oven and set aside until completely cooled.  Then remove from pan, and slice in half to create two layers.

Place one of the layers back in pan, then spread the cooked condensed milk (dulce de leche) over it.  Top with the remaining layer.

In a small saucepan, add the water, sugar and vanilla extract.  Mix well and then bring to a boil, and simmer for 10 minutes.  Remove from heat.   Drizzle onto the cake, making sure to cover it well, then pour any remaining syrup into the sides of the pan so the cake absorbs it.

Sprinkle on powdered sugar.  Enjoy!!!


Sunday, May 10, 2020

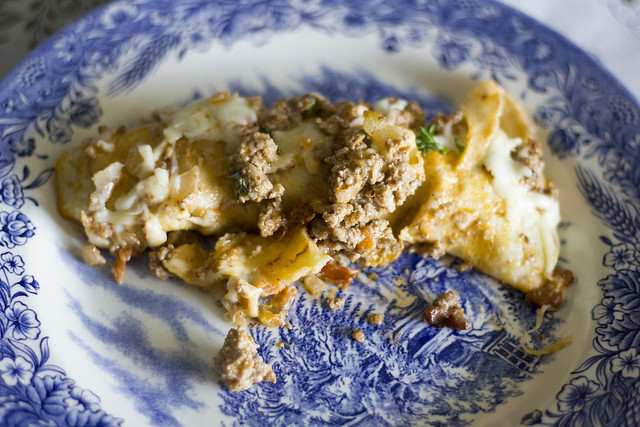
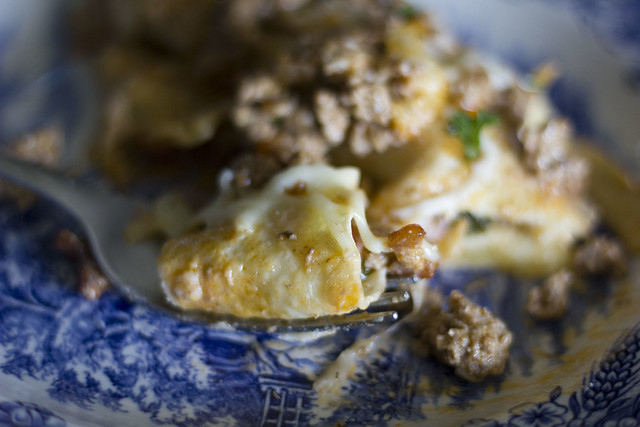
Beef filled Crepes

_MG_8345

I am so blessed to have a heritage that allows me, and my family, to enjoy a myriad of different dishes from different ethnic cuisines.

As you may know, I was born in Mozambique in the East coast of Africa.  When the independence happened in 1974, just a month after I was born, we temporarily moved to Rhodesia, now known as Zimbabwe, and then onto Portugal.  Mozambique was a Portuguese colony, so I am Portuguese but I also have Brazilian on my father's side, my great grandfather and grandmother and their ancestors, were all Brazilian.  Goodness!!!

_MG_8346

From Portugal, to South Africa where I spent most of my childhood and then I married my American husband and have lived in the States for the past 22 years.

_MG_8348

So as you see, I have a lot of influence of different cultures around me, which makes for a constant array of dishes from Portuguese, to Brazilian, South African and American.  Not to mention the Italian, Chinese and Mexican food which I love so much, so yes, a plethora of different food is at our disposal.

The recipe I bring you today is Brazilian.  Super easy to make and a dish I think your family will enjoy.

_MG_8344

Beef filled Crepes

Ground beef
1 medium onion, diced
2 medium tomatoes, diced
2 tablespoons tomato puree
1 tablespoon Garlic paste
Olive oil
Salt and pepper to taste
Parsley
Media Crema

For the crepes:
2 eggs
1 cup of milk
4 tablespoons oil
1 and a half cups of flour
Salt to taste


Add a little drizzle of olive oil to a skillet.  Add in the garlic and onion and cook over medium heat until the onion is translucent.  Next, add in the ground beef and cook until brown.  Once the meat has released all it's liquid and starts to fry, add in your tomato, tomato puree and stir to combine.

Cook over medium heat for a few minutes, until tomato is tender.  You may need to add in a little water.  Season with salt and pepper to taste.  I always add parsley, but if you don't like it you can omit it.

Next goes in a small can of Media Crema.   Mix well, and take off the heat.

For the crepes, you can use the recipe I'm giving you or your favorite crepe recipe.

Make the crepes, allowing 2 for each person.  As I make them, I set them on a plate and roll them up, to keep them warm.

When done, fill each crepe with a bit of the beef filling.

Put a little of the beef mixture on the bottom of a casserole dish.  Then as you fill the crepes, set them in the baking dish.  When done, take any leftover beef filling and spoon over the crepes.  Sprinkle on some shredded cheese and bake at 375 for 5 to 10 minutes until cheese is melted.

Serve immediately!!!

_MG_8347

Wednesday, March 04, 2020

Bolo de Milho (Brazilian Cornmeal Cake )

_MG_7569

There is a special moment in every day life, when you're Portuguese that is, that you have this thing called "lanche".

It is typically in the afternoon between lunch and dinner, and is comprised of a cup of coffee or tea and a slice of cake, some fresh bread with butter, or a sandwich etc.

There really isn't a translation to the word and it's not something that I see many other countries doing, unless in Europe, or Brazil.  It is certainly not something done in America where I've lived for the last 21 years.

But, it is something I try to hold on to as part of my heritage, and really, who says no to a slice of yummy cake mid afternoon?

I try to make a cake every few days, my family has gotten used to it and almost expect it.  When one is finished, I start thinking about which to make next.

This cake that I'm sharing today is certainly one of my favorites, although not a fave or even liked by my son Nicholas, who can not stand cornbread or cornmeal of any kind.  To him, it's a texture thing, and I get that as corn does have that unique texture, almost grit to it, but I absolutely love it.

_MG_7567

Typically you would add guava paste.  It is very similar to the Marmelada that we make with the Quince fruit, but using Guava instead.  You can find it at Walmart and local ethnic stores.

Basically you just cut it into small cubes and gently drop them into the cake batter before baking.  I didn't have any guava paste on hand, so I substituted with half teaspoon drops of raspberry jam.  It still turned out phenomenal.    This step is optional though, and you don't have to add anything to the corn cake, it is equally delicious without.

Give it a try and let me know what you think.

_MG_7562

Bolo de Milho (Brazilian Cornmeal Cake)


1 cup flour
1 cup Corn Meal (I like using yellow, but you can use white corn meal too)
1 tbsp. baking powder
¼ tsp. salt
1cup sugar
2 eggs
½ cup Vegetable Oil
1 cup milk
Guava Paste cut into half inch cubes, or jam of your choice (optional)


Heat oven to 350°F.   Grease a cake pan, bundt or 13x9.  Set aside.

In a mixer bowl, beat eggs and sugar until creamy and pale yellow.  Add the oil and milk.

In a separate bowl, mix together flour, salt, corn meal and baking powder.  Add to egg mixture and mix until smooth.

Pour batter into greased cake pan.  If adding guava paste or jam, gently drop around the cake batter.  They will likely sink to the bottom, but that is ok.  Bake for about 30 minutes, until the cake starts pulling away from the sides, or a toothpick inserted in middle comes out clean.

Remove from oven and let cool for 10 minutes.  If using bundt pan, invert cake onto plate.

Tuesday, May 14, 2019

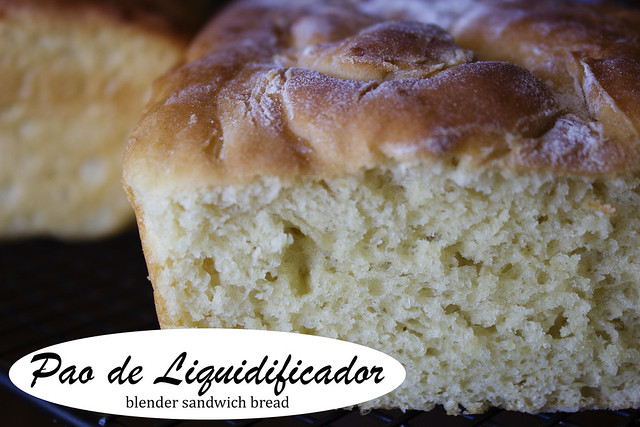
Pao de Liquidificador - Blender Sandwich Bread

_MG_5185

Right, you're probably wondering if I've lost my mind, or wondering just what in the world is a blender sandwich bread.

I had those same kind of thoughts when I first came upon this recipe, but, I'm all for trying new things and the fact that it was basically made in a blender, peaked my interest.

If you're looking for a typical stodgy, firm bread, this is not it, this bread is a softer, flakier consistency, but equally delicious.  And hey, it's easy, dump a bunch of things in a blender, then mix with flour and yeast.

This bread is quite common in Brazil.  You're probably questioning my interest in all things Brazil lately, and the truth is that my greatgrandparents, on my grandfather's side, were Brazilian.  Just recently, I have started delving more into ancestry and family trees and trying to trace back our beginnings, and that has really made me want to tap more into this part of my heritage, so don't be surprised to see a few more recipes here and there from the beautiful country of Brazil.

But that's enough jabbering for now, you're probably sitting there waiting patiently for the recipe, so here it goes.  Give it a try and do let  me know what you think, in the comments down below.

_MG_5182

Pao de Liquidificador - Blender Sandwich Bread


2 packets of instant yeast
1 and a half cups of warm water
2 tablespoons sugar
1 teaspoon salt (I will add more next time as I feel it wasn't enough)
1/2 cup of vegetable oil
3 eggs
4 cups all purpose flour


In a blender, beat the yeast with the warm water and the sugar.  Add in the salt, oil and eggs and mix well for about a minute.

Transfer to a big bowl, and add in the flour, mix well until the dough is well incorporated.  The dough is not a typical bread dough so it will be quite soft and not as solid.

Pour into two greased loaf pans, and cover with a clean kitchen towel.  Let rise for an hour.

Bake at 350 for 40 minutes until golden brown.

Monday, April 22, 2019

Cuca de Banana - Banana Streusel Cake


When people ask me where I'm from, I often wonder how to explain, because I was born in Mozambique which was a Portuguese colony at the time, but it is an African country so I'm African but Portuguese, lived until I was 10 in Portugal, then moved to South Africa and lived there for 14 years.

We are of French descent, and my grandfather's parents were from Brazil.

Are you confused yet?  Hahah

Anyway, that means that when it comes to food I love all kinds but I have a special affinity for Portugese and Brazilian.

With that in mind, I thought I would come in and share a cake recipe that is very well known in Brazil, it is a banana cake with a yummy streusel topping.  There's absolutely nothing to it, it's quick to put together, using ingredients you no doubt already have in your pantry.


Cuca de Banana - Banana Streusel Cake

For the cake:
150 grams sugar (1 cup)
150 grams of cold butter (6 tablespoons)
2 medium eggs
150 grams of self rising flour (if you don't have it, you can use one cup of flour, 1 teaspoon of baking powder and a half teaspoon of salt)
4 ripe bananas, sliced

For the streusel topping:
6 tablespoons of sugar
4 tablespoons of flour
2 tablespoons of ground cinnamon
2 tablespoons of butter


In a stand mixer, beat the cold butter with the sugar for about 5 minutes, until soft and fluffy.  Add the eggs one at a time, until well combined.

Start adding the flour, a little at a time, beating on low speed, once the flour is incorporated, turn the speed up to medium and beat well for 2 minutes.

Grease a springform pan with butter and flour, pour in the batter, and then lay the sliced bananas on top.  Bake in a 350 degree oven for 30 minutes.  Do NOT open the oven door during the first 20 minutes.  After 30 minutes, check to see if cake is cooked all the way by inserting a toothpick near the center, if it comes out dry, it is done.

Remove from oven.

Make the streusel topping by mixing all the ingredients together, then crumble over the baked cake, return to the oven for another 10 to 15 minutes. 

You can also place the streusel on the cake before baking in the oven, but I prefer to do it this way because I find the topping gets nice and crunch and doesn't mix into the batter.

Let cool  and serve.