Wednesday, March 23, 2022

Pao de Leite Condensado - Condensed Milk Bread

IMG_2830

I was having a craving for a sweet bread.  In Portugal we have a few sweet breads, with a special one for Easter called Folar.  The Folar usually contain hard boiled eggs in the center.
 

I will probably make one for Easter this year, and share the recipe with you here, as well.
 
The recipe I'm bringing you today is for a condensed milk sweet bread, which is not only divine, but so easy to make as you use a blender for the liquids and then just mix with the flour and rest of the dry ingredients.  Before going into the oven to bake, you brush on a egg yolk and milk mixture, which in turn give it this beautiful brown color, and a distinct taste that is unbeatable.

IMG_2834
 
You can also turn these into rolls if you wish, but the fun part really is in the preparation, as you cut the dough into slices which in turn produce a loaf that is practically ready to cut.

This makes a delicious toast slathered on with butter, or you can make french toast, or a sandwich too.  If you like Hawaiian bread, you will love this one.
 
The recipe itself makes 3 or 4 loaves, depending on the size of the loaf pan you are using. 
 

Pao de Leite Condensado - Condensed Milk Bread
 
 
Ingredients
4 eggs
3 tablespoons butter (or  75 grams)
2 cups of milk (480 ml)
1 can condensed milk (395 grams)
3 tablespoons sugar (36 grams)
1 teaspoon salt (2 grams)
8 cups all purpose flour (1.120 kg)
Half a tablespoon Yeast (15 grams)
For glaze:
1 egg yolk
2 tablespoons milk


Directions:
In a blender, add the eggs, butter, milk and condensed milk, and blend until well incorporated.
 
In a separate bowl, add the yeast, sugar, flour and the salt.  Remember not to let the salt and yeast touch, so that the salt does not kill off the yeast.  I always add my yeast and my salt on opposite sides of the bowl.
 
Pour the contents of the blender into a big mixing bowl.  Then start adding the flour mixture, a cup at a time, mixing well after each addition.  When it becomes hard to stir, transfer the dough onto a floured surface and knead for about 10 minutes, until smooth but still slightly tacky.  
 
Transfer into a well oiled bowl, cover with plastic wrap and a dish towel, and let rise for an hour or until doubled in size.
 
Punch dough down, transfer to a floured surface and cut into 4 or 3 equal parts (depending on the size of your loaf pans or if you're making 3 or 4 loaves).
 
Take each dough ball and roll out into a rectangle, do not roll too thin.  Then start rolling the dough back up, as if you were making cinnamon rolls, pinching the seam at the bottom and both sides.  I just take both sides of the dough on each end and pinch to close.  

Next, take a dough cutter or a big knife, and divide the roll of dough into equal parts.   I usually cut in half, then half again and half again, etc.  It doesn't really matter how many parts you cut it into, obviously the more cuts you make the thinner the slices will be.  I did 16 slices in each loaf, so I cut the dough into 16 equal parts.

Next, carefully lift the whole loaf up, keeping the slices together, and place into the loaf pan.

Do the same with the remaining dough balls.

Cover with a kitchen towel again and let rise for another hour or until it has doubled in size.

Preheat the oven to 355 degrees.   In a small bowl, mix together 1 egg yolk and 2 tablespoons milk.  Brush over the prepared loaves, and then bake in the oven for 16 to 18 minutes or until brown and cooked through.  Just keep an eye out, obviously each oven is different.

Once the loaves are out of the oven, brush each with a little butter, remove from pan and let cool completely.
 
I keep my bread in a ziploc bag, and usually as with all my other bread, I keep it in the fridge so it stays longer.  
 
Enjoy!!!!


Saturday, March 19, 2022

Bacon Spaghetti

 
I grew up in a house with 4 siblings, at a time when we didn't have a lot of money.  Both my parents worked hard to provide for the family, and there was never a time we went without anything, especially food.  

Meals were a big deal, they were not only sustenance for our bodies, but they were a time to come together as a family, sit around the table, and talk about our day and anything and everything in between.

We always had a family member living with us, my greatgrandmother was there from my earliest memories, until the day I married and left South Africa.  At some point, my uncle lived with us too, and then my grandmother and grandfather, and so on.  So family meals meant a big table, filled with people.


It was important to my stepmother and greatgrandmother, to have meals on the table that were filling, but most of all enough for everybody.  It is not cheap feeding a big family, so they had to get creative at times and use what they had on hand.  Lucky for me, our family is Portuguese, and we know how to cook, we learn from a very young age.  Not to toot our own horns, but we are very much aware of what spices go well with what, and can easily and effortlessly make a delicious dinner with a few ingredients.

Bacon Spaghetti, was one of those meals that I loved, and still do to this day.  It is one that I make when I am in a pinch, or need to cut back on the grocery budget, or for example, now that the prices of food and everything else are soaring.

It doesn't take a lot of ingredients, and you can make as much or as little as you need.  Now remember, I don't cook using measurements, I eyeball everything, so I'll try to tell you how to make it, best as I can.

If you do try it, I would love to know what you think, so please come back and leave me a comment down below.


Bacon Spaghetti


Ingredients:
Bacon, cubed (the amount depends on how much you're making, if it's for a lot of people use a pound)
Spaghetti noodles
Onion, diced
Tomato, diced
Tomato sauce
Olive oil
Garlic
Salt and pepper to taste
Chili flakes
White wine
Bay leaf
Paprika
Fresh Parsley
Boiling water
 
 
Directions:
In a pot, add a drizzle of olive oil, garlic, diced onion and diced tomato, and cook until onion is translucent.   Add in the bacon, and cook for a few minutes.  Season with salt and pepper, bay leaf, paprika, chili flakes and tomato sauce.  Mix well, then add in the white wine and the fresh parsley.

Cook for 5 to 10 minutes.  

Next, add in the spaghetti noodles, then pour in boiling water, until it covers the noodles completely, about an inch above.  Give everything a good stir, place the lid on and cook until the noodles are to your liking.  Remember to give it a stir once in a while, and check to make sure it has enough liquid, if need be, add in a little more water.  Check the seasonings, and adjust as needed.

I like to cook mine until the spaghetti is al dente, and the sauce is thickened.

Serve immediately!

Monday, February 21, 2022

Menu plan for week February 21 - 28

Good morning everyone, I know I haven't been very good at updating this ol' blog, but I've been trying to get more recipes posted the past few days.

I sure hope you've been enjoying them.  

I plan on posting more frequently, sharing family favorites, new meals we have discovered and continuing to build up on my record of recipes, here on the blog.

If you've been following me for a while, thank you for still being here.  I sure hope you'll stick around.

Here is this week's meal plan, I'm making some old favorites, and sticking to recipes already available here on the blog.  I will be taking new pics for some of them, because they're quite old and have been here for many many years, but I enjoy going back in time, seeing what we were eating, and making some of those comfort foods again.

Hope you enjoy the new menu, and hope it inspires some of you, if you're struggling to figure out what to make for your families.
 
 
Sausage Rice, Fried Okra


Chicken Alfredo, Salad


Meatballs and Spaghetti, Garlic Knots


Dad's Favorite Chicken
 
Dad's Favorite Chicken, Mashed Potatoes with Carrot, Salad


Sandwich Ring
 

Baked Ziti
 
Baked Ziti, Homemade Garlic Bread


Day 22
 
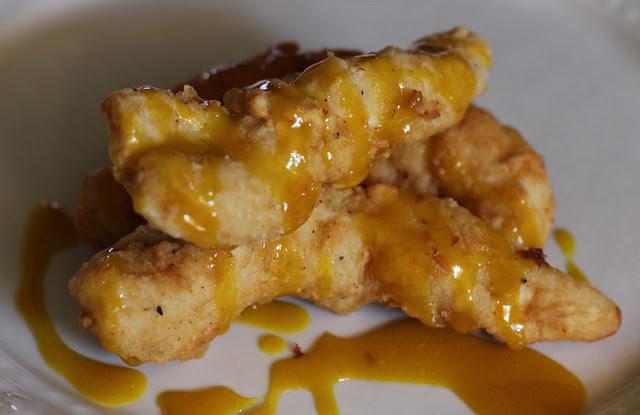
Honey Mustard Chicken Strips, Waffle Fries, Bacon Thousand Island Chopped Salad


Saturday, February 19, 2022

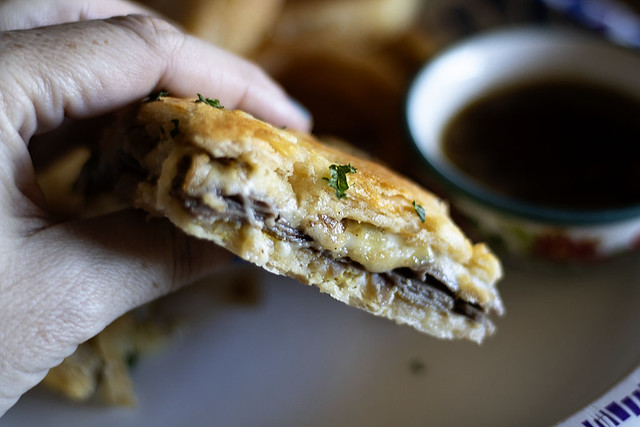
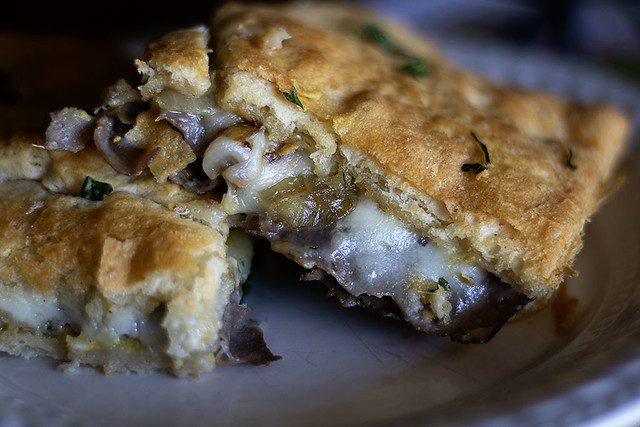
French Dip Squares

IMG_2654

I love a good french dip sandwich.  There used to be a time, where that is all I would order, when we went out to eat. 

When I saw this recipe a while back, I immediately bookmarked it because I knew it would be something, that my family and I would really enjoy.  Since Friday nights and weekends, I try to make easy meals, this was the perfect pick for a yummy, fun, easy meal to get on the table.  

I paired these french dip squares with onion rings, but you could do fries, or a salad.  You could even make these for a get together, party and so on. 

IMG_2652

The recipe is from Delish.com so pop on over there for more delicious meal ideas.
 

IMG_2659

French Dip Squares
 
 
Ingredients
2 (8-oz.) tubes refrigerated crescent rolls 
4 tbsp.butter, divided 
2 medium onions, thinly sliced 
4 sprigs fresh thyme, divided 
Kosher salt 
Freshly ground black pepper 
1/4 c. whole-grain mustard 
1/2 lb. deli roast beef, patted dry 
9 slices provolone 
1 tbsp. freshly chopped parsley 
1 clove garlic, minced 
1 c. low-sodium beef broth 
1 tbsp. Worcestershire sauce 
 
 
Directions 
Preheat oven to 350° and grease a 9"-x-13" baking sheet with cooking spray. Place one unrolled can of crescents on prepared baking sheet and pinch together seams. Bake until edges are slightly golden, about 12 minutes. Remove from oven and set aside. 
 
Meanwhile, caramelize onions: In a large skillet over medium heat, melt 2 tablespoons butter. Add onion and 2 sprigs thyme and season with salt and pepper. Cook, stirring occasionally, until onions begin to soften and turn slightly golden. Continue cooking, stirring occasionally, until onions are soft and caramelized, about 20 minutes. Remove from heat. 
 
Build squares: Spread an even layer of mustard onto prepared crescent, leaving a 1/2" border clear on all edges. Top with a layer of roast beef and a layer of provolone. Top with caramelized onions. 
 
Unroll remaining tube of crescent rolls and place on top of onion layer. Press seam into bottom crust to seal all edges. Melt 1 tablespoon butter and brush all over top of crescent dough, then sprinkle with parsley and salt. Bake until dough is golden and cooked through, about 35 minutes. (If dough is browning too quickly, cover with foil.) 
 
Let cool 15 minutes before slicing into squares. 
 
Meanwhile, make au jus: Melt remaining 1 tablespoon butter in a medium skillet over medium heat. Stir in garlic and cook until fragrant. Add beef stock, Worcestershire sauce, and remaining 2 sprigs thyme, stripped from stem. 
 
Season with salt and pepper. Simmer for 10 minutes until reduced slightly. Serve squares with au jus on the side for dipping. 
 
IMG_2655

Thursday, February 17, 2022

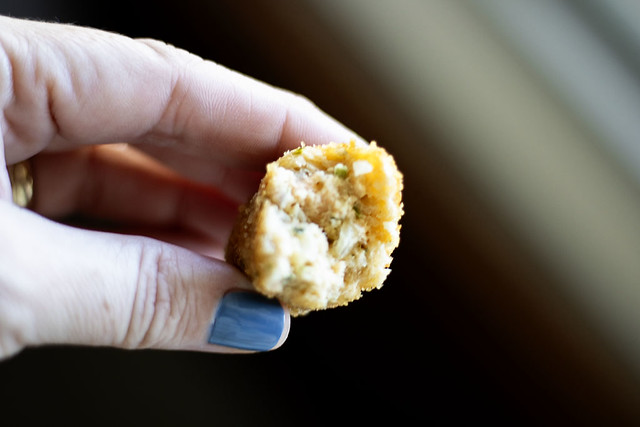
Salmon Croquettes

IMG_2575
 
I was born in a beach town, and then later moved to Portugal where the ocean was always just a few minutes away.  That meant that the availability of fresh fish, was something we just took for granted.

Fish and seafood have always been something I love but don't eat much of, primarily because I prefer fresh to frozen, but also because I find it so expensive at the grocery stores.

When I lived in South Africa, we had a few fresh fish markets that we would always go buy from.  Anything from cod to mussels, crab and huge prawns, clams, calamari, you name it, we had it, so not having that anymore is quite sad at times.  I miss it, and so once in a while that craving comes in and I try to answer the best way I can.
 
IMG_2573

This past grocery trip, I picked up some Salmon.  It's not something I buy ever, I find it extremely expensive and for a family of four, it just isn't enough unless I really splurge.  But I found a small package for $7, it only had 4 small pieces in there.  Clearly not enough to make it a main part of the meal, so I opted to make it stretch and turned it into some Salmon croquettes instead.

It was so good, so so good.  My 18 year old devoured them and asked if we can have them again soon.  We will see son, we will see.

Anyway, here is the recipe, hope you enjoy it.


IMG_2572

Salmon Croquettes


Ingredients 
1/4 cup diced onion
1 pound fresh salmon, skin removed and diced
Salt and pepper, to taste 
1/4 cup of mayonnaise
1/4 cup of bread crumbs
Minced garlic, to taste
1 teaspoon mustard
1/4 teaspoon Old Bay seasoning 
Parsley and Cilantro, to taste
 
 
Directions
 
In a small skillet, add a little bit of olive oil and fry the onion until translucent.  Transfer to a big bowl.  To the onion, add the salmon, salt and pepper to taste, mayonnaise, bread crumbs, garlic, mustard and old bay seasoning  and parsley and cilantro.

Mix well, then form into small croquettes.

In a small bowl, add some breadcrumbs, then roll each croquette in the crumbs and set on a tray.  Repeat with remaining croquettes.  Place in the fridge for 30 minutes to an hour.

When time is up, remove from fridge, and fry over medium heat for about 3 minutes on each side.  Serve immediately!