Tuesday, March 30, 2010

King Ranch Chicken Casserole

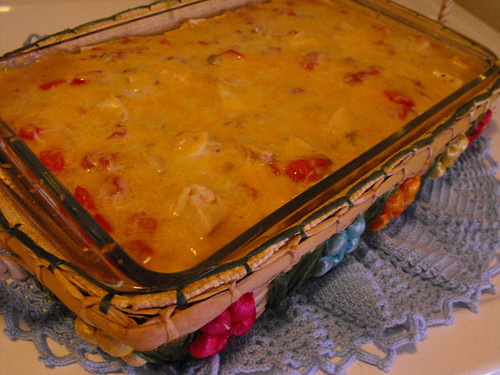
Tried this recipe from the Let's Dish blog. It was pretty good, my kids found it a little too spicy for their liking so I'm thinking of tweaking it in the future.

2010_03300020

KING RANCH CHICKEN CASSEROLE
Credit: Let's Dish

Ingredients
2 pounds boneless, skinless chicken breast halves
2 tablespoons olive or vegetable oil
2 tablespoons butter
1 small onion, chopped
1 medium green bell pepper, chopped
1 medium red bell pepper, chopped
1 garlic clove, minced
1 cup chicken broth
1 (10 3/4 ounce) can cream of mushroom soup
1 (10 3/4 ounce) can cream of chicken soup
1 (10 ounce) can diced tomatoes and green chiles
1/2 teaspoon salt
1 teaspoon dried oregano
1 teaspoon ground cumin
1 teaspoon chili powder
2 cups grated Cheddar cheese
8 (8-inch) flour tortillas, cut into 1/2-inch strips

Directions
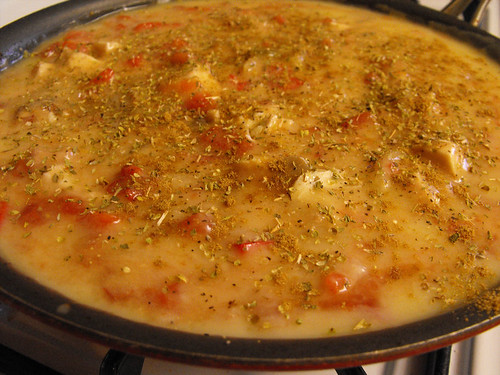
Preheat oven to 350°. Heat oil in a large skillet over medium heat. Cook chicken breasts until browned and cooked through. Remove from pan and shred into bite size pieces. Melt butter in same skillet over medium heat. Add onion, and sauté until tender. Add bell peppers and garlic, and sauté 3 to 4 minutes more. Stir in chicken broth, both soups, diced tomatoes and green chilis, salt and spices.

2010_03300010

Cook, stirring occasionally, for about 5 minutes. Lightly grease a 9x13 inch baking dish. Spread about 1/4 cup of the chicken mixture in the bottom of the pan to coat. Layer with half of the tortilla strips. Top with half of the chicken mixture and 1 cup of cheese. Repeat once. Cover and bake at 350° for about 40 minutes. Uncover and bake for and additional 5-10 minutes. Let stand 10 minutes before serving.

2010_03300014

Delicious Steak Pizza!

So hypothetically, let's say you have grilled T-bone steaks for dinner on Saturday and then Sunday you have a leftover steak just sitting there all alone in the fridge, and you look at it and feel so sad that it's just been left to it's own devices?

Then you look at the clock and realize that it's dinner time but you were running around all day with the family, and you need to get dinner on the table, but it's also need to use up that steak?

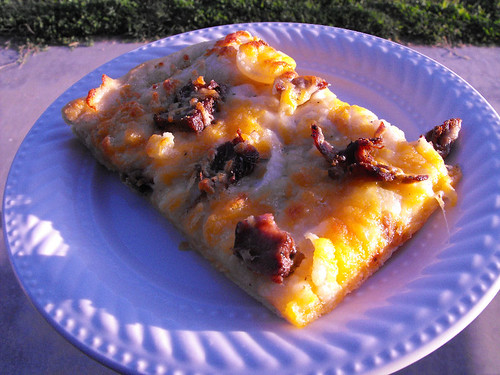
Well, that's when my Honey Pizza dough and the Steak collide in a delicious mixture that will have you crying for more, the kids begging for pizza for breakfast the next day, and your husband's co-workers bribing him for a slice.

This has got to be the easiest pizza I ever made and yet....Oh my word. Phenomenal!

2010_03300001

Steak Pizza

1 pizza dough recipe using my Honey Pizza Dough
1 leftover grilled T-Bone steak (I'm sure it would work with any leftover steak from BBQ)
1 medium onion, sliced
Buttermilk Ranch
Shredded Cheese

Make the pizza dough following the Honey Pizza Dough recipe.

Spread it out on your favorite pizza pan, for me this time I used a rectangle pan. Cut the leftover steak into small bite size pieces and set aside.

Spread Buttermilk Ranch on the dough, add the steak and the onion slices. Cover with Shredded cheese and bake at 450 degrees for 10-12 minutes.

Enjoy!

2010_03300003

Friday, March 26, 2010

Bisquick Upside Down Pineapple Cake!

I love Bisquick, it's one of those pantry staples that I always keep on hand.

But did you know that's it's not just good for pancakes and biscuits? I think far too many times it's taken for granted because this little box can make so much more, like a delicious fluffy cake.

So here's what happened, I got a craving for something sweet, and I haven't made Pineapple Upside Down cake in a long, long, lonnnnnng time.......but I also wanted to make a super fast recipe without too many ingredients.

Little did I know that Bisquick has a great recipe for just what I was looking for.

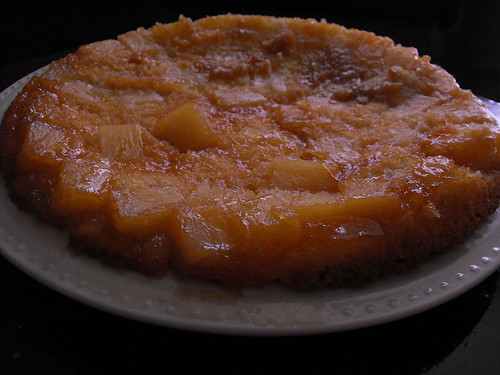
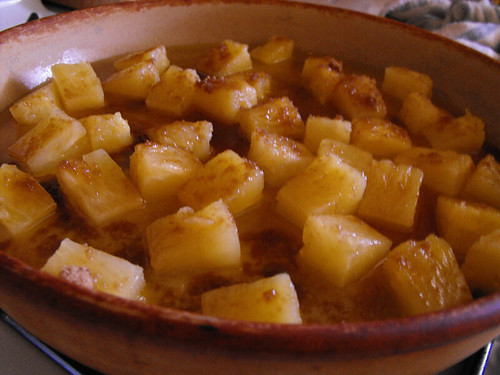
I changed a few things, for one, I didn't use pineapple slices because all I had on hand were chunks.

I also omitted the pecans and the cherries. But it's SO SO good, I've had two slices already, so so bad.

2010_03260011

QUICK PINEAPPLE UPSIDE DOWN CAKE
Credit: Bisquick

1/4 cup butter or margarine
1/4 cup packed brown sugar
1 can (8 oz) pineapple slices, drained, cut in half
2 tablespoons chopped pecans, if desired
Maraschino cherries, if desired
1 1/2 cups Original Bisquick® mix
1/2 cup granulated sugar
1/2 cup milk or water
2 tablespoons vegetable oil
1 teaspoon vanilla
1 egg


1. Heat oven to 350°F. In 9-inch round pan or 8-inch square pan, melt butter in oven. Sprinkle brown sugar evenly over melted butter. Arrange pineapple slices in single layer over sugar mixture. Sprinkle with pecans. Place cherry in center of each pineapple slice (cherries with stems can be added after baking).

2010_03260006

2. In large bowl, beat remaining ingredients with electric mixer on low speed 30 seconds, scraping bowl constantly. Beat on medium speed 4 minutes, scraping bowl occasionally. Pour batter over pineapple and cherries.
3. Bake 30 to 35 minutes or until toothpick inserted in center comes out clean. Immediately place heatproof serving plate upside down over pan; turn plate and pan over. Leave pan over cake a few minutes so brown sugar mixture can drizzle over cake; remove pan.

2010_03260013

Cool at least 10 minutes before serving. Store loosely covered.

2010_03260016

Tuesday, March 23, 2010

Cheeseburger Pie

Quick middle of the week dinner, my kids loves it, hubby loves it and I love it too.

It's super easy to make and I'm sure you have all the ingredients needed already, why not give it a try?

I actually made two pies from this recipe, I was able to divide the meat mixture into two pies, made one with the American cheese and one with Pepper Jack, this way I have an extra pie in the freezer for a quick weekend lunch.

2010_03230008

CHEESEBURGER PIE

1 unbaked (9-inch) pie shell
1 pound ground beef
1/2 cup tomato sauce
1/3 cup chopped onion
1/3 cup chopped green bell pepper
1 teaspoon instant beef bouillon granules
3 eggs, beaten
2 tablespoons all purpose flour
8 slices American cheese, divided

Preheat oven to 425 F. Bake pie shell for 8 minutes, remove from oven.
Reduce temperature to 350 F.

Heat a large skillet over medium heat; add beef. Cook until brown and crumbly, about 5 minutes.

Add tomato sauce, onion, bell pepper and bouillon. Cook until bouillon dissolves; remove from heat. Add eggs and flour, mix well.

Tear cheese slice into small pieces. Stir cheese into beef mixture; spoon into pie shell. Bake pie for 25 minutes or until filling is heated through.

2010_03230005

Cut remaining cheese slices into triangles. Arrange triangles in a spoke fashion on top of pie.
Bake for another 5 minutes longer or until cheese is melted. Cut pie into wedges.

2010_03230007

Friday, March 19, 2010

Crockpot Nachos

We are a nacho loving family.

They're so easy to make but too many times we succumb to the busy day excuse and pick the drive thru of Taco Bell.

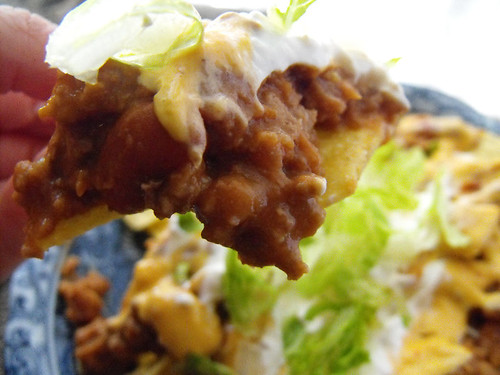
Well, no more....I threw some ingredients together in the crockpot, went about my day and 2 hours later had these awesome nachos ready to eat.

My kids have deemed them "Better than Taco Bell" and that for me is music to my ears.

Go ahead and try them, then come back and let me know what you thought.


2010_03190057
Crockpot Nachos

1 lb ground beef, cooked and drained
1 can refried beans
1 can red kidney beans, undrained
2 tablespoons tomato paste
1 pkg. taco seasoning
1/2 cup water
salt and pepper to taste
garlic powder
tortilla chips
Mexican 4 cheese salsa con queso
Topping of your choice (I used finely diced onions, sour cream and lettuce, we don't like tomatoes here at home lol)

My crockpot can be used on the stovetop to cook meat etc in, so I browned the ground beef, then drained out the grease. Placed it back on the crockpot base and added the refried beans, kidney beans, tomato paste, taco seasoning, water, salt and pepper and garlic powder.

Cook on high for 2-3 hours.

Warm up the salsa con queso, remember to pour it into a microwave safe container and not use the glass jar it comes in.

2010_03190058

Serve the meat mixture over the tortillas, pour over the warm cheese and add the toppings.

2010_03190060

Yum, Enjoy!

Wednesday, March 17, 2010

Garlic Sauced Chicken

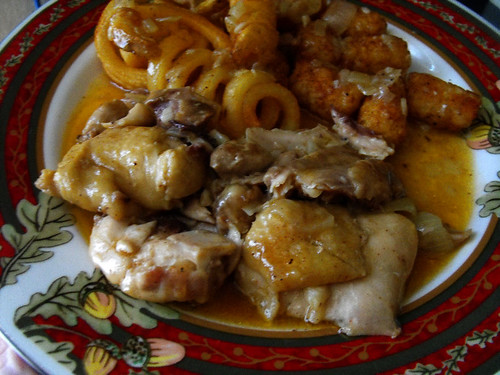
Easy chicken dish but it tastes amazing. Besides, who doesn't love garlic?


2010_03170036

Garlic Sauced Chicken

1 tablespoon vegetable oil
1 (2 1/2 pound) chicken, quartered
1 onion, chopped
3 cloves garlic, minced
2 tablespoons flour
1 1/2 cups boiling water
Salt and pepper
Paprika
1 Bay leaf

Heat oil in large skillet over medium-high heat. Add chicken; cook until browned, about 5 minutes per side. Remove chicken; keep warm.

Add onion and garlic to drippings in skillet. Cook, stirring frequently, until vegetables are a deep golden brown, about 5 minutes. Add flour. Cook, stirring continually, until golden brown.

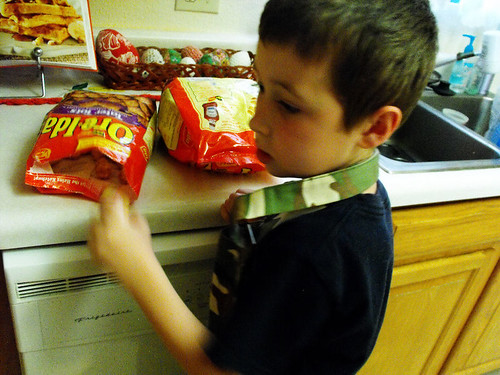
Nicholas picked tater tots and curly fries as a side dish, so here he is getting them ready. The kids absolutely LOVE cooking and I'm so thrilled.

2010_03170032

Gradually stir boiling water into skillet. Cook, stirring continually, until sauce thickens slightly. Return chicken to skillet.

2010_03170035

Simmer, covered, stirring occasionally, for 20 minutes or until chicken is tender. Add salt and pepper, paprika and bay leaf and cook chicken for 5 minutes longer.

2010_03170037

Monday, March 15, 2010

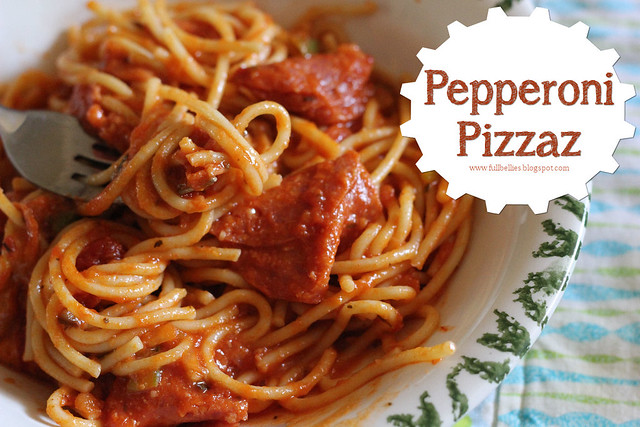
Kids in the Kitchen - Pepperoni Pizzaz

It's Spring Break here in our household and my children are home for the whole week.

Pepperoni Pizzaz

Thankfully they both love helping in the kitchen and cooking, so this week they've requested to be the ones making dinner every night, so with me just supervising and overseeing, they will be the Chefs in the kitchen this week.

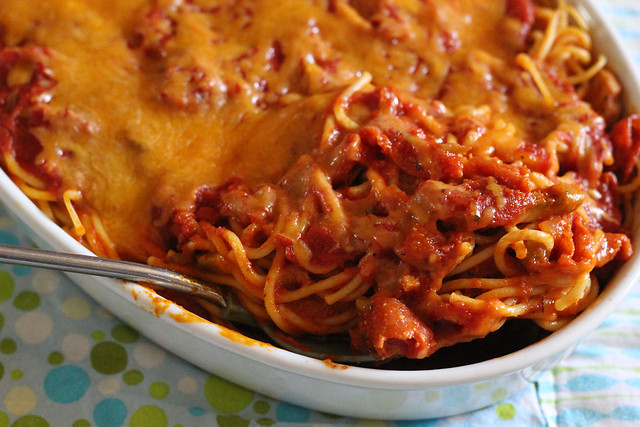
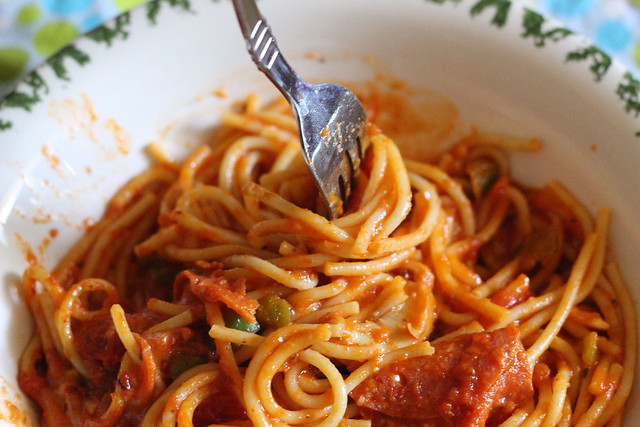
Starting with Jasmine who made Pepperoni Pizzaz, a great meal for kids who love Pizza and Pepperoni.

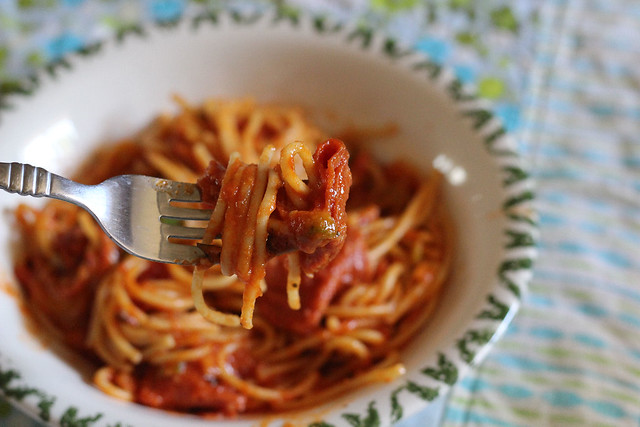
I used Spaghetti Noodles this time, instead of Penne pasta.

Pepperoni Pizzaz

PEPPERONI PIZZAZ
Credit: Tried and True Cooking with Heidi


8 ounces uncooked penne pasta
1 jar (28 ounces) spaghetti sauce, divided
1 package (8 ounces) sliced pepperoni
1 jar (4-1/2 ounces) sliced mushrooms, drained
1/2 cup chopped green pepper
1/2 cup chopped onion
1/2 cup grated Parmesan cheese
1/2 teaspoon garlic powder
1/2 teaspoon salt
1/8 teaspoon pepper
1/8 teaspoon crushed red pepper flakes
1 can (8 ounces) tomato sauce
2 cups (8 ounces) shredded mozzarella cheese


Cook pasta according to package directions.

Meanwhile, combine 2-1/3 cups spaghetti sauce, pepperoni, mushrooms, green pepper, onion,

Parmesan cheese, garlic powder, salt, pepper and red pepper flakes in a bowl.
Drain pasta; add to sauce mixture and mix well.

Transfer to a greased 3-qt. baking dish. Combine the tomato sauce and remaining spaghetti sauce; pour over top. (Note: for easier clean up, just empty the tomato sauce into the remaining spaghetti sauce jar, close tight and shake)

Cover and bake at 350° for 40-45 minutes or until bubbly. Sprinkle with mozzarella cheese. Bake, uncovered, 5-10 longer or until cheese is melted. Let stand 5 minutes before serving. Yield: 9 servings.
Pepperoni Pizzaz

Pepperoni Pizzaz

Sunday, March 14, 2010

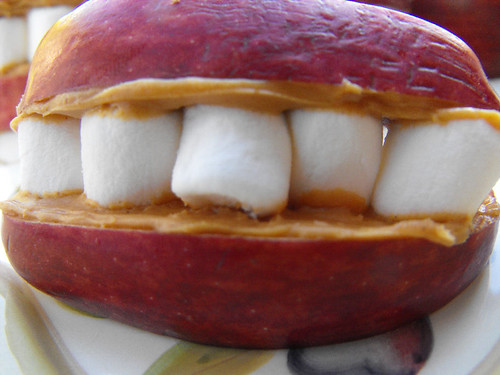
Hillbilly Teeth Snack!

My kids love snacks but sometimes they tend to go for what is easily accessible, which may not exactly be the healthiest to have around.

But here's a snack they can really sink their teeth into. *snicker*

And don't forget to grab your camera, because kids will not only love eating these but playing with them too, mine lost a few teeth along the way, but thankfully these false teeth are cheap and easily accessed in your own kitchen, and they're mighty purty too, just look at them pearly whites.

2010_03140022

HILLBILLY TEETH
Credit: Heide at Tried and True Cooking with Heidi

smooth peanut butter
1 red apple, cored and slice into eighths
miniature marshmallows


Spread peanut butter on one side of each apple slice (squeeze a little lemon juice over apple if not serving immediately). Place marshmallows on one apple slice using the peanut butter as glue. Lay another apple slice, peanut butter side down, on top.


2010_03140023

Now that's what I call a pretty smile.

2010_03140017

He should really see the dentist, that one crooked tooth on the right is growing in sideways

2010_03140020

Saturday, March 13, 2010

Banana Nut Buttermilk Waffles

Week day breakfasts are super simple around here, either toast, cereal or oatmeal, but weekends I try to make something special.

This morning I whipped up a batch of Banana Nut Buttermilk Waffles from my Kitchenaid Best-Loved Recipes cookbook. They are SO good!

2010_03130010

Banana Nut Buttermilk Waffles

3/4 cup walnuts or pecans
2 cups flour
1/4 cup sugar
2 teaspoons baking powder
1 teaspoon salt
2 eggs, separated
2 cups buttermilk
2 very ripe bananas, mashed (about 1 cup)
4 tablespoons butter, melted
1 teaspoon vanilla


Toast walnuts in medium nonstick skillet over medium heat 5 to 8 minutes until fragrant, stirring frequently. Transfer to plate to cool; chop and set aside.

Lightly spray waffle iron with nonstick cooking spray; preheat according to manufacturer's directions.

Meanwhile, combine flour, sugar, baking powder and salt in large bowl. Beat egg yolks in medium bowl. Add buttermilk, mashed bananas, butter, vanilla and wanuts; mix well.

2010_03130003

Stir buttermilk mixture into flour mixture just until moistened.

2010_03130005

Beat egg whites in bowl of electric stand mixer on high until stiff but not dry. Fold egg whites into batter.

Pour 3/4 cup batter into waffle iron; bake 4 to 5 minutes or until golden.

2010_03130006

Serve with syrup and banana slices. Garnish with additional walnuts.

2010_03130009

Friday, March 05, 2010

Quick Yellow Cake and Chocolate Frosting

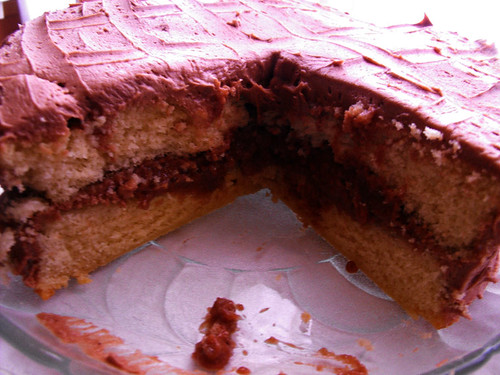
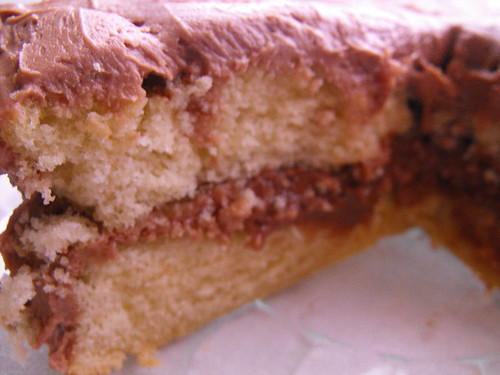
Straight from my new KitchenAid Cookbook, comes this super easy yellow cake and chocolate frosting.
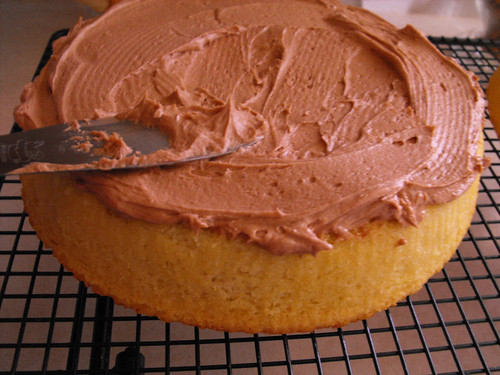
It brings me memories of my grandfather and the cakes he would bake for us, sometimes late at night on a weekend he would ask if we wanted some cake and after our joyful replies of yes, he would stroll into the kitchen and dump a little of this and a little of that, pop it in the oven and 30 minutes later we sat around with big slices of warm yellow cake.
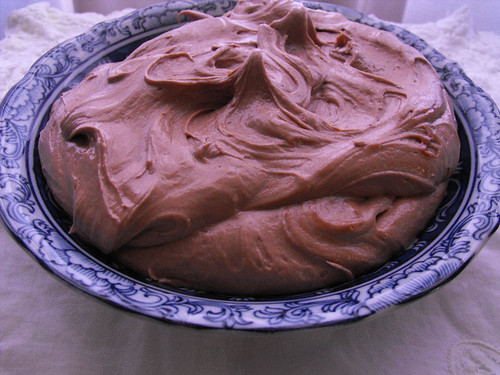
I miss him and I miss those cakes and I want my children to one day look back and say "you know, my mom baked cakes that did not come out of a box".

Let's face it, they are convenient but nothing beats a made from scratch cake and that includes frosting made at home too, not from a tub.

2010_03050023


Quick Yellow Cake

2 1/4 cups all purpose flour
1 1/3 cups sugar
3 teaspoons baking powder
1/2 teaspoon salt
1/2 cup shortening
1 cup low-fat milk
1 teaspoon vanilla
2 eggs

Combine dry ingredients in bowl of electric stand mixer. Add shortening, milk and vanilla. Turn to low and mix about 1 minute. Stop and scrape bowl. Add eggs. Continuing on low, mix about 30 seconds. Stop and scrape bowl. Increase speed to medium and beat about 1 minute.

2010_03050006

Pour batter into 2 greased and floured 8- or 9- inch round baking pans. Bake at 350 F for 30 to 35 minutes or until toothpick inserted into center comes out clean. Cool 10 minutes. Remove from pans. Cool completely on wire rack. Frost, if desired.

2010_03050019

2010_03050029

2010_03050031

***************************************

2010_03050013

Chocolate Frosting

1 cup (2 sticks) butter, softened
2 tablespoons light corn syrup
4 cups powdered sugar
2 squares (1 ounce each) unsweetened chocolate, melted

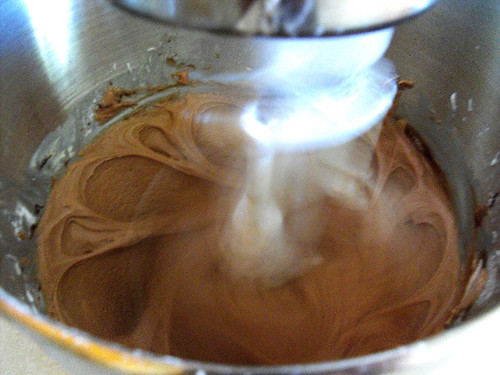
Place butter in bowl of electric stand mixer. Turn mixer to medium-low and beat 1 1/2 minutes or until creamy. Stop and scrap bowl. Add corn syrup. Reduce speed to low and mix well. Stop and scrape bowl.

2010_03050009

Continue mixing on low. Gradually add powdered sugar, mixing until blended. Turn speed to meidum-low and beat about 1 minute. Stop and scrape bowl. Reduce speed to low. Slowly add melted chocolate and mix about 1 1/2 minutes. Stop and scrape bowl. Turn speed to medium-low and beat about 1 minute.

2010_03050011

Makes frosting for a 2-layer or 13/9/2-inch cake.