Showing posts sorted by date for query bread. Sort by relevance Show all posts

Wednesday, July 15, 2026

Menu Plan for the next two weeks - July 15th to 29th, 2026

Well hello,  yes it is me, I am still here.  I have been so bad with updating my food blog, it's been forever since I've added a recipe or a post of any kind.  I can't make promises that I will be updating all the time, but I am hoping to get back to it as time permits.
 
Today, I am bringing you the meal plan for the next two weeks, as you may know if you've followed me for a while or follow my main blog Diary of a Stay at Home Mom, I shop for two weeks at a time.  it's something I started doing when we were an active duty family, and it's just stuck.  Why change a good thing right?
 
So here we go, the meal plan for the next two weeks:


Garlic Tilapia, Curried Couscous, Salad


 Eggplant Ground Beef Casserole, Steamed Broccoli


Ground Turkey Pasta Bake, Garlic Bread, Salad 


Chicken Shawarmas, Garlic Tzatziki


 Islak Burgers, Fries
 
 IMG_8528


 Sausages in tomato sauce, mashed potatoes, roast veggies
 
 2012_02170015


 Italian Chicken bake, Chickpeas and tomato salad


Ground Turkey Zucchini Casserole, Salad


 Fish Fillets in tomato sauce, Quinoa, Sauteed Squash


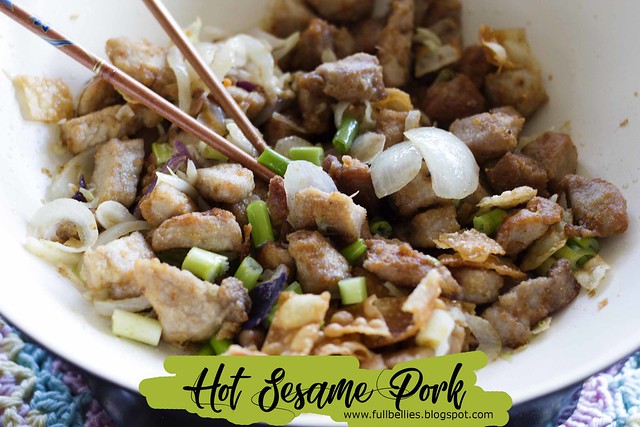
 Hot Sesame Pork, Basmati Rice
 
 Hot Sesame Pork


 Sandwiches or leftovers


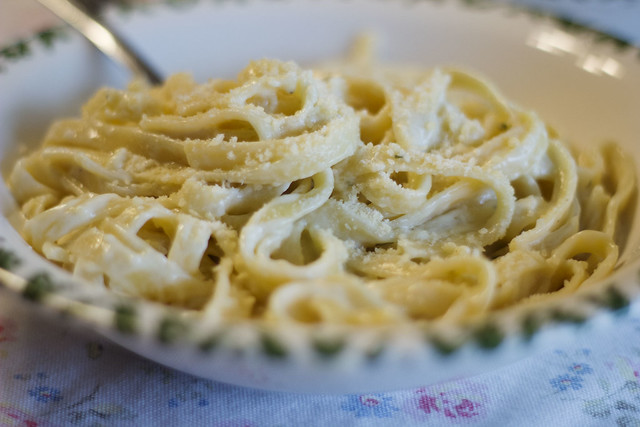
 Fettucine Alfredo, Garlic Bread, Salad
 
_MG_6077


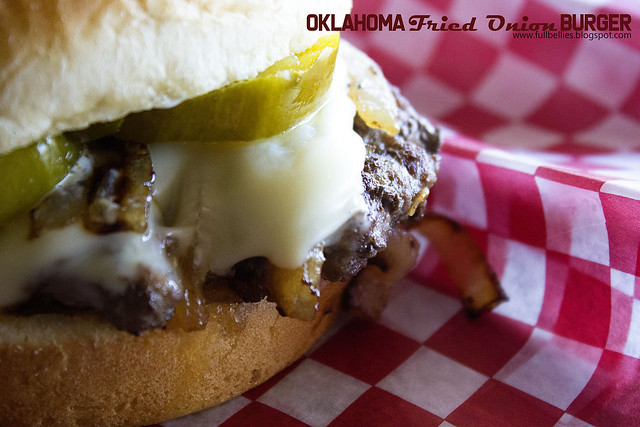
Oklahoma Fried Onion Burgers, Sweet Potato Fries
 
 Oklahoma Fried Onion Burgers


 Brother in law's birthday, out to eat


Monday, February 09, 2026

Menu Plan Monday - February 9 to 15th, 2026

Good morning.  It has been a while since I've posted something on this blog, and I do miss sharing, so am hoping to start doing more of that.  I have a couple recipes to post, just need to sit down and do it instead of getting distracted.
 
One thing I do want to get back into is posting the Meal plans for the week, it helps me stay on track and also gives me a place to look back and see what I was making, for future meals.
 
So without further ado, here is the meal plan for this week.


Monday 9th

Breakfast: Low Carb Banana Pancake
Lunch:
Tuna Salad
Dinner: 
Sticky Asian Chicken, Sesame Noodles, Sauteed Squash

Tuesday 10th
Breakfast: Oatmeal, Coffee
Lunch: Leftover Salad
Dinner: BBQ Pork Ribs, Roast Sweet Potatoes, Five Bean Salad


Wednesday 11th
Breakfast: Scrambled Eggs, Multigrain Toast
Lunch: Honey and Vanilla Greek Yogurt, Walnuts
Dinner: Steak and Shrimp, Garlic Rice and bean salad
 

Thursday 12th
Breakfast: Weetabix, Coffee
Lunch: Leftover roast sweet potatoes, boiled egg, leftover shrimp
Dinner: Meat, Chicken Rissois, Leftover Rice, Avocado Ranch Salad


Friday 13th
Breakfast: Oatmeal
Lunch: Greek Yogurt with honey, granola and blueberries
Dinner: French Bread Pizzas
 
 
Saturday 14th
Breakfast:  Toast, Coffee
Lunch:  
Dinner:  Fend for yourself 

 
Sunday 15th
Breakfast: Oatmeal with coconut and dates
Lunch:  Salad
Dinner: BBQ Chicken Legs, Sweet Potato Fries, Broccoli and Cauliflower

Thursday, March 06, 2025

2 Ingredient Bread Rolls

I think everyone has seen this recipe floating around.  It comes from Kirbie Cravings.  It is a very quick and easy recipe to throw together, and the results are quite a tasty roll, albeit a bit heavier than a usual roll.
 
The family all enjoyed it, I did too but I am low carb so it's not something that I will be having a lot, but for a quick bread roll, it is definitely a recipe I'll keep on hand.
 
IMG_8537

2 Ingredient Bread Rolls

Ingredients:
2 cups self rising flour
1 3/4 cups + 2 tbsp nonfat plain Greek yogurt


Preheat oven to 350°F (177°C). Line a baking sheet with parchment paper.
In a large mixing bowl, add flour and yogurt. Stir with a spatula just until all the flour is fully incorporated and a dough forms. Your dough will be quite sticky. Be careful not to overmix. The more you mix, the stickier your dough will be.  Divide dough evenly into 9 pieces. Lightly wet your hands and grab one of the dough pieces. Roll it between your hands until it forms a ball (it's okay if it has cracks, you just want to make sure it is round) and then place it onto the prepared baking sheet. Repeat with remaining dough (wash your hands clean and rewet for each one), spacing dough balls 2 inches apart.  Place rolls into oven and bake for about 25 minutes or until rolls are done.

Notes: If you don't have self-rising flour, you can make your own by whisking together 2 cups all purpose flour + 3 tsp baking powder + 1/2 tsp salt.

IMG_8533

Thursday, October 05, 2023

Turkish Flatbread Pizza - Pide

I have recently been on a journey, to find and try different recipes from all over the world.  My background is quite diverse, I am Portuguese, born in Africa, my greatgrandparents on my father's side were Brazilian, the ones on my mother's side were all from Portugal, Madeira and Azores.  We have French ancestors too.  
 
But having lived in South Africa my entire childhood, also opened up my palate to African food.  So I am quite blessed to enjoy so many different cultures with so many wonderful recipes.
 
Loving food the way I do, also means that I am very much interested in trying dishes from all over the world, and sometimes, something simple as watching a series or movie from a different country, and seeing the food they're eating, is enough to make me want to try.
 
I have recently (over the past few months), become completely obsessed with Turkish shows.  So of course, seeing what they eat, has peeked my curiosity into the food they eat.  The whole Mediterranean cuisine itself is very appealing to me,  Fresh ingredients, healthy food, lots of vegetables, delicious street food, and the flatbreads?  Yum!!!
 
So today, I am bringing the first of many recipes I've been trying, and loving recently.  
 
The Turkish Flatbread Pizza, known as Pide. 
 
The Pide originated in the city of Samsun,  in the Turkish Black Sea region, and has been a favorite since 1725.  The flatbread is shaped into a boat, or a flat American football, if that helps you visualize it, then filled with a variety of delicious fillings, from beef, to cheese, to spinach....yum!


This was my first attempt at making these, so although they were absolutely delicious, I wasn't thrilled with the final look.  It takes a bit of practice to make sure the Pide doesn't open up, and stays flat around the edges.

Anyway, I hope you will enjoy this recipe, it is a great alternative to your usual Friday night pizza.  

The recipe I'm sharing with you, is from one of my favorite Turkish channels on Youtube.  I just love Aysenur, she is such a sweet lady and shares so many wonderful recipes.  Be sure to give her a follow.


Turkish Pide

FOR THE DOUGH:

  • 2 cups lukewarm water
  • 25 gr. fresh yeast or 1 tbsp active dry yeast (use dry yeast according to packet details)
  • 1 tbsp sugar
  • about 5 to 5+1/2 cups bread or all-purpose flour
  • 2 tsp salt

PIDE TOPPINGS: (You can adjust the amount depending on which pide you want more)

MINCED MEAT TOPPING (This is enough for about 8 pides)

  • 1 medium-size onion
  • 2 sweet green peppers
  • 1 medium-size red capia pepper
  • 1 tomato
  • 2 cloves of garlic
  • 250gr. ground beef (%30 fat would be ideal if you can get it)
  • 1 tsp salt and ground black pepper
  • if the meat doesn’t have much fat add 3-4 tbsp olive oil

SPINACH TOPPING/ FILLING (for 3 pide)

  • 1 small onion
  • two handfuls of fresh washed and pat dried spinach
  • 1/2 tsp salt and ground black pepper

CHEESE TOPPING (use as much as pide you want) Turkish white cheese (crumbled) shredded kashar or mozzarella cheese


How to make Turkish Pide

Prepare the simple yeast dough:

  1. In a mixing bowl add lukewarm water, yeast, sugar. Disolve the yeast or use according to package. Add most of the flour amount along with salt and knead adding more flour if needed until it is smooth and elastic.
  2. Cover and let it rise until almost doubled in size

Toppings:

Traditionally we use a special knife to chop veggies and minced meat together. But it is easier to make it in a food processor. You can choose whichever you like.

  • For minced meat topping: In a big size food processor process onion, red and green pepper until it is chopped in small cubes. Add peeled tomato, salt, black pepper, red pepper and tomato pastes and minced meat. Process pulsing until everything is chopped and mixed well. If the minced meat doesnt contain much fat you can drizzle a little bit olive oil.
  • For spinach filling: Proccess onion with washed and dry spinach leaves, salt and pepper pulsing until everything is chopped (don’t make it very small) While fill it you can alternately add crumbled Turkish white cheese (or feta) or kashar, mozarella cheese (Check the video)
  • Cheese and Sujuk topping: (use as much as pide you want) Turkish white cheese (crumbled) shredded kashar or mozzarella cheese


Shaping The Pide:

Rolling Turkish pide dough

Classic Open Pide Shape (Açık pide)

  • Heat the oven to highest setting (about 230 to 250C). Cut the risen dough into 12 pieces and shape them round. Cover the ones you don’t use with a damp clean kitchen towel or freezer bag so they don’t get dry. 
  • Roll out one piece in a lightly floured surface into a oblong shape that can fit to your baking try. Place then to the try that is lined with baking paper. Add generaously from the minced meat filling (about two full tbsp) on top leaving 1cm space in sides. Spread evenly with back of a spoon or your hand.
  • Fold the sides of the pides inside and press them well.
  • Pinch the ends and seal. Hold from the corners and strech a bit more as far as it can fit to your tray and place it back. Brush the sides with egg yolk and bake until sides and bottom has nice golden color.


Friday, February 24, 2023

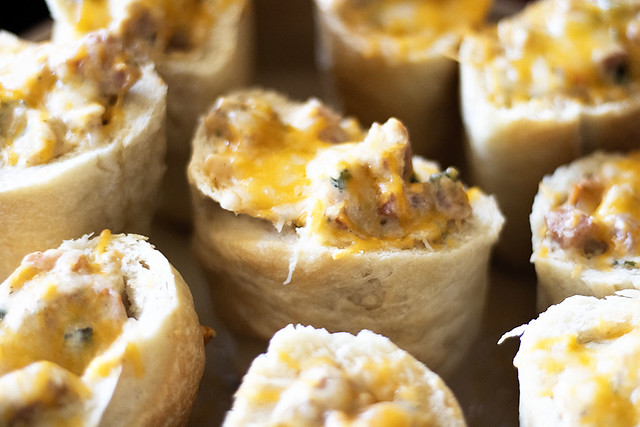
Smoked Sausage Stuffed Sandwich

IMG_4784
 
I wanted to bring you a recommendation for a pretty inexpensive dish, that you can definitely stretch and serve to a crowd, or make it even for just one or two people.  It's up to you.  

It uses very few ingredients, but the result is delicious and filling and just ooohhhhh.  Love it ♥

This recipe or rather this dish, is from Brasil and it's known as Buraco Quente.  It's usually made with ground beef, but you can certainly use beef, or chicken or smoked sausage which is what I used for mine.

If I have to translate exactly, word for word, to English, it means Hot Hole, and I don't know about you all, but that does not sound appealing at ALL when talking about food.  LOL

So, I just call them Stuffed Sandwiches.  Much better!
 
This is one of those sandwiches that your family will love, and will be talking about for a while.  The fact that it's so easy to make and you can change it up, using whatever meat you have on hand, is even better.  
 
 
IMG_4783
 
 
Smoked Sausage Stuffed Sandwich
Buraco Quente de Linguica


Bread Rolls (I made some of my french bread sub rolls, and cut them in half)
Drizzle of olive oil
1 package smoked sausage
1 small onion, finely diced
2 cloves of garlic
parsley and cilantro
salt and pepper to taste
oregano to taste
1 can Media Crema (table cream)
Shredded cheese


In an oven proof dish, take each roll, cut a small piece off the bottom so that it stands flat.  Place the rolls in the dish, then take a small knife and cut out the inside, creating a hole.  Don't leave the edges too thin, or it will fall apart when you fill it with the meat mixture.

In a saucepan, add a little bit of olive oil.  Dice up the smoked sausage.  I cut it into slices, then cut those slices in half then half again, creating little cubes.  Saute them in the olive oil, then add the onion and garlic and cook for a minute or two until the onion is translucent.

Season with salt and pepper and oregano, add the cilantro and parsley to taste, stir well to combine, then add the can of media crema, give it another good stir and remove off the heat.

Fill each sandwich with some of the sausage mixture, then add a sprinkle of shredded cheese of your choice.
 
Pop into the oven for a minute or so until the cheese is melted, then serve immediately.
 

IMG_4781

IMG_4782

Monday, October 31, 2022

Menu Plan for October 31st to November 6th

Good morning everyone.
 
It is Monday, and that means a new week of meals is before us.  Now, I haven't posted this in a really long time, but with the prices being so high lately, I've started being a lot more conscious of what I'm making, using what I have on hand, and trying to eat at home as much as possible.
 
We have never been a family that eats out a lot, just the occasional take out on payday.  But, the prices of take out are ridiculous at the moment, so when we have a craving for something, I try to make it at home as well.
 
With that in mind, I am cooking from my fridge and freezer the next two weeks, and really trying to use what is already available.  Here is this week's meal plan, and I'll be back next week with the new one for that week.


Monday October 31st
Breakfast:   Coffee, Toast with butter and liver spread
Lunch:   Clam Chowder, Oyster Crackers
Dinner:   Best Chili Ever, Rice, Homemade rolls


Tuesday November 1st
Breakfast: Instant Pot Oatmeal, Coffee
Lunch: Leftover chili
Dinner: Million Dollar Gnocchi, Salad, Garlic Bread


Wednesday November 2nd
Breakfast: Pancakes, Orange Juice, Coffee
Lunch: Salad
Dinner: Cracker Barrel Hamburger Steak, Mashed Potatoes, Broccoli


Thursday November 3rd
Breakfast: Toast with Apple Butter, Coffee
Lunch: Tuna salad
Dinner:  Bifanas (pork sandwiches), Air Fryer Potato Wedges


Friday November 4th
Breakfast: Cinnamon Toast
Lunch: Grilled Cheese and Tomato Sandwich
Dinner:   Copycat Uno's Pizza


Saturday November 5th
Breakfast: Scrambled Eggs, Toast
Lunch: Leftover pizza
Dinner:  Breakfast for dinner - biscuits and gravy, hashbrown casserole


Sunday November 6th
Breakfast: Sausage Biscuits, Coffee, Juice
Lunch: Frozen Pizza
Dinner:   Onion and Potato Soup, Grilled Cheese Sandwiches

Monday, August 29, 2022

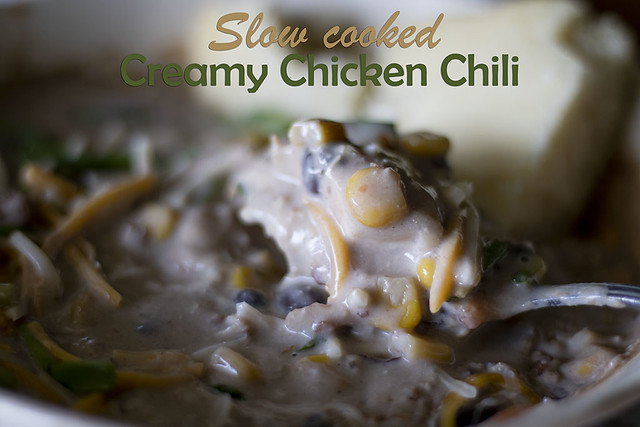
Slow Cooked Creamy Chicken Chili

IMG_3622

As our temperatures start dropping, my mind immediately shifts to Fall and Winter cooking, although to be honest I am a person who eats whatever she wants, whatever time of the year.  Soups in July?  Yes!

Chili in the middle of August?  Why not?

This chili comes together using very few ingredients, but still makes for a delicious filling meal.  I paired it with homemade corn bread and some tortilla chips, and it was a meal that the whole family enjoyed.
 
IMG_3620

Slow Cooked Creamy Chicken Chili


Ingredients

2 boneles sskinless chicken breasts
1 (11-oz) can corn, drained
1 (15-oz) black beans, drained and rinsed
1 (10-oz) diced tomatoes and green chilies, undrained
2 cups chicken broth
1 cup cooked chopped bacon
1 (1-oz) packet ranch seasoning & salad dressing mix
1 tsp cumin
1 Tbsp chili powder
1 tsp onion powder
1 (8-oz) package cream cheese
1 cup shredded cheddar cheese


Instructions

Add chicken to the slow cooker, then top with the remaining ingredients.  I break the cream cheese into smaller chunks before stirring it in. 

Cook on LOW for 8 hours.
 
When done, break the chicken into smaller chunks, or shred if you prefer.  Serve with sour cream, green onion, shredded cheese or any other topping you wish.  


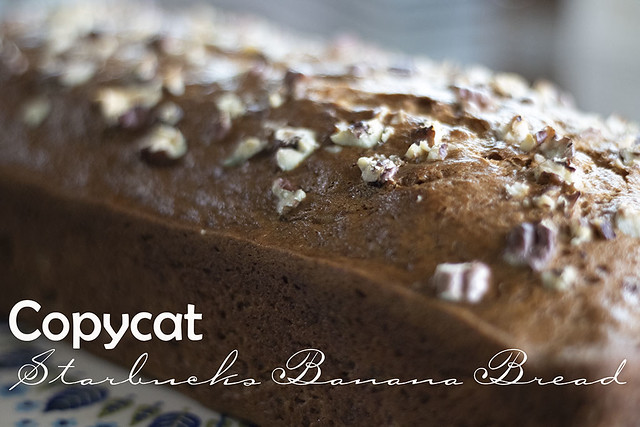
Copycat Starbucks Banana Bread

Today, I am sharing the recipe for a copycat Starbucks Banana Bread.  It is so good.  What I love about it, is that it's just the perfect combination, it's not overly sweet,  and it's also really easy to make.

If you have bananas that you need using up, this is the perfect recipe.  Now I know we all have a ton of banana bread recipes, I think it's probably one of the most made recipes all over the world.  I myself have quite a few, even posted here on the blog, but it never hurts to have one more right?

Give this one a try and let me know what you think, it's become my go to banana bread.

Recipe comes from My Frugal Adventures.
 
 
IMG_3637

Copycat Starbucks Banana Bread


Ingredients 
 
2 cups flour 
1 teaspoon baking soda 
 ¼ teaspoon salt 
1 egg 
1⅛ cup sugar 
 ½ cup vegetable or canola oil 
 2 tablespoons buttermilk or milk 
½ teaspoon vanilla 
3 bananas mashed very well 
 ½ cup chopped walnuts (optional) 
 
 
Instructions 
 
Preheat oven to 325 degrees. Add flour, baking soda and salt to a small bowl and set aside. Mix egg, sugar and oil and stir until well combined 
 
Add the dry ingredients to the wet and stir well. The mixture will be thick and dry. Next add milk, vanilla and bananas and stir until incorporated. 
 
Mix in walnuts and pour into a loaf pan. 
 
Cook 50-75 minutes, checking regularly until a knife comes out clean. 
 
 
IMG_3636

Wednesday, March 23, 2022

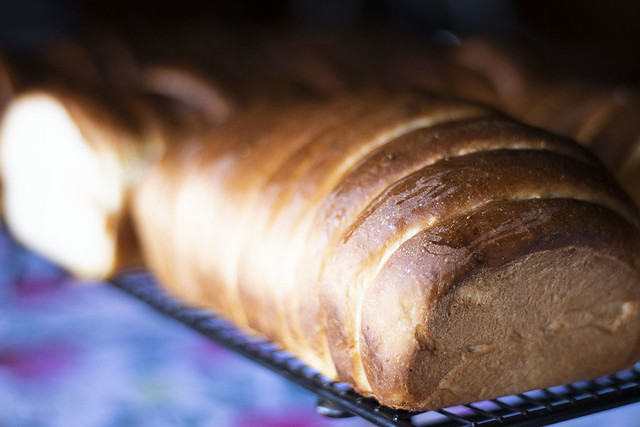
Pao de Leite Condensado - Condensed Milk Bread

IMG_2830

I was having a craving for a sweet bread.  In Portugal we have a few sweet breads, with a special one for Easter called Folar.  The Folar usually contain hard boiled eggs in the center.
 

I will probably make one for Easter this year, and share the recipe with you here, as well.
 
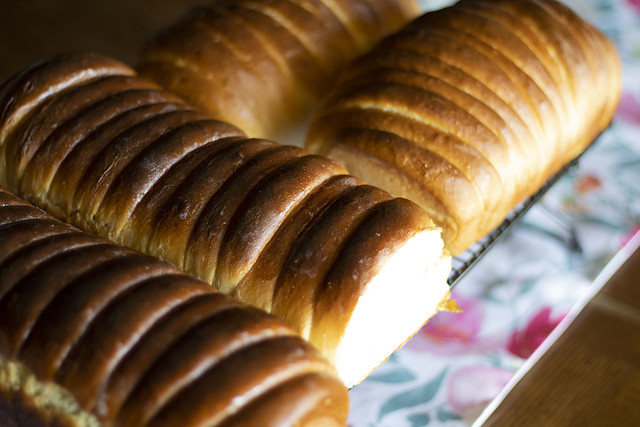
The recipe I'm bringing you today is for a condensed milk sweet bread, which is not only divine, but so easy to make as you use a blender for the liquids and then just mix with the flour and rest of the dry ingredients.  Before going into the oven to bake, you brush on a egg yolk and milk mixture, which in turn give it this beautiful brown color, and a distinct taste that is unbeatable.

IMG_2834
 
You can also turn these into rolls if you wish, but the fun part really is in the preparation, as you cut the dough into slices which in turn produce a loaf that is practically ready to cut.

This makes a delicious toast slathered on with butter, or you can make french toast, or a sandwich too.  If you like Hawaiian bread, you will love this one.
 
The recipe itself makes 3 or 4 loaves, depending on the size of the loaf pan you are using. 
 

Pao de Leite Condensado - Condensed Milk Bread
 
 
Ingredients
4 eggs
3 tablespoons butter (or  75 grams)
2 cups of milk (480 ml)
1 can condensed milk (395 grams)
3 tablespoons sugar (36 grams)
1 teaspoon salt (2 grams)
8 cups all purpose flour (1.120 kg)
Half a tablespoon Yeast (15 grams)
For glaze:
1 egg yolk
2 tablespoons milk


Directions:
In a blender, add the eggs, butter, milk and condensed milk, and blend until well incorporated.
 
In a separate bowl, add the yeast, sugar, flour and the salt.  Remember not to let the salt and yeast touch, so that the salt does not kill off the yeast.  I always add my yeast and my salt on opposite sides of the bowl.
 
Pour the contents of the blender into a big mixing bowl.  Then start adding the flour mixture, a cup at a time, mixing well after each addition.  When it becomes hard to stir, transfer the dough onto a floured surface and knead for about 10 minutes, until smooth but still slightly tacky.  
 
Transfer into a well oiled bowl, cover with plastic wrap and a dish towel, and let rise for an hour or until doubled in size.
 
Punch dough down, transfer to a floured surface and cut into 4 or 3 equal parts (depending on the size of your loaf pans or if you're making 3 or 4 loaves).
 
Take each dough ball and roll out into a rectangle, do not roll too thin.  Then start rolling the dough back up, as if you were making cinnamon rolls, pinching the seam at the bottom and both sides.  I just take both sides of the dough on each end and pinch to close.  

Next, take a dough cutter or a big knife, and divide the roll of dough into equal parts.   I usually cut in half, then half again and half again, etc.  It doesn't really matter how many parts you cut it into, obviously the more cuts you make the thinner the slices will be.  I did 16 slices in each loaf, so I cut the dough into 16 equal parts.

Next, carefully lift the whole loaf up, keeping the slices together, and place into the loaf pan.

Do the same with the remaining dough balls.

Cover with a kitchen towel again and let rise for another hour or until it has doubled in size.

Preheat the oven to 355 degrees.   In a small bowl, mix together 1 egg yolk and 2 tablespoons milk.  Brush over the prepared loaves, and then bake in the oven for 16 to 18 minutes or until brown and cooked through.  Just keep an eye out, obviously each oven is different.

Once the loaves are out of the oven, brush each with a little butter, remove from pan and let cool completely.
 
I keep my bread in a ziploc bag, and usually as with all my other bread, I keep it in the fridge so it stays longer.  
 
Enjoy!!!!


Monday, February 21, 2022

Menu plan for week February 21 - 28

Good morning everyone, I know I haven't been very good at updating this ol' blog, but I've been trying to get more recipes posted the past few days.

I sure hope you've been enjoying them.  

I plan on posting more frequently, sharing family favorites, new meals we have discovered and continuing to build up on my record of recipes, here on the blog.

If you've been following me for a while, thank you for still being here.  I sure hope you'll stick around.

Here is this week's meal plan, I'm making some old favorites, and sticking to recipes already available here on the blog.  I will be taking new pics for some of them, because they're quite old and have been here for many many years, but I enjoy going back in time, seeing what we were eating, and making some of those comfort foods again.

Hope you enjoy the new menu, and hope it inspires some of you, if you're struggling to figure out what to make for your families.
 
 
Sausage Rice, Fried Okra


Chicken Alfredo, Salad


Meatballs and Spaghetti, Garlic Knots


Dad's Favorite Chicken
 
Dad's Favorite Chicken, Mashed Potatoes with Carrot, Salad


Sandwich Ring
 

Baked Ziti
 
Baked Ziti, Homemade Garlic Bread


Day 22
 
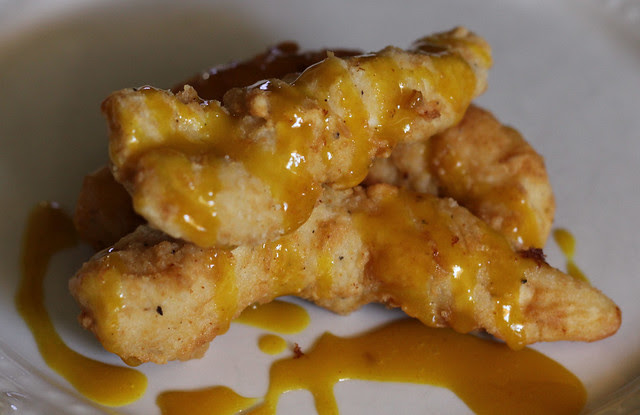
Honey Mustard Chicken Strips, Waffle Fries, Bacon Thousand Island Chopped Salad