Thursday, December 15, 2016

Chocolate Crinkles


I've been in the kitchen for the past few days, just baking cookies.  It's something I always used to do when the kids were smaller, but the past few years haven't really had the time to do.  Or rather, didn't have the motivation with everything else that was going on in my life.

It's been nuts, plain and simple.

I fear I've failed miserably at updating my food blog and it's quite sad, because it used to be one of my favorite things to do.....share recipes, show you what I was eating, and also having an online place to keep all our family favorites.  Anyway, it's life, it is what it is, but I do hope that next year I can make a come back on both my blogs.

Now that, that is out of the way, let's move right on to Christmas baking and more specifically Cookies.  I have a few recipes to share with you, starting with these.  If you love Chocolate, you are going to be in absolute heaven.

These Chocolate Crinkles are amazing and super easy to make.

You'll notice in the recipe that you need to refrigerate the dough for at least 4 hours, but you can certainly do it overnight, just DO NOT skip that part because it's imperative for the crinkles to come out perfect.

Also, the recipe says it will make about 40 cookies, but I got 70 out of one batch.  So I guess it depends on the size of the cookie balls you're going to form.


Chocolate Crinkles

Chocolate Crinkles
Source:  Food 52

Makes about 40 cookies

1 cup unsweetened cocoa powder
2 cups granulated sugar
1/2 cup vegetable oil
4 eggs
2 teaspoons vanilla extract
2 cups all-purpose flour
2 teaspoons baking powder
1/2 teaspoon salt
1/2 cup confectioner's sugar

In a medium bowl, mix the cocoa, granulated sugar, and vegetable oil.
Beat in eggs one at a time and stir in vanilla.

In a separate large bowl, combine the flour, baking powder, and salt; then stir into the cocoa mixture.
Cover the dough and let cool in fridge for at least 4 hours. (This step is incredibly important to get the crinkles in the cookies)

Preheat oven to 350° F.

Line baking sheet with parchment paper and roll dough into 1-inch balls.

Coat each ball with confectioners sugar before placing on the baking sheet.

Bake for 10 to 12 minutes.
Transfer cookies to wire rack to cool and enjoy!


Tuesday, October 18, 2016

Chipotle Style Burrito Bowls


If you've been to Chipotle, then you'll no doubt have had their burrito bowls.

I still remember the first time I went, it was last year December and we had taken our daughter out of the house to try and distract her, after her break up with her boyfriend.

We walked around the mall for a while and then headed to Chipotle, which is right across the road, for a quick dinner.

I felt so out of place, I always do when I have no idea how it works, how you order, what to do etc.  I didn't even know that it was burrito bowls, I knew it was some sort of Mexican food but had no clue what it was.

Thankfully, the place was packed and we sat in line for a while, which gave me plenty of time to observe and see how things were done.

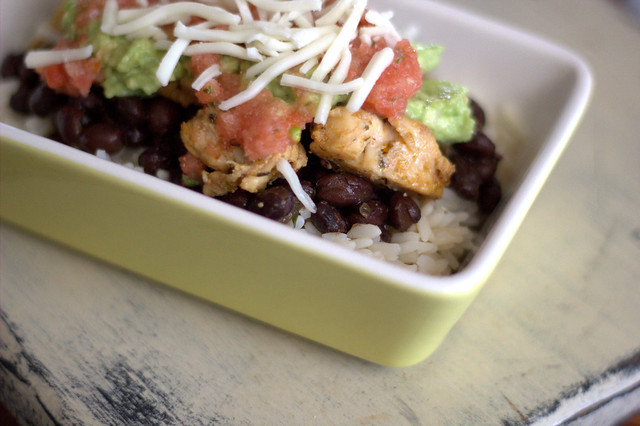
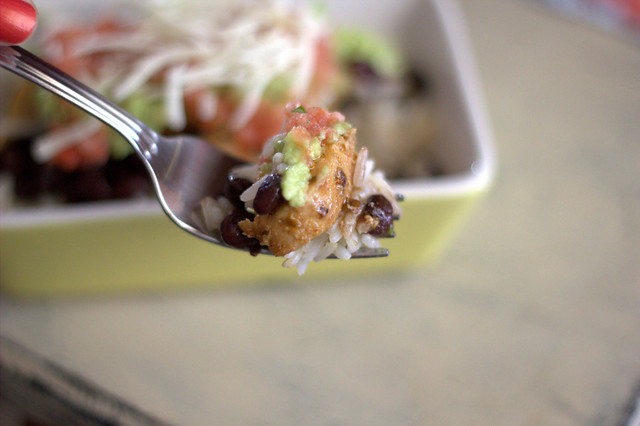
I decided to go for a simple order, cilantro lime rice, chicken, corn salsa, guacamole and black beans.  My word it was so good, and as with many other dishes I try at restaurants, I often come home and attempt to recreate them.

I know it will never be exactly as the original, but this is a pretty tasty version and it's quickly become one of the family's favorites.

Chipotle Burrito Bowls

Chipotle Style Burrito Bowls


Chicken
1 pound raw or cooked boneless, skinless chicken breasts
2 chipotle peppers, chopped, and 1 tablespoon adobo sauce from 1 7-ounce can chipotles in adobo
1 large garlic clove, minced
1 tablespoon fresh oregano leaves or 1/2 teaspoon dried oregano
4 tablespoons canola oil, divided (see below)

Cilantro-Lime Rice
1 1/4 cups water
2 tablespoons lime juice
2 tablespoons lemon juice
1/2 teaspoon salt
1 cup long grain white rice
2 tablespoons minced fresh cilantro

Black Beans
1 tablespoon canola oil
1/2 small yellow or white onion, minced
2 small to medium garlic cloves, minced
1 teaspoon fresh minced oregano or 1/2 teaspoon dried oregano
2 15-ounce cans black beans
1 tablespoon adobo sauce from 1 7-ounce can chipotles in adobo

Corn Salsa
1 1/2 cups thawed frozen white corn
1/4 cup minced red onion
1 small jalapeno pepper, stemmed, de-seeded and minced
1 tablespoon minced fresh cilantro
Juice of 1/2 large lime

Guacamole (I use my own recipe but feel free to use whichever you want)

1. Make the chicken:

For raw chicken: Cut the chicken into rough 1-inch cubes and toss in a large zip-top bag with the chipotle peppers and adobo sauce, garlic, oregano and 2 tablespoons oil. Seal tightly and gently press the bag with your hands to mix the ingredients, then leave at room temperature for 1 hour. (Alternatively, refrigerate the bag for up to 8 hours.)

Heat 1 tablespoon olive oil in a large skillet over medium heat and add about 1/4 of the marinated chicken cubes — don't crowd the pan, or the chicken will steam instead of brown. Cook, flipping after 2-3 minutes, until the chicken is cooked through, and transfer to a clean bowl or plate. Repeat with the remaining chicken, adding the final tablespoon of oil as needed. Slice the cooked chicken into small bits.

For cooked chicken: Cut the chicken into rough 1-inch cubes. Heat 1 tablespoon canola oil in a large skillet over medium heat and add the chipotle peppers and adobo sauce, chopped garlic and oregano. Stir together and add the chicken, tossing in the sauce to season and coat the chicken. Transfer to a cutting board and slice the cooked chicken into small bits.


2. Make the black beans:

Heat the oil in a small (1 ½ to 2 quart) saucepan over medium-low heat and add the onion, garlic and oregano. Cook, stirring frequently, for 3-4 minutes until the onion begins to soften.

Drain the beans, reserving 1/2 cup of liquid from one of the cans. Add the beans, reserved liquid and adobo sauce to the pan. Stir, then cover and cook for 10 minutes more until the beans are softened and warmed through.


3. Make the rice:

Bring the water, lime juice and lemon juice to a boil in a small (1 ½ to 2 quart) saucepan over medium heat. Add the salt and stir to dissolve, then stir in the rice. Cover and reduce the heat to low.

Cook without stirring or uncovering the pot for about 20 minutes, until the rice is fluffy and has absorbed the liquid. Remove from the heat and let sit, covered, for 10 minutes. Stir in the cilantro.


4. Make the corn salsa:

Toss the corn, onion, jalapeno, cilantro and lime juice together in a bowl. Refrigerate up to 3 days, until ready to use.


Start with the rice and then pile on whatever other toppings you want.

Chipotle Burrito Bowls

Pumpkin Donuts with Buttermilk Glaze


It's Pumpkin season, you know that, I know that.  Usually this time of the year means that I'm in the kitchen even more than usual, whipping up cakes, donuts, pancakes and pretty much anything that includes pumpkin, cinnamon, cloves etc.

I have said before and I will say it again.  If I had to pick a food that I would eat forever and ever, giving up everything else for it, I would always pick donuts.  No ifs, ands or buts about it.

Pair that with pumpkin and I'm in literal food heaven.

This recipe doesn't require rising time of any kind, it's pretty straight forward, easy and relatively quick to make.  The longest part of the process is the frying and even then, it's quite fast because they puff up and cook quite quickly.

Now to keep my son away from these, as his 13 year old self already plowed through 2 in no time.  Who am I kidding, I need to keep myself away from these too.  :)

Pumpkin Donuts

Pumpkin Donuts with Buttermilk Glaze
Source: Babble


For the donuts:

3 1/2 cups all purpose flour
4 teaspoons baking powder
1 teaspoon salt
2 teaspoons pumpkin pie spice
1 cup sugar
2 tablespoons butter
2 eggs
2 teaspoons vanilla
1/2 cup buttermilk
1 cup pumpkin puree

For the buttermilk glaze:

3 cups powdered sugar
1/2 cup buttermilk
1/2 teaspoon vanilla


In a large bowl, whisk together the flour, baking powder, salt, spice and sugar. Whisk together all of the remaining ingredients (except for the canola oil) in a second, medium bowl. Make a well in the center of the dry ingredients. Pour the wet ingredients into the dry ingredients, and stir them around the bowl until the mixture is well combined. Turn out onto a lightly floured surface, rolling the donut dough to approximately1/4-1/2″ thick. (I know this will seem quite thin, but the donuts puff up immensely while frying). Cut with a donut cutter.

Meanwhile, whisk the glaze ingredients together in a small bowl until smooth.

Heat 2 inches of oil in a large skillet over medium-high heat. When the oil is hot, gently slide the donuts into the oil, frying on the first side until the edges of the donut are lightly browned, flip carefully and allow to cook on the other side until lightly browned. Remove and dunk immediately into buttermilk glaze. Allow to air dry on a cooling rack before serving.

Note:  You may find that the dough is too sticky and wet to really roll into anything.  Just add a bit more flour at a time until you get a soft, non stick dough that you can press out into a rectangle, with your hands.

Monday, October 17, 2016

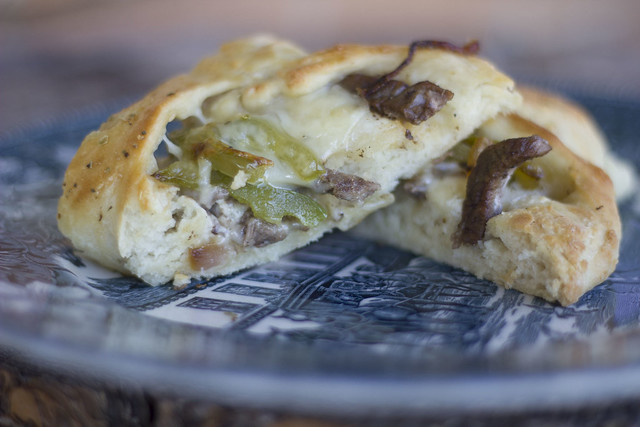
Philly Cheesesteak Star


I'm sure you've seen this recipe and video, making it's rounds around social media, more specifically on Facebook.

I saw it a while ago and saved it to my favorites, but only really got around to trying it yesterday.

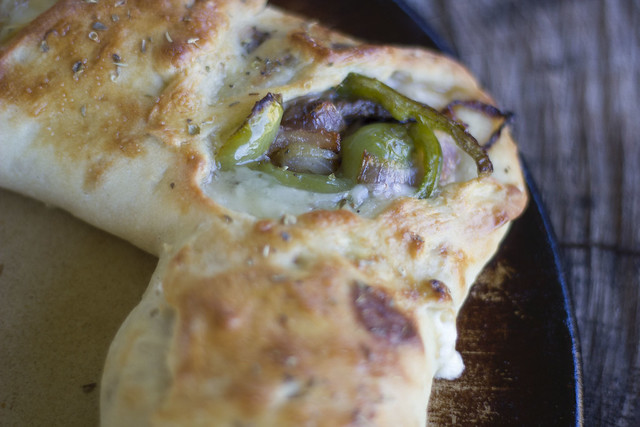
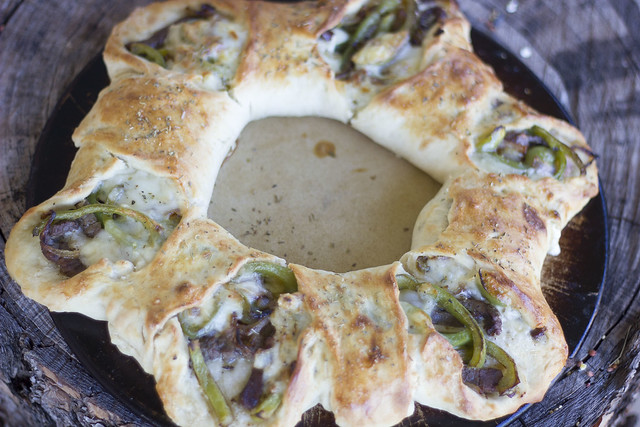
Philly Cheesesteak Star

The first thing that caught my eye was that it's pretty inexpensive to make.  I used one thin steak and it was only a little over a dollar for it, and I made my own pizza dough recipe, which you can find here on the blog.

The results, super delicious, quick, easy and I think one of the family's newest faves.  It almost tasted like the Domino's Philly Cheesesteak pizza.  Yum!!


Philly Cheesesteak Star


Philly Cheesesteak Star
Source: Tasty Meals


1 pre-rolled pizza base
1 sirloin steak, very thinly sliced
1 onion, sliced
1 green pepper, sliced
1/4 cup cream cheese
1 block pizza mozzarella, sliced
salt and pepper
1 egg, beaten
1 tsp oregano
3 tbsp olive oil


1.Fry your steak slices in 1 tbsp oil until a little coloured. Season well and set aside.
2.Fry your onion and pepper separately in the remaining olive oil. Set aside.
3.Lay down your pizza base and make 3 incisions in the centre with a pizza cutter. These individual triangles will be folded out to the edges.
4.Spread over the cream cheese in a ring around the incisions. Lay on your steak, peppers and onions. Top with mozzarella. Brush the central triangles with egg and fold out to join with the outside of the pizza base. Brush the entirety with egg and sprinkle with oregano.
5.Bake for 20 minutes at 400°F.

Philly Cheesesteak Star

Monday, September 26, 2016

Carrot Cake


Hello friends, I'm pretty sure you're surprised to see me here.  I know, I've been an awful food blogger, but so much has been going on in my life the past year and a half, that it's been quite hard to consolidate my personal life, moving across States, dealing with some family health issues and cooking.

Some meals have been whatever is on hand.  Some meals have been based on the cheapest ingredients I could find, some meals have happened thanks to local take outs.  But, with that said, the love that I have for being in the kitchen and cooking, has never diminished in any way, shape or form.  It's just had to take a back seat.

I don't know how things will go from this moment on, but I've been severely lacking some updates here on the old blog, and I've also terribly missed trying new recipes, posting, sharing and all that fun stuff.

So I'm back, and I decided that the way to come back would be by bringing some cake for us to share over a cup of coffee.

There are not many cakes I consider my favorites, I would have to actually state quite firmly, that my cake loves center on Chocolate, Tres Leches, or Carrot.  That's it!!!  I am not saying I won't eat others, but I don't crave them, I don't go out of my way to make them or have them, they're just there.

Right, so Carrot Cake, homemade, with fresh carrots, some mixed nuts thrown in, cinnamon and sweetness......all rolled into a great Fall cake.

If you want to make something for your family, that is not out of a box (and I'm totally not judging, boxed mixes live in my pantry and are often used in a pinch), then give this one a try. 

Carrot Cake

Carrot Cake
Source:  All Recipes


4 eggs
1 1/4 cups vegetable oil
2 cups white sugar
2 teaspoons vanilla extract
2 cups all-purpose flour
2 teaspoons baking soda
2 teaspoons baking powder
1/2 teaspoon salt

2 teaspoons ground cinnamon
3 cups grated carrots
1 cup chopped pecans
1/2 cup butter, softened
8 ounces cream cheese, softened
4 cups confectioners' sugar
1 teaspoon vanilla extract
1 cup chopped pecans

Directions

Preheat oven to 350 degrees F (175 degrees C). Grease and flour a 9x13 inch pan.
In a large bowl, beat together eggs, oil, white sugar and 2 teaspoons vanilla. Mix in flour, baking soda, baking powder, salt and cinnamon. Stir in carrots. Fold in pecans. Pour into prepared pan.
Bake in the preheated oven for 40 to 50 minutes, or until a toothpick inserted into the center of the cake comes out clean. Let cool in pan for 10 minutes, then turn out onto a wire rack and cool completely.
To Make Frosting: In a medium bowl, combine butter, cream cheese, confectioners' sugar and 1 teaspoon vanilla. Beat until the mixture is smooth and creamy. Stir in chopped pecans. Frost the cooled cake.

Monday, June 27, 2016

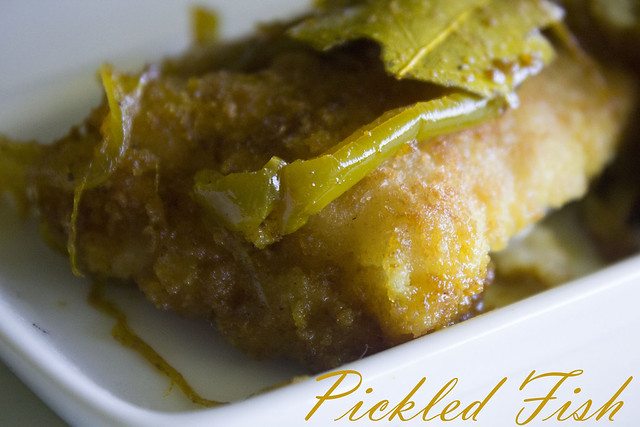
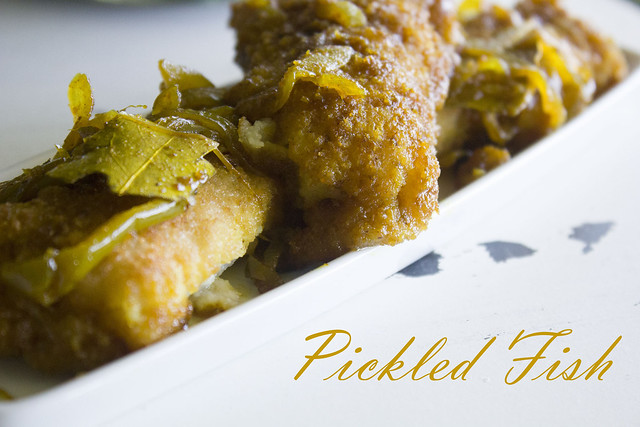
Pickled Fish or Curried Fish


Now here's a recipe that you may not have tried before or even heard of.  To be honest, I didn't really try it until this past Easter, when my sister in law mentioned the pickled fish that her mom Valerie, would make for Easter every year.

It is pretty much a tradition for them in South Africa.

Having lived in that country for bout 15 years when I was growing up, I do remember seeing it and hearing about it, but I just never got around to eating it.  I wish I had, because I am absolutely in love with it.

The recipe comes from Auntie Valerie, and although there are measurements, she is used to making it all by eyeballing, pretty much like I cook my meals.  But, I'm giving you the recipe as she has given us and I promise you, if you love pickled anything, or curry flavors, you will fall in love with it too.

I'm giving you the recipe for the pickled mixture, not the fish itself.  You can fry up some battered fish, about a pound for this recipe.  Or you can even use the ready bagged breaded or battered fish fillets.  Just bake them in the oven according to directions and then place in a casserole dish and pour the pickled sauce over.

Pickled Fish

Pickled or Curried Fish
Source:  Auntie Valerie


1 big onion, thinly sliced
1 green pepper, thinly sliced
Butter
2 teaspoons masala
10 pepper corns
6 cloves
6 bay leave
3 curry leaves (you can leave out if you don't have)
2 tablespoons apricot jam
Half a cup of vinegar
1 cup sugar
1 heaped tablespoon of curry powder
2 tablespoons of chutney (very important, do NOT leave out)


Braise Onions and green pepper in butter with the masala, pepper corns, cloves, bay leaves, curry leaves thin straps of green pepper.

Add apricot jam, vinegar, sugar, curry powder and chutney.  Simmer for a few minutes until onion and green pepper are tender.  Check spices, if it is too sweet for your liking, add a bit more vinegar.

Pour over fried fish and refrigerate for at least a day.

It tastes better as it sits and soaks in all that goodness.  We eat ours cold.  You can serve it with potatoes, or rice, enjoy as a snack or even as a sandwich (one of my favorite ways to eat it).

Enjoy!!!  

Pickled Fish

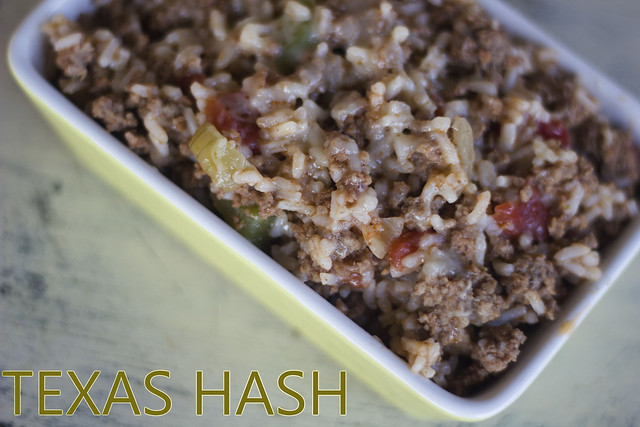
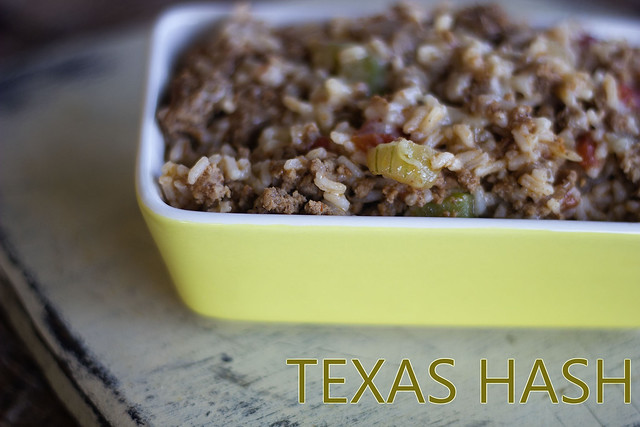
Texas Hash


If there is one thing I enjoy, are casseroles or one dish meals.  I can throw it all in one pan, cook it, serve it and only have to worry about very minimal cleanup.

Not to mention, casseroles have always been synonymous with comforting and filling food, which when you're cooking for 7 people at a time, can mean inexpensive and I'm all about that.

This was pretty good, the whole family enjoyed it.  I served it with a salad and some steamed broccoli and it got thumbs up from everyone, so I hope you enjoy it too.

Texas Hash

Texas Hash

2 tablespoons olive oil
1 cup diced onion
1 cup diced green bell pepper
1 tablespoon minced fresh garlic
1 pound ground beef, 80/20
½ teaspoon dry mustard
2 teaspoons chili powder
2 teaspoons kosher salt
¼ teaspoon freshly ground black pepper
½ cup long grain white rice
2 tablespoons tomato paste
1 14.5-ounce can diced tomatoes with juice
1 cup water
1 teaspoon Worcestershire sauce


In a skillet that has a tight fitting cover, heat olive oil over medium high.
Add onion, peppers, garlic, ground beef, dry mustard, chili powder, salt and pepper. Sauté until ground beef is no longer pink, breaking up beef as you cook.

Add rice and cook for two minutes letting rice absorb liquid.  Add tomato paste and cook for one minute.  Add canned tomatoes with juice, water and Worcestershire sauce. Stir, cover and simmer for 20 minutes covered.

After 20 minutes, remove lid and fluff the mixture then serve. If the mixture is to wet, cook for another few minutes with lid off.

Texas Hash

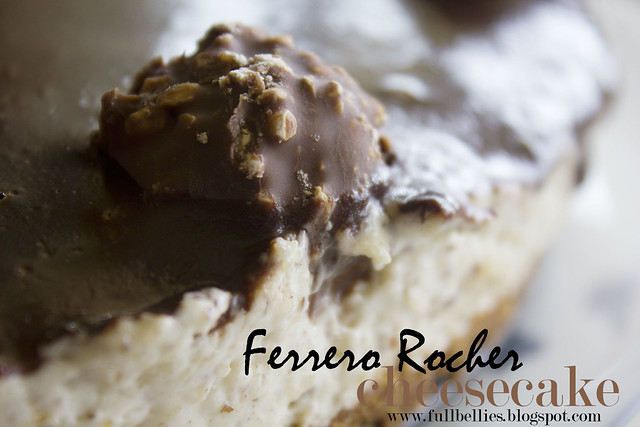
Ferrero Rocher Cheesecake - No Bake

Ferrero Rocher.......and cheesecake......all in one delicious mixture.  I mean, what is there NOT to like about that?

Last week it was my sister in law's birthday and she had been eyeing out this cheesecake, so I decided that instead of a birthday cake, I would make her this instead.

It was a hit.  I think it's the perfect combination of chocolate and hazelnuts and cream cheese.  It's not overly rich and sweet which makes it even better, in my opinion.

Super easy, no bake cheesecake.


Ferrero Rocher Cheesecake
Source: Tastemade


8 ½ oz of crushed corn flakes

2 ½ oz unsalted butter, melted

4 tbsps cocoa powder

7 oz hazelnut

1.1 lbs cream cheese

1 ½ cup + 4 tbsps cream (25% fat content)

3 oz sugar

½ teaspoon vanilla extract

170g dark chocolate

8 Ferrero Rocher chocolates


Crush the cornflakes with melted butter and cocoa powder. Cover the bottom of a springform pan with the crushed corn flakes and refrigerate for 20 minutes.

Toast the hazelnuts in the oven.

Blend the still warm hazelnuts to form a paste. Add the cream cheese, half of the cream, vanilla extract and sugar and beat until all ingredients are incorporated.

Pour it in the pan and spread with a spatula. Refrigerate until firm.

Melt the chocolate with the rest of the cream.

Cover the cheesecake with chocolate. Decorate with Ferrero Rocher chocolates let it cool for 30 minutes. Serve.


Ferrero Rocher Cheesecake

Monday, June 13, 2016

Menu Plan Monday

Hello everyone, I'm back today with my menu plan for the next week. 

I have meals planned until Thursday, Friday we will either eat out or have something super simple, and then Saturday morning I'll be headed to the commissary for my grocery shopping, so you'll see the new meal plan the following week.


http://www.forkfulofcomfort.com/

Skillet Fried Smoked Sausage and Potatoes, Steamed Mixed Veggies


http://www.afamilyfeast.com 

 Texas Hash


http://www.ahintofhoney.com

Breaded Fish Fillets, Black Eyed Pea Salad


Shepherd's Pie


2012_01290012


Wednesday, May 18, 2016

Sandwich Bread Loaf

 
I already have a few bread recipes posted, but you can never have enough, at least that is what I honestly believe.

I've had this recipe sitting around for a while and honestly hadn't even given it a thought because my usual go to loaves are the Buttermilk ones.

But I wanted something different today, and this recipe looked easy enough to try.  What I wasn't counting on was the fact that it would turn out to be darn near perfect bread.

Now I've made many loaves through the years, some have been good, some not so great, but I've always gotten a pretty good rise out of the bread.  Or at least I thought, until these happened.

They started rising like crazy in the pan before even going in the oven, and by the time they were done, they had popped up and over.  I was actually shocked at how big they got.

I'm thinking, this may just be my new favorite go to bread recipe.  Super easy to make, perfect rise, perfect texture, and the best sandwich bread you'll find.

I got the recipe from Noreen, you can find her at her blog or on Youtube.


Noreen’s Sandwich Bread Loaf


4 cups all purpose flour
1 1/2 cups Warm Water
2 teaspoons instant yeast
2 tablespoons granulated sugar
2 tablespoons butter, softened
1 teaspoon salt
2 tablespoons instant dry milk powder


Combine all ingredients in the bowl of your mixer fitted with the dough hook. 


Allow ingredients to come together in the mixing bowl.  If dough seems too dry add a tablespoon of water at a time if it seems too wet, add a tablespoon of flour at a time until the dough reaches the desired consistency. 

The dough should not be sticking to the bottom of the bowl.  It should move around the bowl and the hook freely.   Allow the dough to knead for 5 minutes.

Remove the dough from the bowl and oil the bowl and return the dough and oil the dough as well.  

Cover with a towel or plastic wrap and allow to rise for at least 1 hour or until double in size. Deflate the dough gently and turn it out onto a board without additional flour.

Press into a rectangle that is slightly smaller on the short side than your bread pan.  Roll the dough into a log, keeping the spiral tight.

Pinch the seam together and push each end into itself and pull the bottom layer up over each end and pinch to close.

Place loaf into an oiled bread pan and cover. Preheat oven to 350 degrees.

Allow to rise for an additional 30 to 45 minutes until the dough has double and/or crowned to at least 1 inch above the rim of the pan.

Bake for 30 minutes or until browned and when tapped, the loaf sounds hollow inside. 

Remove from oven and immediately remove bread from the pan. Allow to cool on a baking rack for at least 1 hour before slicing. 

Bread will slice much better once it has cooled completely.

Friday, April 29, 2016

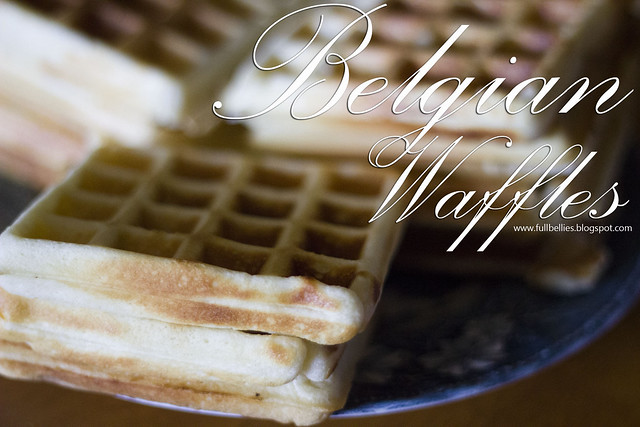
Belgian Waffles

We all have waffle recipes, some we love more than others, some are plain and simple, others are more elaborate like Waffles with Vanilla Custard, or  Banana Nut Buttermilk Waffles.

But there are times when one wishes to try a good ol' Belgian Waffle.

This recipe is super simple to make, they taste pretty good and they also create a nice crispy edge, which personally I love.


Belgian Waffles


2 cups flour
4 teaspoons baking powder
1⁄2 teaspoon salt
1⁄4 cup sugar
2 eggs, separated
1⁄2 cup oil
2 cups milk


Sift the dry ingredients together in a large bowl.  Separate the eggs.

In small bowl, beat egg whites until stiff.

Mix together the egg yolks, milk and oil and stir slightly.  Add to dry ingredients and mix well.
Fold in beaten egg whites.

Use 1/4 cups mix per waffle in your hot waffle iron.

April 28, 2016

Pepperoni Rolls


Hello everyone, I'm sure you're quite surprised to see a post from me.  It's been a while, a couple of months actually but I've missed this little corner of the web, and most of all I've missed having a place for my recipes.

I've often been trying to menu plan only to realize that I have nothing new on the blog to look back on, not even my menu plans.

So, I need to get that fixed and am planning to start up again posting recipes and doing my Monday Menu Plan.  I don't know how many of you are still around, hopefully there are a few left?  If so, leave me a quick comment below so I know you're still here :)

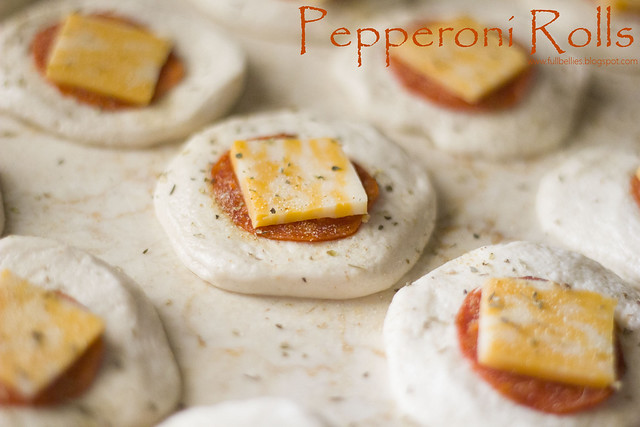
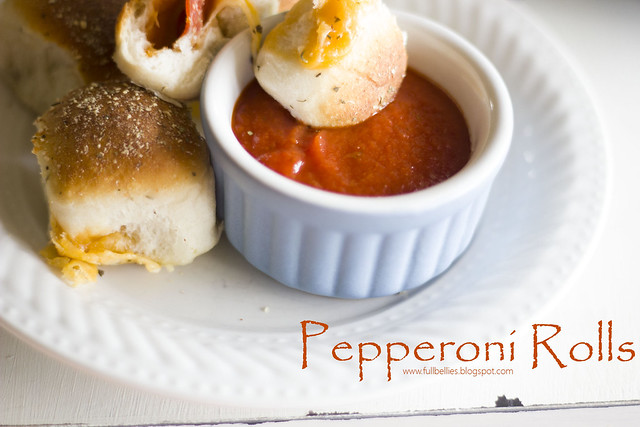
I thought my first recipe back would be these quick and easy Pepperoni Rolls.  I was going to make them for my daughter's birthday last week and ended up not getting around to them because I already had so much food.

These are quick to make, bake up beautifully and are tasty, kids especially will enjoy these.


Pepperoni Rolls
Pepperoni Rolls


Refrigerated Biscuits
Pepperoni Slices
Block of Cheese
Garlic powder, Italian Seasoning


Flatten the biscuits out, I like to use the palm of my hand for this.

Pepperoni Rolls

In the middle of each biscuit place a slice of pepperoni and a little square of cheese.  Just cut the cheese into slices and then into squares.  Season with garlic powder and italian seasoning, then gather up the edges of the biscuits into a little pouch.

Pepperoni Rolls

Place seam side down into a greased baking dish.

Sprinkle on some more garlic and italian seasoning, and last I like to sprinkle on grated parmesan cheese.

Pepperoni Rolls

Bake at 425 for 18 minutes.

Serve with Pizza sauce.  Enjoy!!

Friday, January 22, 2016

Hamburger Buns


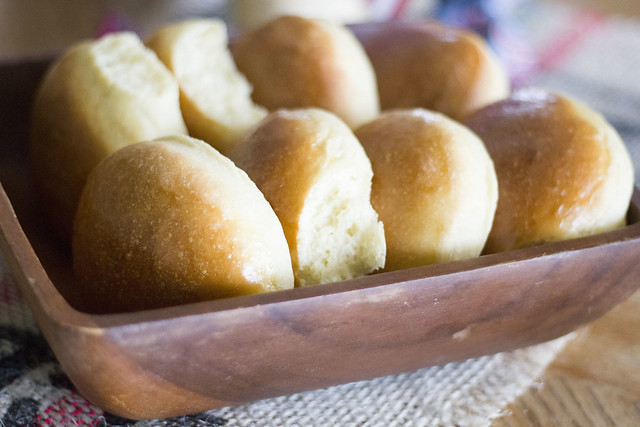
I already have a recipe for homemade hamburger and hotdog buns, here on the blog, but this is a different one and I think I prefer this one for the hamburger buns, to be honest.

The other recipe is great for the hotdog buns though, so give that one a try.

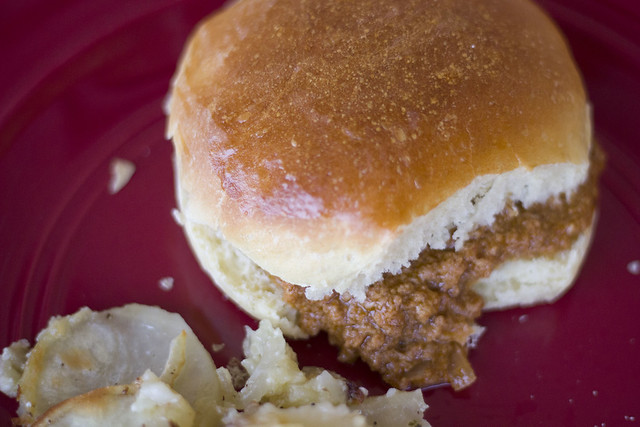
Yesterday I was making sloppy joes for dinner and realized that I had completely forgotten to buy the bread.  Good thing about making your own is that you don't have to rush out to spend money, and they usually turn out better, cheaper and more delicious than store bought anyway.

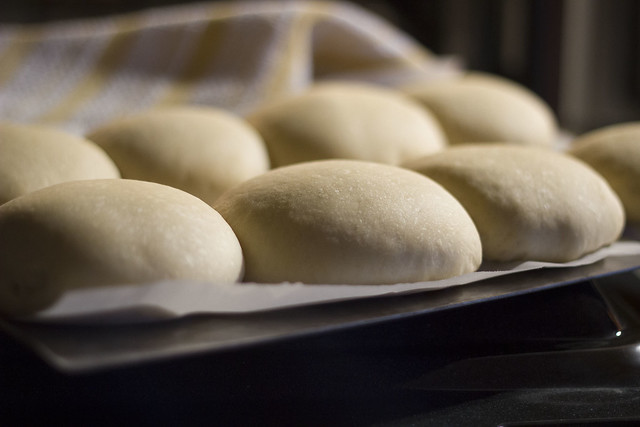
These do take time to rise, but aside from that, they are easily one of the easiest bread recipes you'll find.


January 22, 2016

Hamburger Buns
Source:  Chef John


1 (.25 ounce) package active dry yeast (such as Fleischmann's ActiveDry Yeast(R))
1 pound all-purpose flour, or as needed - divided
1 cup warm water (105 degrees F/41 degrees C)
1 large egg
3 tablespoons butter, melted
3 tablespoons white sugar
1 1/4 teaspoons salt
1 teaspoon olive oil
1 egg, beaten
1 tablespoon milk


Line a baking sheet with a silicone mat or parchment paper.
Place yeast into bowl of a large stand mixer; whisk in 1/2 cup flour and warm water until smooth. Let stand until mixture is foamy, 10 to 15 minutes.

Whisk 1 egg, melted butter, sugar, and salt thoroughly into yeast mixture. Add remaining flour (about 3 cups).

Fit a dough hook onto stand mixer and knead the dough on low speed until soft and sticky, 5 to 6 minutes. Scrape sides if needed. Poke and prod the dough with a silicone spatula; if large amounts of dough stick to the spatula, add a little more flour.

Transfer dough onto a floured work surface; dough will be sticky and elastic but not stick to your fingers. Form the dough lightly into a smooth, round shape, gently tucking loose ends underneath.
Wipe out stand mixer bowl, drizzle olive oil into the bowl, and turn dough over in the bowl several times to coat surface thinly with oil. Cover bowl with aluminum foil. Let dough rise in a warm place until doubled, about 2 hours.

January 22, 2016

Transfer dough to a floured work surface and pat to flatten bubbles and form into a slightly rounded rectangle of dough about 5x10 inches and about 1/2 inch thick. Dust dough lightly with flour if needed. Cut dough into 8 equal pieces. Form each piece into a round shape, gently tucking ends underneath as before.

Use your hands to gently pat and stretch the dough rounds into flat disc shapes about 1/2 inch thick. Arrange buns about 1/2 inch apart on prepared baking sheet. Dust buns very lightly with flour. Drape a piece of plastic wrap over the baking sheet (do not seal tightly). Let buns rise until doubled, about 1 hour.

Preheat oven to 375 degrees F (190 degrees C).

Beat 1 egg with milk in a small bowl, using a fork, until mixture is thoroughly combined. Very gently and lightly brush tops of buns with egg wash without deflating the risen dough.

Bake in the preheated oven until lightly browned on top, 15 to 17 minutes. Buns will stick together slightly where they touch. Let cool completely, tear the buns apart, and slice in half crosswise to serve.

January 22, 2016

Pressure Cooker Beef Tips

Ok, so this is how this meal came about.  When I meal plan I usually will write the page number of the cookbook I'm using, or make a note that it is on my blog or online elsewhere etc.

Tonight I was supposed to make Beef Tips and forgot to write any notes down.  I searched the cookbooks I'm using this week, I looked online, I looked at my blog and nothing.  I don't know where I got the idea from, but low and behold, it was there and I had already bought the meat so had to wing it.

Good thing about loving to cook and knowing how to cook, is that you pretty much know what flavors work well with others and you're not scared of trying new things.

Since getting my Pressure Cooker, I've been using it a lot and trying out different recipes.  I have yet to find one that didn't turn out well, so I figured this would be the perfect time to try cooking up some stewing beef which is one of those beef cuts that need to cook for a very long time to get it nice and tender.

I didn't have a long time, it was 4pm and I needed to get dinner on the table by 5pm.

I threw in a bit of this and a cup of that and 25 minutes later had the most delicious tender beef tips.  I'm so excited with the pressure cooker that I just have to come and share this recipe, well that and the fact that I've been so bad about sharing recipes lately and need to get butt in gear.

Now I'm sure you could certainly adapt this recipe to make it in a slow cooker for a couple of hours, or even on the stove top for two or so hours, at a low heat to get them nice and tender, but this recipe is for the digital pressure cookers.  By the way, mine is a 4 quart Gourmia Smart Pot Electric Pressure Cooker.


Pressure Cooker Beef Tips


2 pounds stewing beef
1 onion, diced
1 orange pepper, diced
2 tablespoons flour
salt, pepper and garlic powder to taste
olive oil
Half a bottle of Guinness Beer
1 envelope of Onion and Mushroom Soup
Worcestershire sauce
1 cup of water


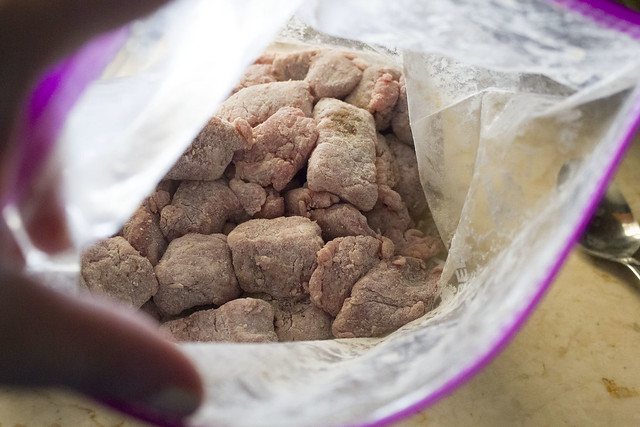
In a ziploc bag, add the beef, flour, salt, pepper, garlic powder and onion and mushroom soup.  Shake well to cover the meat.

January 20, 2016

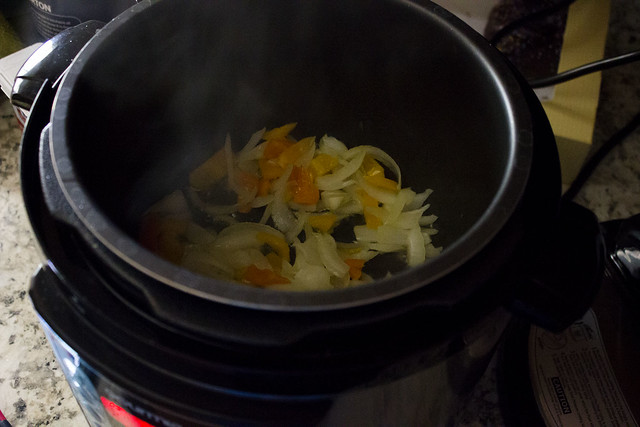
Set your pressure cooker to Saute, add a little bit of olive oil to the bowl, dump in the onion and pepper and saute for a few minutes until onion is transparent.  Add in the meat mixture and brown.

January 20, 2016

Once the meat is brown, pour in the Guinness Beer, a few dashes of Worcestershire Sauce and the water.  Stir well.

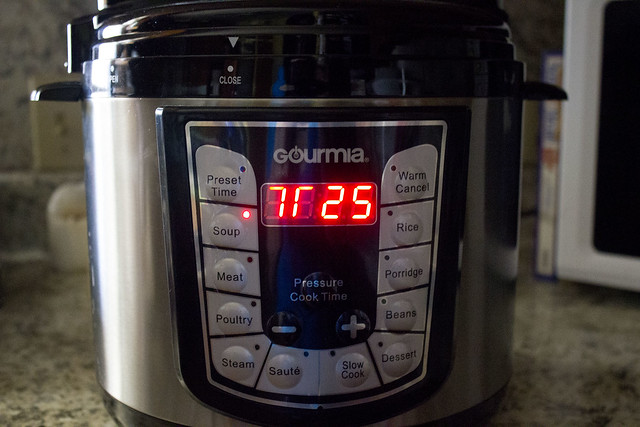
Place the lid on and lock it.  Make sure the pressure release is set to airtight.  Cook on high for 25 minutes.  I actually used the Soup preset button which is exactly 25 minutes.  Walk away and let it do it's thing.

January 20, 2016

When the time is up, either let it release pressure on it's own, or use the quick release.  

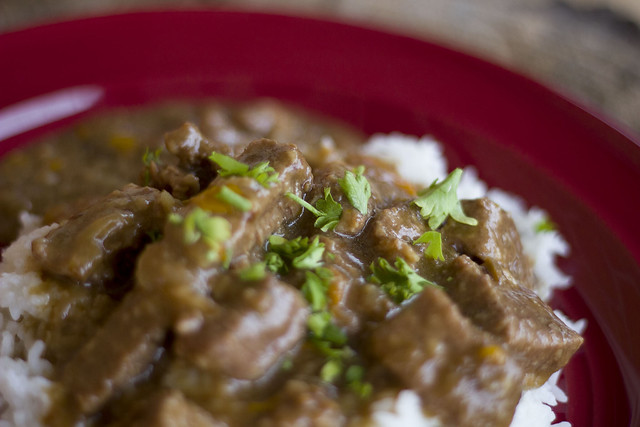
25 minutes was enough time to make the beef tender and to create a nice thick sauce.

I served mine with rice.

Pressure Cooker Beef Tips