I've decided to give get back into a normal routine here because I've literally unplugged from the internet for a little. I needed some time away to think things through etc, you can read more on my main blog.
One of the things I'm definitely bringing back are my Menu Plans, just like I used to post before :)
MONDAY 1st
BREAKFAST: Cinnamon Toast
LUNCH: Mac & Cheese, Fruit, Juice
DINNER: Jambalaya
TUESDAY 2nd
BREAKFAST: Stir-Abouts (recipe to come)
LUNCH: Cheese and Ham Quesadillas
DINNER: King Ranch Chicken Casserole
WEDNESDAY 30th
BREAKFAST: Cereal, Milk, Fruit
LUNCH: Totino's Pizza
DINNER: Beef Pot Pie with Beer Biscuits
THURSDAY 4th
BREAKFAST: French toast, juice, milk
LUNCH: Tuna Salad
DINNER: Turkey a la King w/ rice
FRIDAY 5TH
BREAKFAST: Muffins and Warm Spiced Milk
LUNCH: Hot and Spicy Chicken Tenders
DINNER: Chicken Pepper Pasta
SATURDAY 6th
BREAKFAST: Mile High Buttermilk Biscuits w/ Gravy
LUNCH: Grilled Cheese Sandwiches, Celery & Carrot Sticks
DINNER: Meatloaf, Mashed potatoes and Green Beans
SUNDAY 7TH
BREAKFAST: Waffles w/ Vanilla Custard
LUNCH: Corned Beef Hash
DINNER: Beef Stroganoff w/ homemade noodles
Sunday, July 31, 2011
Friday, July 22, 2011
Best Pizza courtesy of Skype
I want to show you the best pizza you could ever prepare for your family.
I mean, they will be shocked at the end result and will no doubt leave them with mouths hanging open, amazed and speechless.
This pizza...............Ohhhhhh this pizza is amazing.
Pepperoni, cooked nice and crisp.....a nice golden brown crust......YUM.MY!

Best thing about this pizza is that it's multi-functional too..........you can use it at the park as a substitute Frisbee

I mean, they will be shocked at the end result and will no doubt leave them with mouths hanging open, amazed and speechless.
This pizza...............Ohhhhhh this pizza is amazing.
Pepperoni, cooked nice and crisp.....a nice golden brown crust......YUM.MY!


Ahhhhh, bet you're dying to know how to prepare such a beauty, aren't you?
Well, it's pretty easy actually....you pull it out of the box, you warm up the oven to 400 degrees, then you pop in the pizza and go get on Skype with your family in South Africa.
Just talk and talk and laugh and joke and talk some more and then proceed to take them around your whole house with the laptop in hand so they can see everything you're doing.....all while this delicious pizza is cooking.
Then come back into the kitchen an hour later and say "Oh pizza is done".
That's it! Easy huh???????
I will NEVER live this down. This is my FIRST time ever burning anything that I've cooked. HA!
Note: Don't try this at home.
Thursday, July 21, 2011
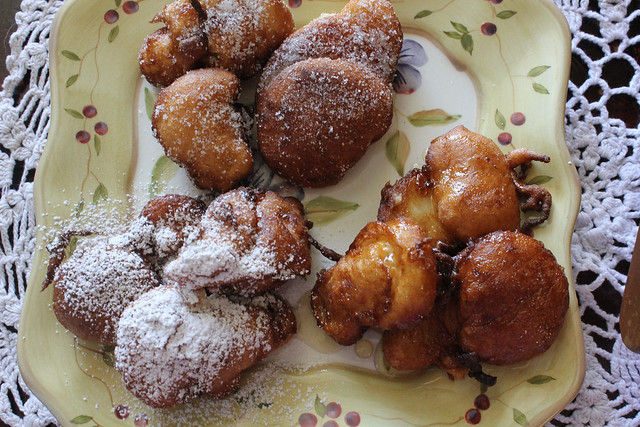
Malasadas
First I'll start by saying that the reason I'm putting the recipe up today is because I hadn't realized that it wasn't on my blog, so when one of my readers asked me on Facebook if I had the recipe, I told her that I would put it up for you all.
Secondly, I'll have to say that the first time I had Malasadas was when I was in high school, over at a friend's house. They were from the island of Madeira and I remember many afternoons a couple of us girls would go over to her house and make these and then sit and snack on them all afternoon long.
It brings back such fond memories, but it also makes me sad because my friend Ana, whose house we had these at, has since then passed away, matter of fact not long after we graduated from high school.
Since then I've made these a couple of times and not until I came to live in the USA did I realize that many people seem to think of Malasadas as this doughnut dish from Hawaii, which really confused me since their idea of a Malasada is what I would actually call a Bola de Berlim. A donut filled with cream custard inside.....but, I guess different folks, different recipes and all that.
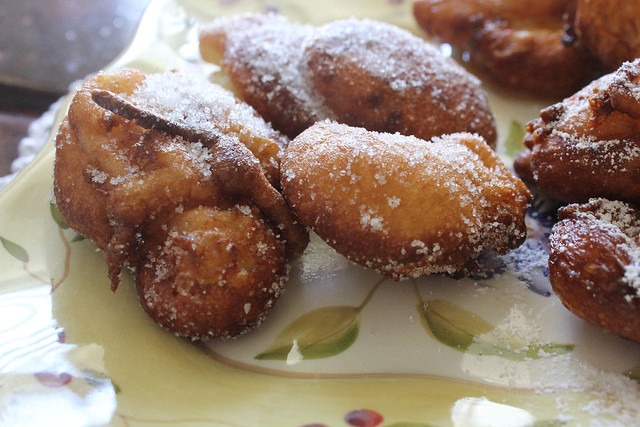
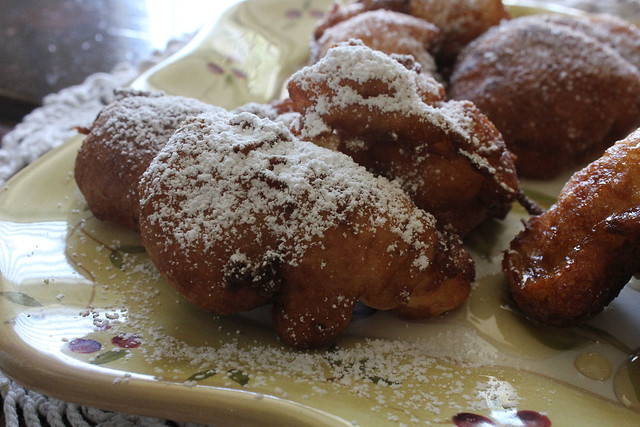
Here are the Malasadas that I know and have been eating my whole life, these are the Portuguese ones that I'm used to making. Enjoy :)
4 c. flour
1 tsp. salt
1 c. sugar
2 pkg. yeast
2 c. warm milk
8 eggs
In a big bowl, add 1 cup of warm milk and the yeast, stir well. In a medium bowl, add the flour, salt and sugar, combine well and then add 2 cups of that flour mixture into the milk and yeast bowl.
Beat well until smooth. Next, add in the eggs 2 at a time, a little bit more of the milk and a little bit more of the remaining flour mixture, keep mixing well until all ingredients are combined. Cover and let sit for about an hour.
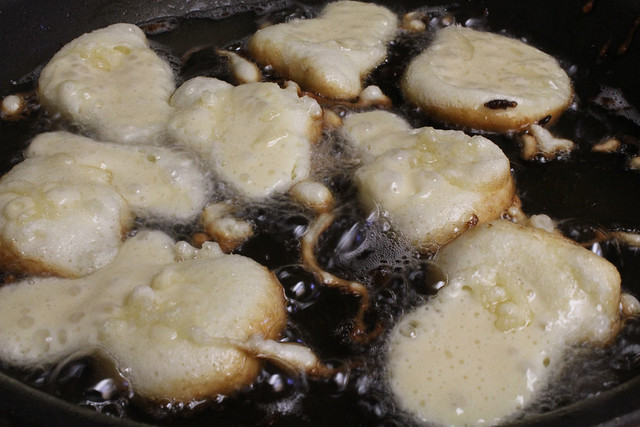
In a skillet, add oil and when it's hot, add the dough by tablespoons,
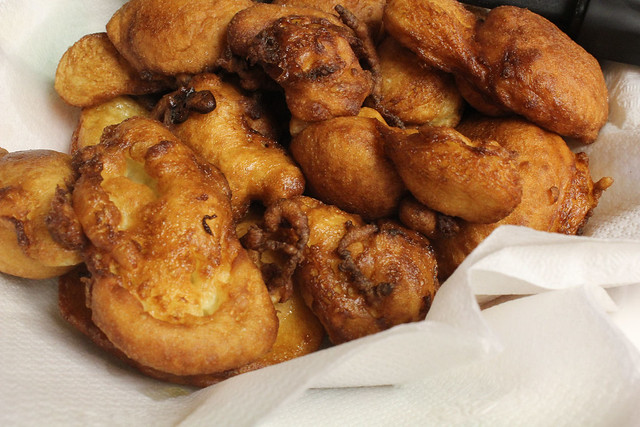
be careful not to splash. I always manage to burn myself when making these. They will fry up really fast, so within a few seconds, turn them over and after a few seconds more, remove them onto a plate lined with paper towels.
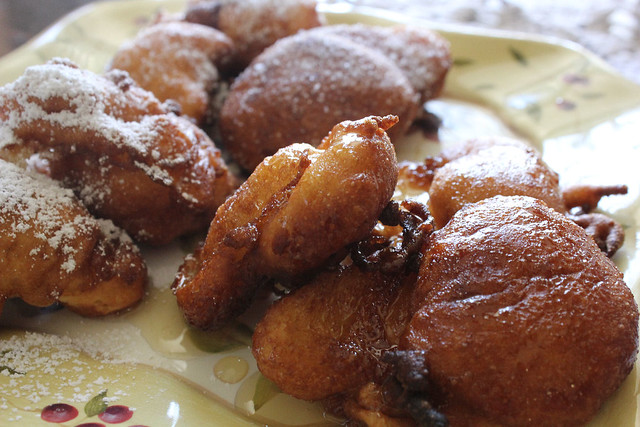
The way we used to eat them at Ana's house was by drizzling *mel de cana* or sugar cane syrup over these. You can also drizzle honey on them,
or roll them in sugar,
or sprinkle some powdered sugar on top.
Either way is delicious.
Secondly, I'll have to say that the first time I had Malasadas was when I was in high school, over at a friend's house. They were from the island of Madeira and I remember many afternoons a couple of us girls would go over to her house and make these and then sit and snack on them all afternoon long.
It brings back such fond memories, but it also makes me sad because my friend Ana, whose house we had these at, has since then passed away, matter of fact not long after we graduated from high school.
Since then I've made these a couple of times and not until I came to live in the USA did I realize that many people seem to think of Malasadas as this doughnut dish from Hawaii, which really confused me since their idea of a Malasada is what I would actually call a Bola de Berlim. A donut filled with cream custard inside.....but, I guess different folks, different recipes and all that.
Here are the Malasadas that I know and have been eating my whole life, these are the Portuguese ones that I'm used to making. Enjoy :)
Malasadas
4 c. flour
1 tsp. salt
1 c. sugar
2 pkg. yeast
2 c. warm milk
8 eggs
In a big bowl, add 1 cup of warm milk and the yeast, stir well. In a medium bowl, add the flour, salt and sugar, combine well and then add 2 cups of that flour mixture into the milk and yeast bowl.
Beat well until smooth. Next, add in the eggs 2 at a time, a little bit more of the milk and a little bit more of the remaining flour mixture, keep mixing well until all ingredients are combined. Cover and let sit for about an hour.
In a skillet, add oil and when it's hot, add the dough by tablespoons,
be careful not to splash. I always manage to burn myself when making these. They will fry up really fast, so within a few seconds, turn them over and after a few seconds more, remove them onto a plate lined with paper towels.
The way we used to eat them at Ana's house was by drizzling *mel de cana* or sugar cane syrup over these. You can also drizzle honey on them,
or roll them in sugar,
or sprinkle some powdered sugar on top.
Either way is delicious.
Wednesday, July 20, 2011
Pepperoni Pizza Bread
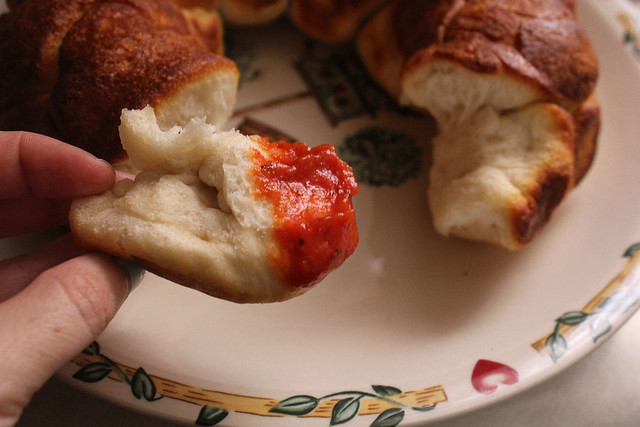
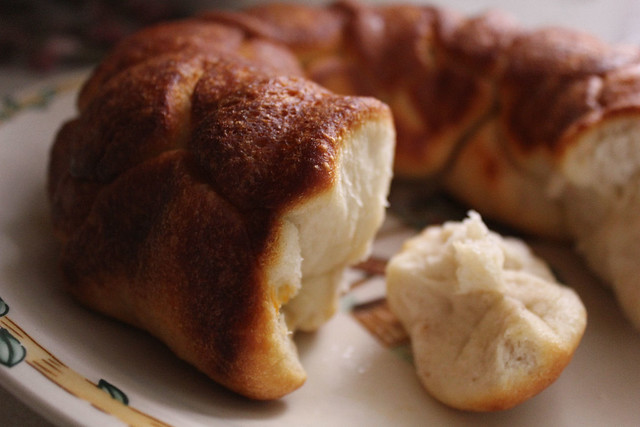
Pepperoni pizza but in small bites. Yeah, I wish I could take credit for this but I am not that smart LOL
When I came across this recipe at Confessions of a Foodie Bride I thought "why didn't I think of that?". It's so easy but such a great snack you will wonderful why you didn't think of it either.
Needless to say, I made it for lunch today and within 10 minutes there was only 2 small pieces left which, by the way, have now been eaten by the kids, so there is nothing but crumbs.....and the thought that I need to make it again.
I took a shortcut and used biscuits instead of the pizza dough, next time I'll make my own pizza dough and I think it will be just as good.
You can take the long route and make your favorite pizza dough and marinara sauce, or the short route and pick up your favorite pizza dough and red sauce from the store.
Pepperoni Pizza Monkey Bread
Credit: Confessions of a Foodie Bride
Ingredients
- 2 cloves garlic, thinly sliced
- 4 Tbsp butter
- 2 lbs pizza dough (I used refrigerated biscuits)
- 6 oz mozzarella cheese, cut into small cubes (I used mozzarella sticks)
- 48 slices of Turkey pepperoni (from 1 package)
- 2-3 cups marinara sauce, warmed, for serving
Instructions
- Heat garlic and butter over medium heat just until the garlic begins to brown. Remove from heat and let sit.
- Lightly brush the inside of a bundt pan (or other oven-safe dish) with garlic butter.
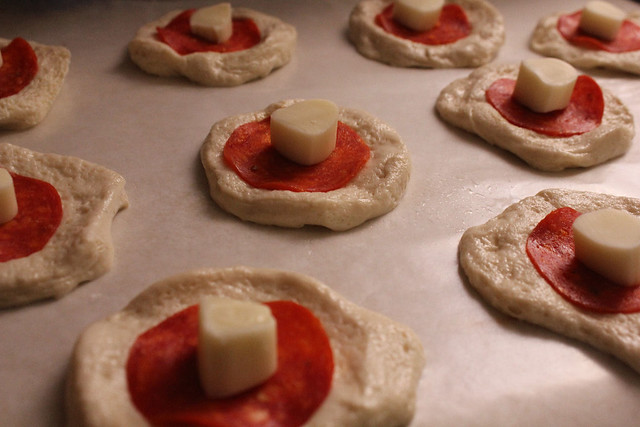
- Pull off large marble-sized balls of dough and flatten (a kitchen scale makes this very easy). Top with a slice of pepperoni and a cube of mozzarella.
- Wrap the dough around the pepperoni and cheese, pinching well to seal.
- Very lightly brush the pizza ball with garlic butter and place into the bundt pan (I dabbed the pizza balls on a butter-dipped silicon brush to keep butter use low - there will be 1+ Tbsp leftover - and my hands butter free. Buttery hands make it hard to get the pizza balls to seal).
- Repeat until all of the dough is used.
- Cover and let sit for 30 minutes, while preheating the oven to 400.
- Bake for ~35 minutes, until the top is very brown.
- Remove from the oven and let sit for 10 minutes.
- Turn out onto a platter and serve with warmed marinara sauce for dipping.
Notes
Yields: 48 piecesTuesday, July 19, 2011
Beef and Beer Sliders
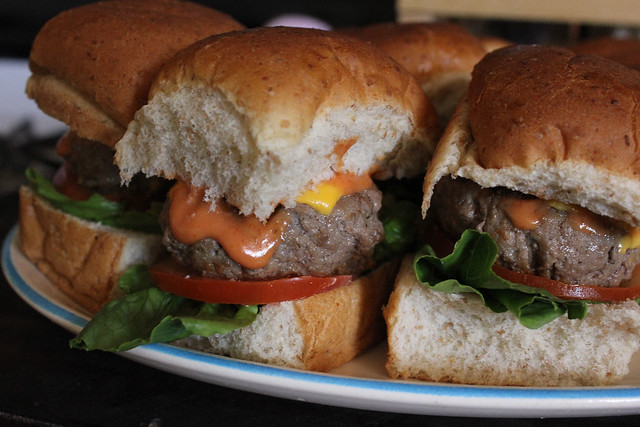
I love sliders, I think they're not only delicious but such a fun way to present burgers and there's something about the size that makes it just the perfect bite, for me at least.
These are just yet another variation on these popular burger bites.
1 pound ground beef
1/2 cup beer
salt and pepper
oregano
cumin
1/4 cup plus 2 tablespoons ketchup
2 tablespoons mayonnaise
2 teaspoons mustard
Mix the ketchup, mayo and mustard well and set aside.
In a bowl, mix the beef and the rest of the ingredients, divide into 12 parts, shape into small patties and grill or fry in a skillet.
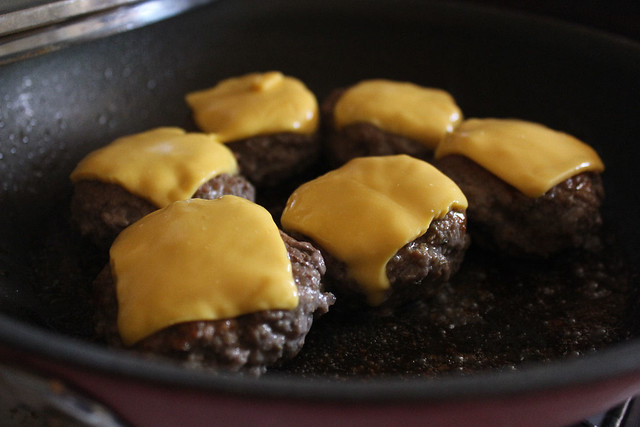
I fry them for about 5 minutes, then flip them over and fry for another 4 or so minutes, add a little slice of cheese and cover with a lid for about 30 seconds or until cheese is melted.
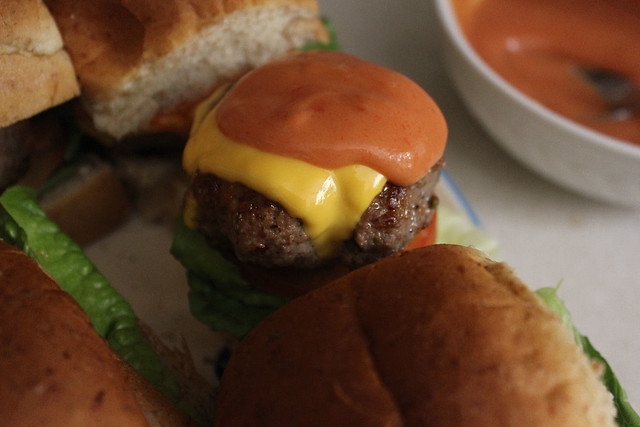
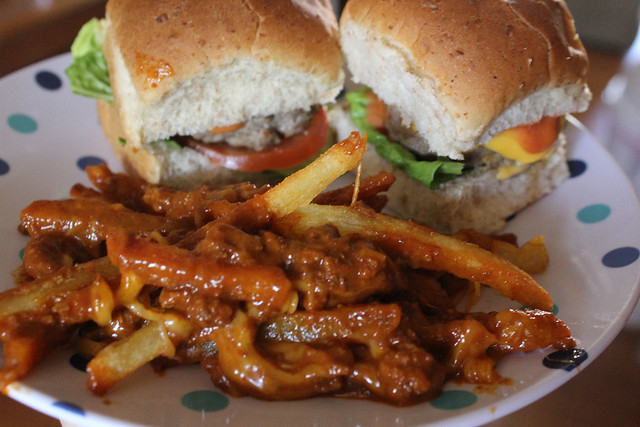
Split the dinner rolls in half, on the bottom bun put a slice of lettuce, a slice of tomato and then top with the burger, add a teaspoon or however much you want of the sauce and top with the top half of the bun.
Enjoy!
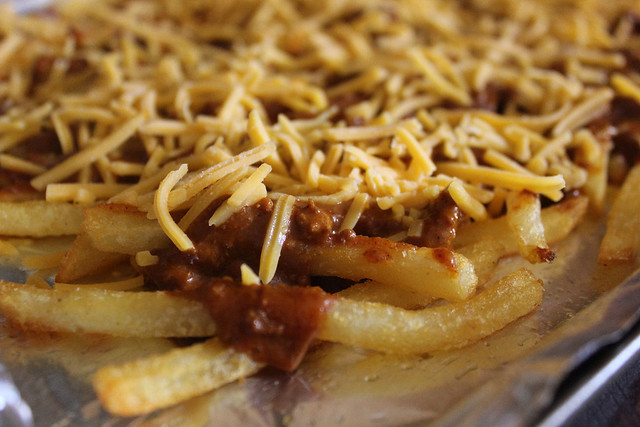
I served these with some chili fries
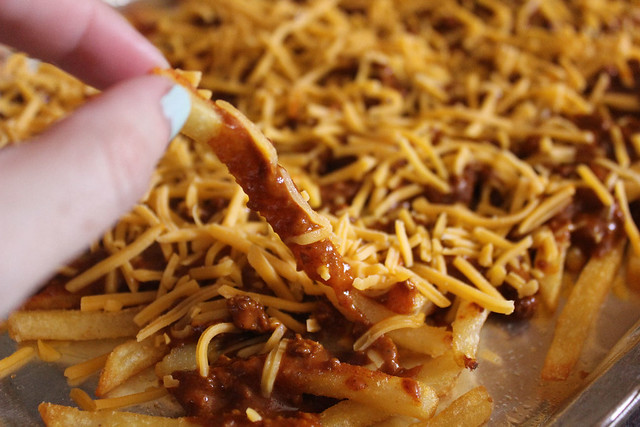
which are so easy to make.
Just bake some frozen fries, warm up a can of your favorite chili or use leftover homemade chili, sprinkle shredded cheese on top and enjoy.
These are just yet another variation on these popular burger bites.
Beef and Beer Sliders
1 pound ground beef
1/2 cup beer
salt and pepper
oregano
cumin
1/4 cup plus 2 tablespoons ketchup
2 tablespoons mayonnaise
2 teaspoons mustard
Mix the ketchup, mayo and mustard well and set aside.
In a bowl, mix the beef and the rest of the ingredients, divide into 12 parts, shape into small patties and grill or fry in a skillet.
I fry them for about 5 minutes, then flip them over and fry for another 4 or so minutes, add a little slice of cheese and cover with a lid for about 30 seconds or until cheese is melted.
Split the dinner rolls in half, on the bottom bun put a slice of lettuce, a slice of tomato and then top with the burger, add a teaspoon or however much you want of the sauce and top with the top half of the bun.
Enjoy!
I served these with some chili fries
which are so easy to make.
Just bake some frozen fries, warm up a can of your favorite chili or use leftover homemade chili, sprinkle shredded cheese on top and enjoy.
Sunday, July 17, 2011
Old West Ranch Style Barbecue Sauce
On our recent trip to Tombstone, one of the souvenirs I picked up was a cookbook called Cowboy Cookin'.
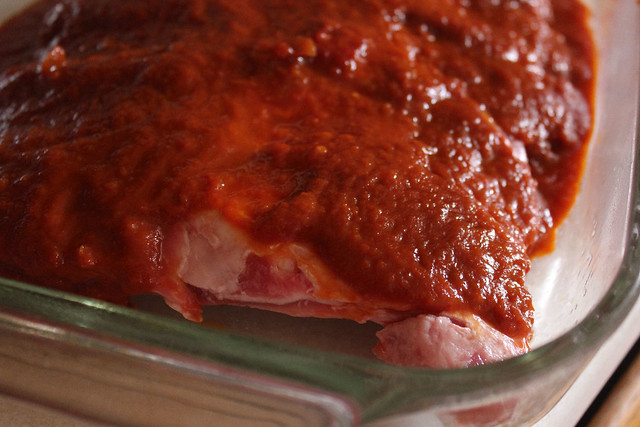
After browsing through the recipes, which I'm hoping to try soon, I came upon this one for Barbecue Sauce and it immediately caught my eye. Having some ribs to cook for dinner I thought that it would be the perfect time to try this sauce.
It has to cook for 2 hours, so if you're making it for dinner, be sure to start it early in the morning.
1 cup molasses
1 medium onion
1/2 cup butter or bacon drippings (I used butter)
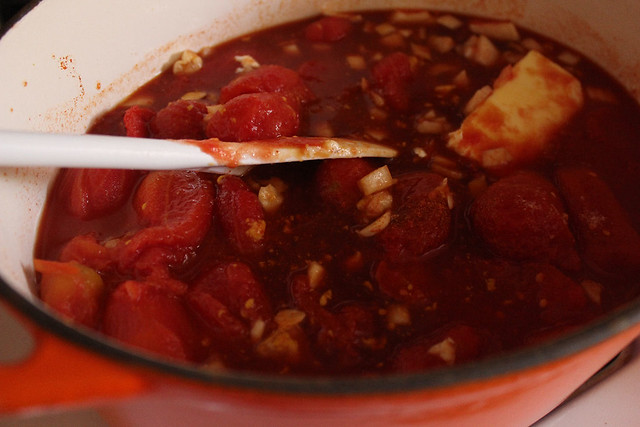
2 large cans of tomatoes
1 tablespoon dry mustard
1/3 cup of vinegar
4 cloves of garlic (mashed)
1 teaspoon salt
Combine all ingredients in a large sauce pan.
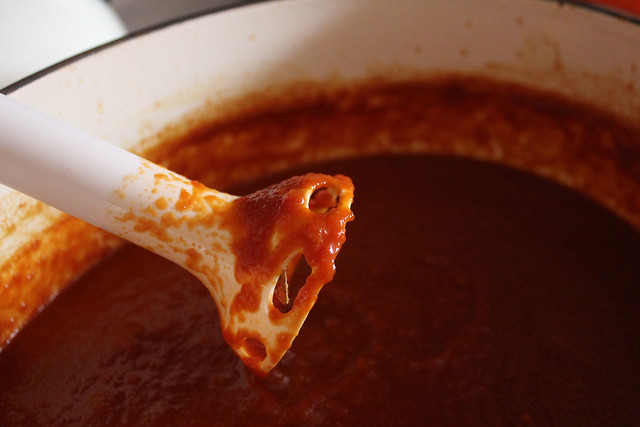
Bring to a full boil over medium heat stirring occasionally. Reduce to a low heat. Cover and cook for about 2 hours, stir occasionally, until sauce has thickened and all ingredients are well blended. Sauce will turn very dark.
Apply to rib-eye steaks or ribs as required.
Note: It doesn't tell you to do this, but I used my immersion blender to puree everything.
After browsing through the recipes, which I'm hoping to try soon, I came upon this one for Barbecue Sauce and it immediately caught my eye. Having some ribs to cook for dinner I thought that it would be the perfect time to try this sauce.
It has to cook for 2 hours, so if you're making it for dinner, be sure to start it early in the morning.
Old West Ranch Style Barbecue Sauce
1 cup molasses
1 medium onion
1/2 cup butter or bacon drippings (I used butter)
2 large cans of tomatoes
1 tablespoon dry mustard
1/3 cup of vinegar
4 cloves of garlic (mashed)
1 teaspoon salt
Combine all ingredients in a large sauce pan.
Bring to a full boil over medium heat stirring occasionally. Reduce to a low heat. Cover and cook for about 2 hours, stir occasionally, until sauce has thickened and all ingredients are well blended. Sauce will turn very dark.
Apply to rib-eye steaks or ribs as required.
Note: It doesn't tell you to do this, but I used my immersion blender to puree everything.
Saturday, July 16, 2011
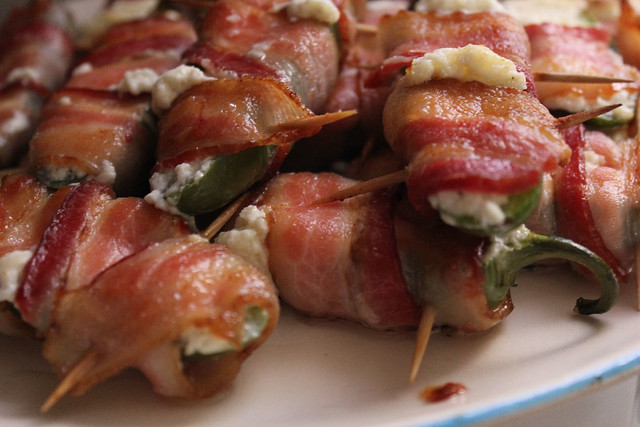
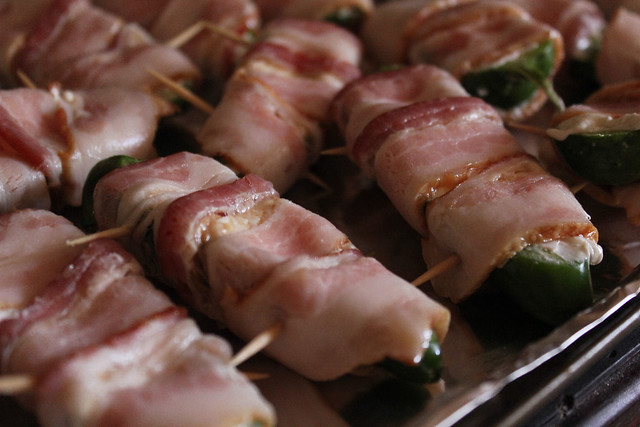
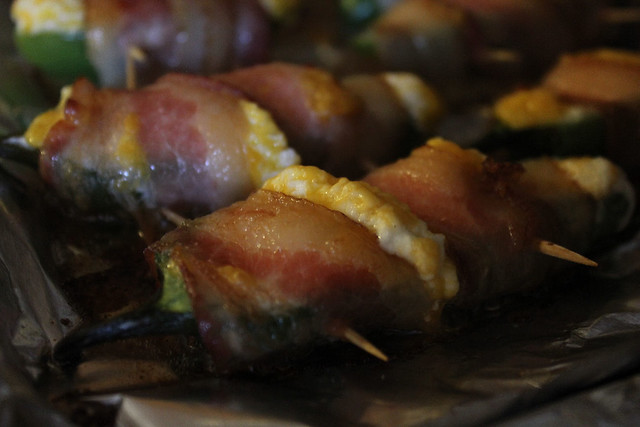
Bacon Wrapped Jalapeno Poppers
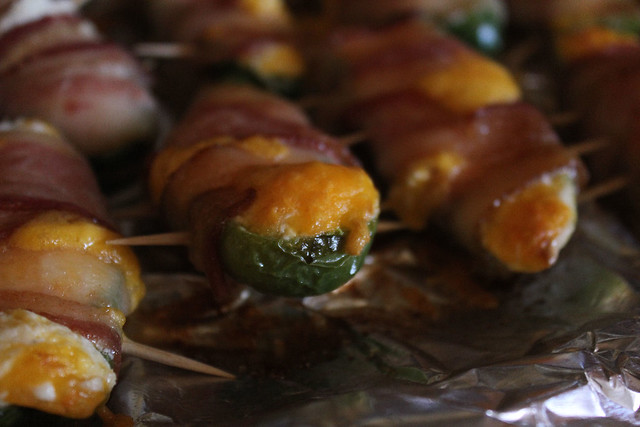
I love appetizers but I love them even more when I can just make a whole meal out of them. These are very filling and definitely good as a weekend dinner.
They are seriously addictive and I dare you to eat just one or two and walk away, because I tell you, you will be eating them over and over and over and literally begging yourself to stop. Or maybe that's just me, I don't know, I'm still trying to stay away from them but I may just lose that battle and go grab another one in the kitchen.
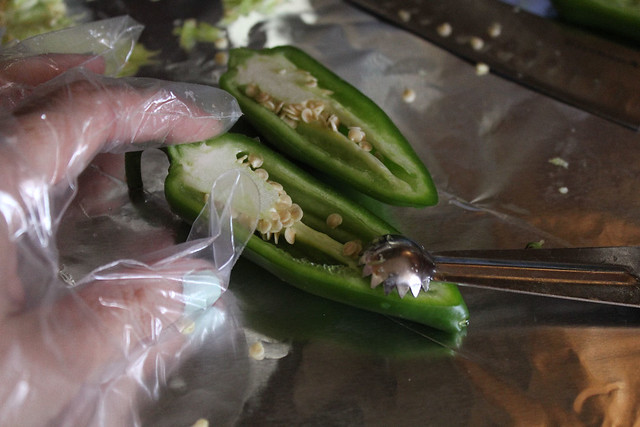
Quick tip, just use some gloves if you're going to be working with the Jalapeno's, don't do what I did the first time I made them which was use no gloves and then proceed to scratch my eye. YEAH, not a happy moment.
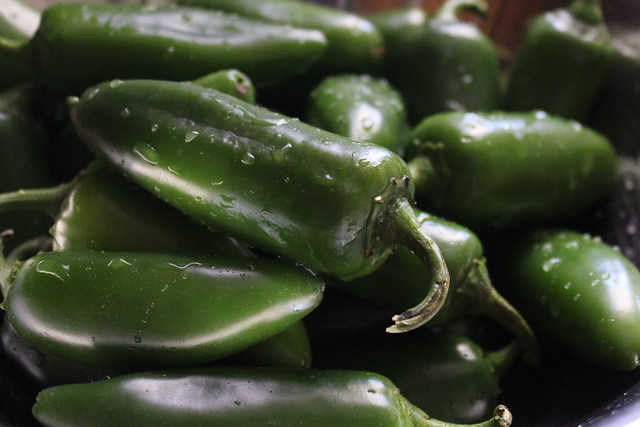
12 -15 fresh jalapeno peppers
1 8oz package cream cheese
1 cups shredded cheddar cheese
1 (16 ounce) package thick cut bacon cut in half
Cut stems off of peppers and cut them all in half longways.
Remove seeds from peppers.
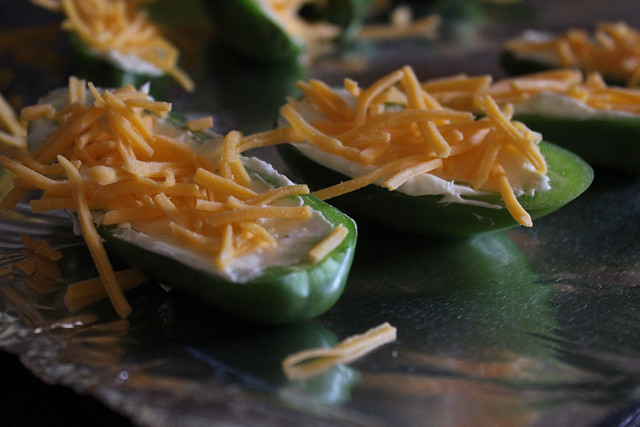
Fill each pepper with cream cheese and sprinkle cheddar cheese on top.
Wrap 1/2 slice of bacon around each pepper half.
Place on baking sheets and place in 450 degree oven for 10 to 15 minutes or until bacon is fully cooked. Remove and serve warm.
They are seriously addictive and I dare you to eat just one or two and walk away, because I tell you, you will be eating them over and over and over and literally begging yourself to stop. Or maybe that's just me, I don't know, I'm still trying to stay away from them but I may just lose that battle and go grab another one in the kitchen.
Quick tip, just use some gloves if you're going to be working with the Jalapeno's, don't do what I did the first time I made them which was use no gloves and then proceed to scratch my eye. YEAH, not a happy moment.
Bacon Wrapped Jalapeno Poppers
recipe from Food.com
12 -15 fresh jalapeno peppers
1 8oz package cream cheese
1 cups shredded cheddar cheese
1 (16 ounce) package thick cut bacon cut in half
Cut stems off of peppers and cut them all in half longways.
Remove seeds from peppers.
Fill each pepper with cream cheese and sprinkle cheddar cheese on top.
Wrap 1/2 slice of bacon around each pepper half.
Place on baking sheets and place in 450 degree oven for 10 to 15 minutes or until bacon is fully cooked. Remove and serve warm.
Friday, July 08, 2011
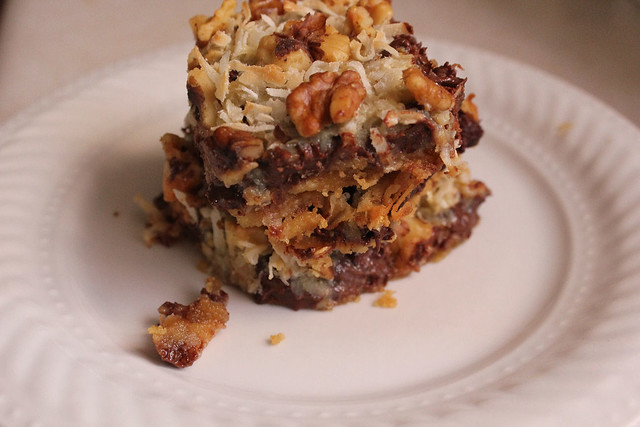
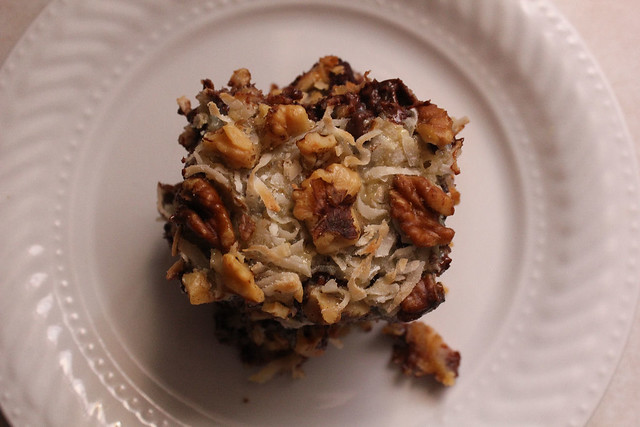
Magic Cookie Bars
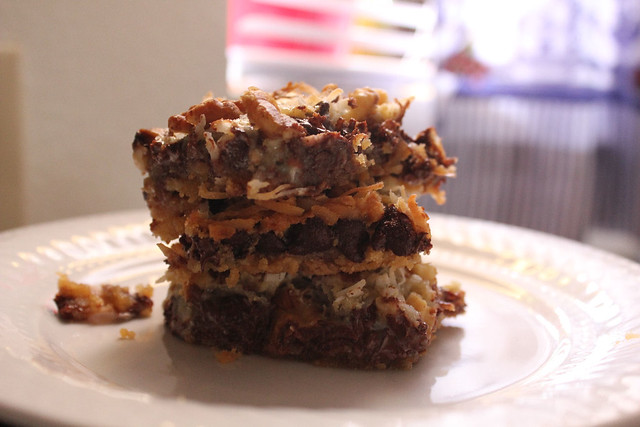
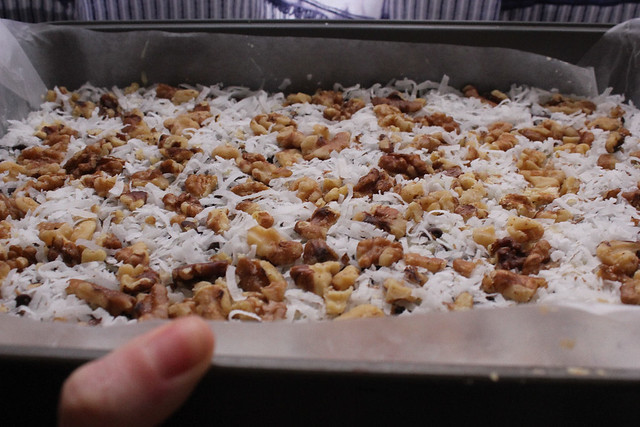
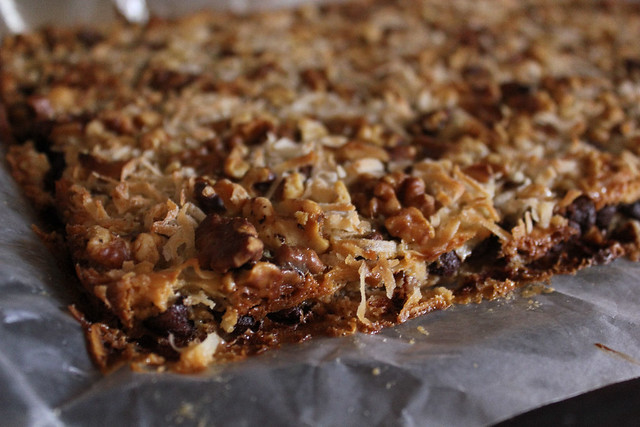
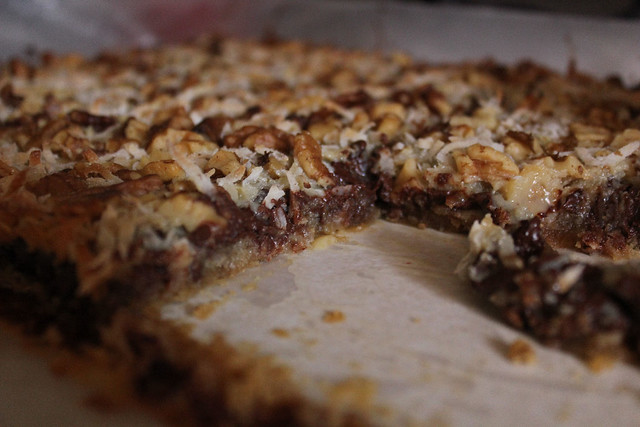
Have a batch of Magic Cookie Bars baking in the oven.
I don't think there's anything that I can say about these that you haven't heard before, for the most part when you talk about them you are usually met with "Oh yeah, I remember eating those when I was little".....or "Oh now those bring back memories".
So I'm going to say nothing else, I'm just going to let YOU reminisce about what Magic Cookie Bars remind you of.
Ingredients
* 1/2 cup butter or margarine, melted
* 1 1/2 cups graham cracker crumbs
* 1 (14 ounce) can EAGLE BRAND® Sweetened Condensed Milk
* 2 cups semisweet chocolate morsels
* 1 1/3 cups flaked coconut
* 1 cup chopped nuts
Heat oven to 350 degrees F (325 degrees for glass dish). Coat 13x9-inch baking pan with no-stick cooking spray.
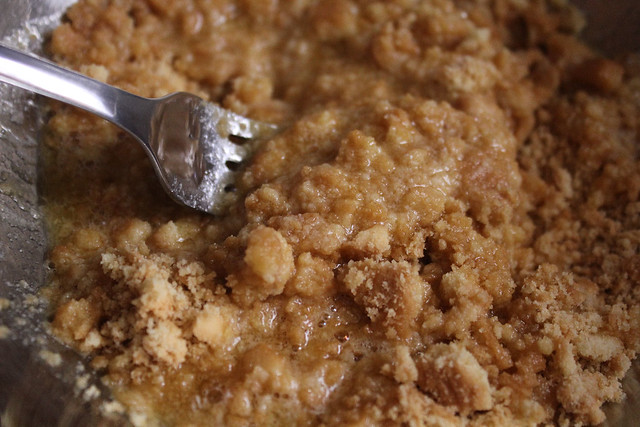
Combine graham cracker crumbs and butter.
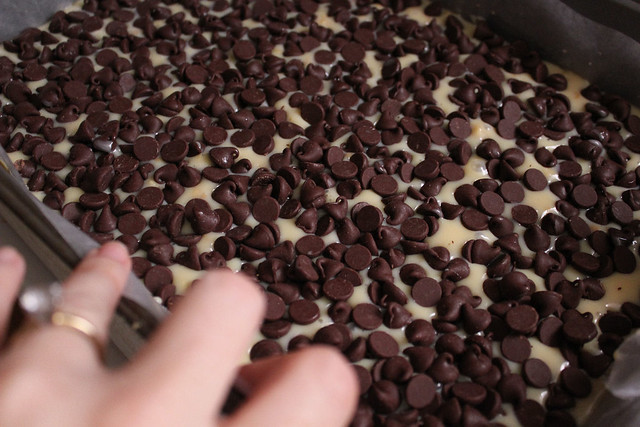
Press into bottom of prepared pan. Pour sweetened condensed milk evenly over crumb mixture. Layer evenly with chocolate chips,
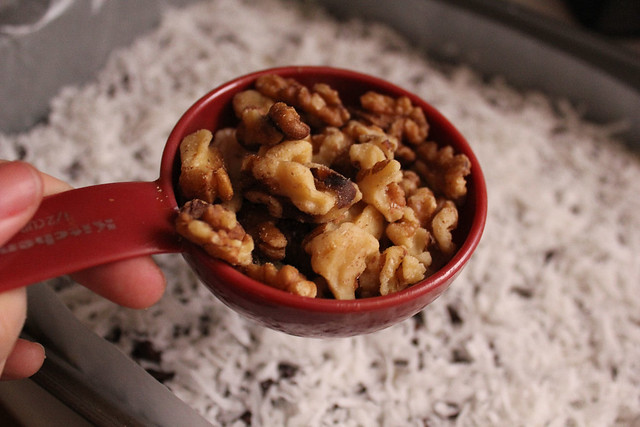
coconut and nuts.
Press down firmly with a fork.
Bake 25 minutes
or until lightly browned.
Cool. Cut into bars or diamonds. Store covered at room temperature.
I don't think there's anything that I can say about these that you haven't heard before, for the most part when you talk about them you are usually met with "Oh yeah, I remember eating those when I was little".....or "Oh now those bring back memories".
So I'm going to say nothing else, I'm just going to let YOU reminisce about what Magic Cookie Bars remind you of.
Magic Cookie Bars
Credit: Eagle Brand
Ingredients
* 1/2 cup butter or margarine, melted
* 1 1/2 cups graham cracker crumbs
* 1 (14 ounce) can EAGLE BRAND® Sweetened Condensed Milk
* 2 cups semisweet chocolate morsels
* 1 1/3 cups flaked coconut
* 1 cup chopped nuts
Heat oven to 350 degrees F (325 degrees for glass dish). Coat 13x9-inch baking pan with no-stick cooking spray.
Combine graham cracker crumbs and butter.
Press into bottom of prepared pan. Pour sweetened condensed milk evenly over crumb mixture. Layer evenly with chocolate chips,
coconut and nuts.
Press down firmly with a fork.
Bake 25 minutes
or until lightly browned.
Cool. Cut into bars or diamonds. Store covered at room temperature.
Wednesday, July 06, 2011
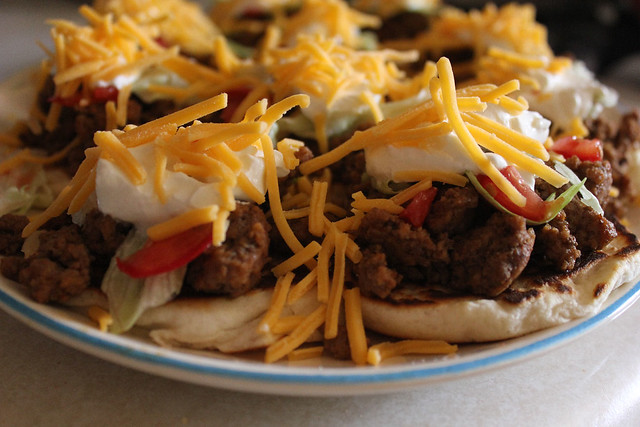
Mini Tacos
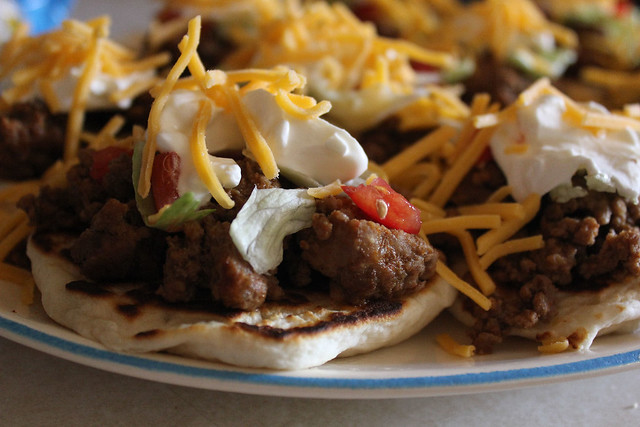
Nothing special, nothing difficult, just some mini tacos using Refrigerated Biscuits.
I've made some Flatbread Tacos before also using Refrigerated Biscuits and you can find that recipe right here. But these were just done a little different, for one, the biscuits were the small ones, I didn't stretch them as much and I also didn't fold them, so in actuality it's almost like a little tostada.
All you need is 1 lb of ground beef, a little bit of water about 3/4 cups if that, 1 packet Taco Seasoning, 1 tube of refrigerated biscuits. Then for the toppings whatever you wish: lettuce, tomato, sour cream and shredded cheese.
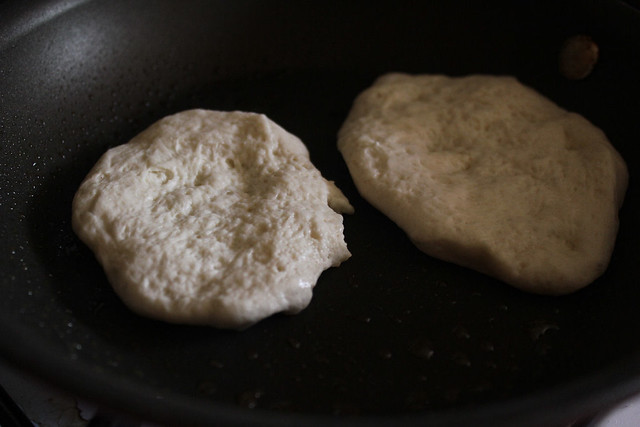
Pull out the biscuits and flatten them with your hand, I stretched them a little not too much, but I wanted a size a tad bigger than the biscuit.
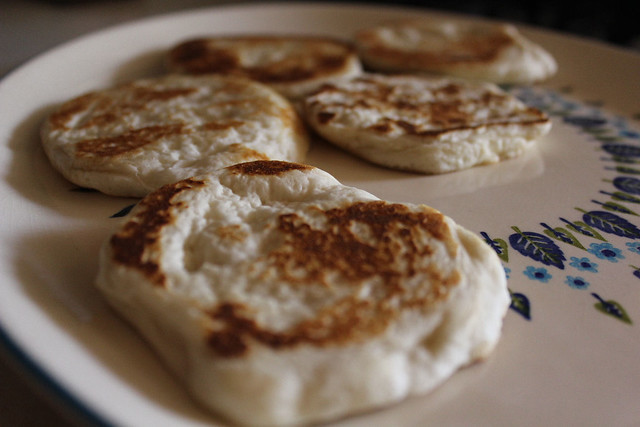
In a small skillet, spray with non stick spray and then cook the biscuits on each side for about a minute or two, they cook real quick and you don't want to burn them.
In another skillet, brown the ground beef, when done drain, add the taco seasoning and the water, simmer for about 3 minutes or so.
Spoon onto each biscuit, add the toppings and enjoy :)
Saturday, July 02, 2011
Red, White and Blue Flag Cake
4th of July is upon us yet again, but this year I wanted to make a different cake than the one I usually serve, which is a flag cake made out of strawberries and blueberries OR using blueberry or cherry pie filling to make the stars and stripes.
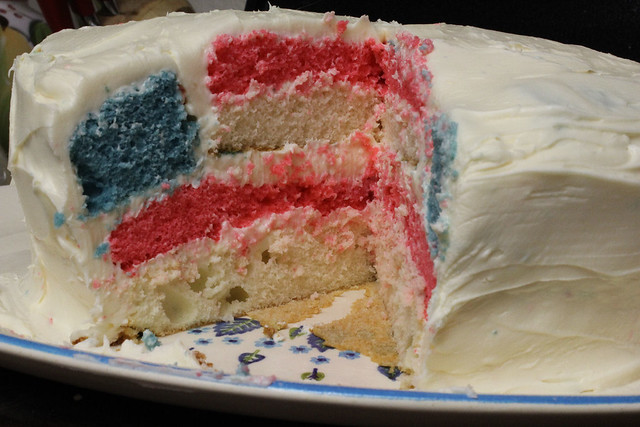
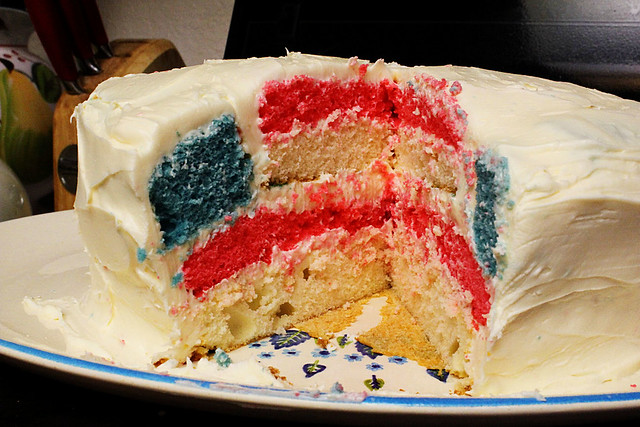
I searched around online and then I saw it. My jaw hit the ground and I thought "NO WAY". I was just completely taken with the cake and even more so when I realized that the creator is none other than Elissa from 17 and Baking. Yeah folks, a now 19 year old, Elissa and her dad came up with this creation for the 4th of July and if you've never seen it before, you're going to flip out. Just imagine your guests reaction when you serve them a slice of this cake.
Baking Directions:
To make this cake you will need three full layers of white cake, all the same height (make two recipes of cake or two cake mixes - you will end up with four layers so use one for another purpose). One layer will need to be white, one layer will need to be red and one layer will need to be blue. Use food coloring to get desired shade. Bake the layers in 9" round greased and floured rounds. Let cool. Freeze the layers to make them easier to work with during assembly.
Assembly:
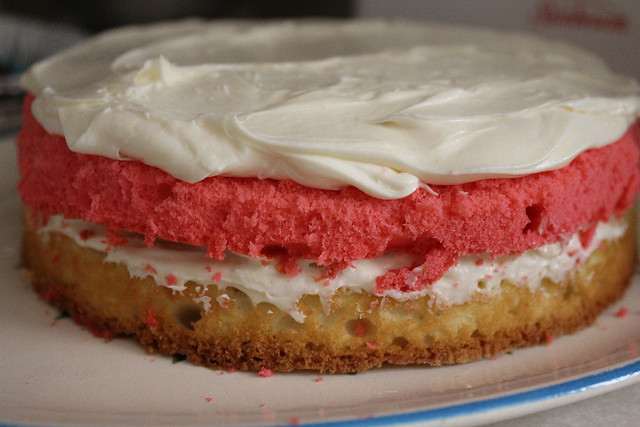
Split the white layer and the red layer in half horizontally using a long serrated knife. (You can also use a cake leveler to help keep the cut even.) Do not split the blue layer. Start assembly by placing one split white layer on a cake plate. Frost the top of this layer using white icing. Place one of the red split layers on top of the frosted white layer and frost it with icing. Set aside.
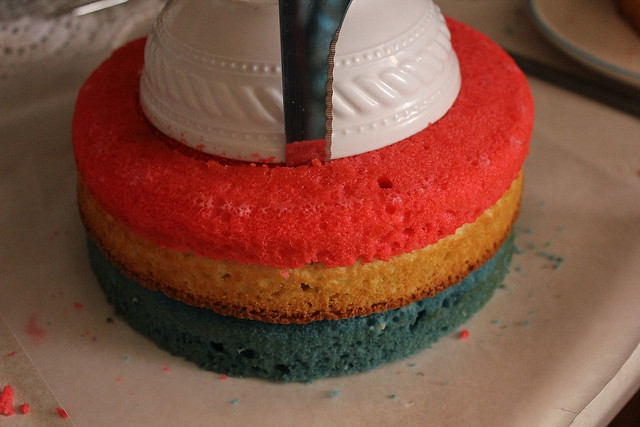
Place the remaining red split layer and the remaining white split layer on top of the full blue layer. Place a round bowl (or paper pattern) approximately 5" diameter on the top of the cakes in the center and cut through all the layers using the bowl as a guide.
You should now have a circle cut through the layers. Keep the center red circle, the center white circle and the outer (approximately 2" wide) blue cake ring. Set aside all other cake pieces for a different use.
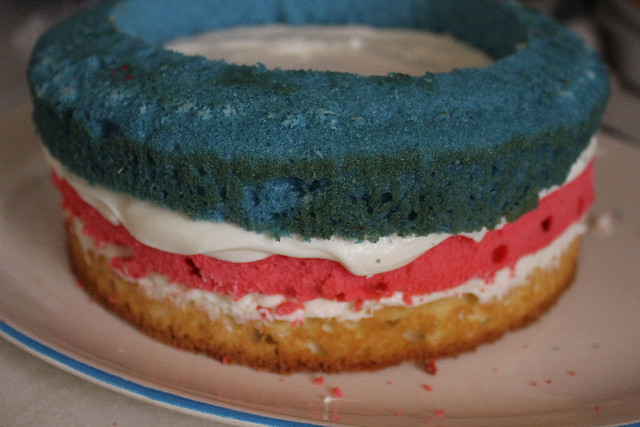
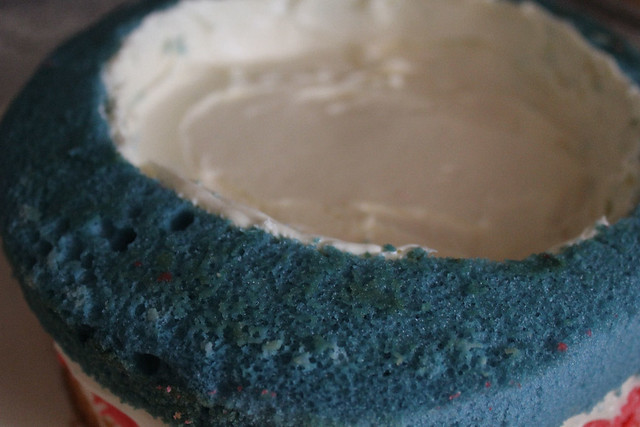
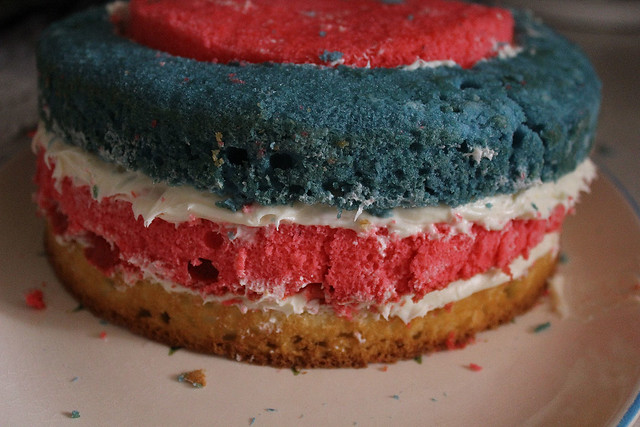
Place the outer blue cake ring piece on the iced white and red cake layers.
Carefully spread icing around the inside of the blue ring.
Insert the round white cake piece in the center of the blue ring and ice. Insert the red round cake piece making sure it is flush with the blue cake ring.
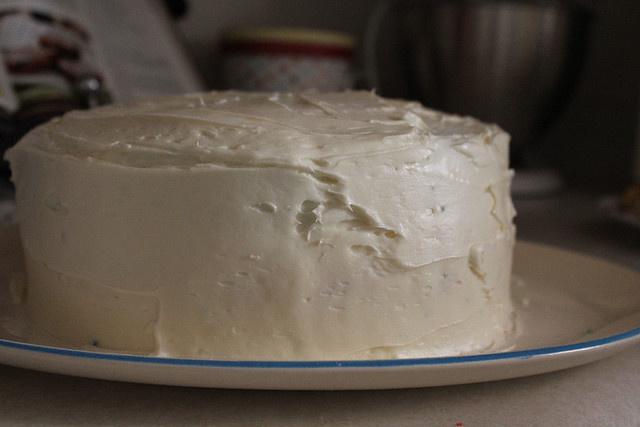
You should now have a complete cake ready to ice. Finish by icing the entire cake with white icing and decorating as desired.
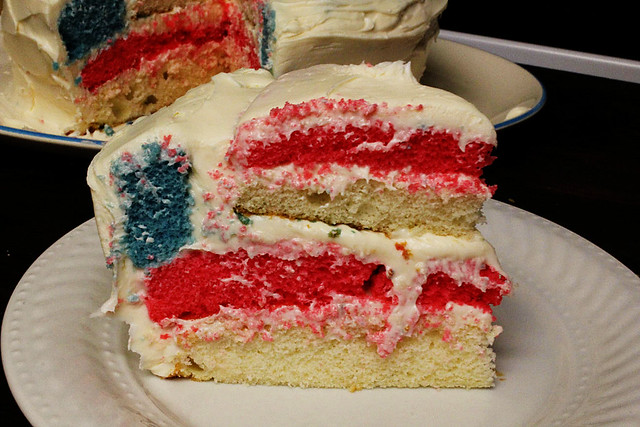
To serve, cut into slices and be amazed at the cool flag each piece becomes!
I searched around online and then I saw it. My jaw hit the ground and I thought "NO WAY". I was just completely taken with the cake and even more so when I realized that the creator is none other than Elissa from 17 and Baking. Yeah folks, a now 19 year old, Elissa and her dad came up with this creation for the 4th of July and if you've never seen it before, you're going to flip out. Just imagine your guests reaction when you serve them a slice of this cake.
Red, White and Blue Flag Cake
Credit: Elissa
Baking Directions:
To make this cake you will need three full layers of white cake, all the same height (make two recipes of cake or two cake mixes - you will end up with four layers so use one for another purpose). One layer will need to be white, one layer will need to be red and one layer will need to be blue. Use food coloring to get desired shade. Bake the layers in 9" round greased and floured rounds. Let cool. Freeze the layers to make them easier to work with during assembly.
Assembly:
Split the white layer and the red layer in half horizontally using a long serrated knife. (You can also use a cake leveler to help keep the cut even.) Do not split the blue layer. Start assembly by placing one split white layer on a cake plate. Frost the top of this layer using white icing. Place one of the red split layers on top of the frosted white layer and frost it with icing. Set aside.
Place the remaining red split layer and the remaining white split layer on top of the full blue layer. Place a round bowl (or paper pattern) approximately 5" diameter on the top of the cakes in the center and cut through all the layers using the bowl as a guide.
You should now have a circle cut through the layers. Keep the center red circle, the center white circle and the outer (approximately 2" wide) blue cake ring. Set aside all other cake pieces for a different use.
Place the outer blue cake ring piece on the iced white and red cake layers.
Carefully spread icing around the inside of the blue ring.
Insert the round white cake piece in the center of the blue ring and ice. Insert the red round cake piece making sure it is flush with the blue cake ring.
You should now have a complete cake ready to ice. Finish by icing the entire cake with white icing and decorating as desired.
To serve, cut into slices and be amazed at the cool flag each piece becomes!
Subscribe to:
Comments (Atom)


